Focus, aimpoint, shoot
Our correspondent gets a lesson in shooting driven targets with one of the smallest scopes on the market
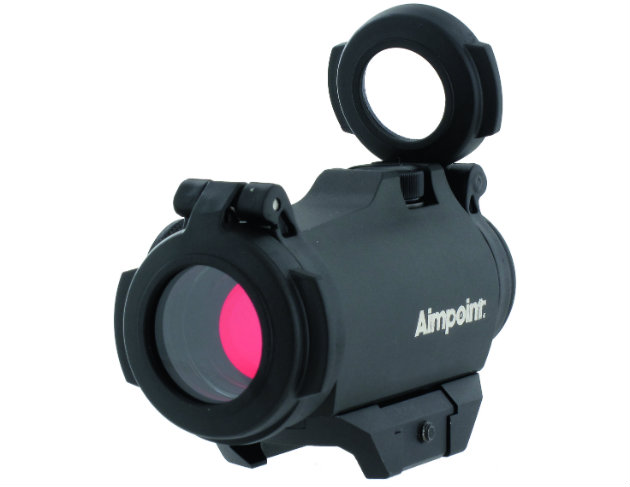
Optics on the market today are complex both in construction and use. One sight, however, is proud of its simplicity on both fronts: Aimpoint. These small, robust optics are an increasingly common sight on our gunshop shelves.
The company is still family owned, and the original Aimpoint sight was invented in 1975 for hunting and sport shooting. Though it took some 20 years before the products really took off, confidence in the sights was strong enough to continue developing them. In 1993, during the Kuwait War, Aimpoint was steered in the direction of military applications, and today they are used worldwide by military and police forces, which now make up the biggest segment of the business.
The hunting market is still a thriving part of the company, however. If you’ve had any experience shooting driven boar, or moving targets on the range, you’ll know the dilemma you are faced with when it comes to sights. These, generally, fall into two categories.
1. Low-mag/variable scope
Even at the lowest magnifification, the fact is that you are looking through a tube, thereby reducing peripheral vision, which is all-important for driven game. Field of view is hugely compromised. Think of how you use your shotgun, and imagine if you had to pick up the bird through a scope! Another problem is that, though great for static targets, magnification means judging range is harder, particularly if the quarry is moving at speed.
2. Open sights/twin-post system
These have an advantage of the maximum peripheral view, as well as giving more ability to judge range. Field of view is unobstructed, so boar coming into shooting range are easier to spot. With the open or post system, though focusing on one animal, picking it up, following it through and achieving a kill shot is possible, the dominant eye will take over. So if you have a dominant eye that is the opposite side of the shoulder from which you shoot, you will have to close it, and it’s back to the field-of-view problem. Not only that, the posts or sights must be perfectly aligned — no mean feat with a wild pig steaming past!
 The double whammy
I’ve always had to close my left eye while shooting. Not only is it dominant, but I was extremely short-sighted (before my laser treatment), with my left eye marginally less bad than my right eye, meaning it took over completely if I tried to keep both eyes open. This has two major effects: first, I lose peripheral vision, and my field of view is constrained. Second, and just as important, my perception of depth of field is altered. Judging range is harder with one eye closed, particularly if the light is less than perfect, and even more so with a moving target. I once put this to a terrifying test, when a contact lens popped out at the top of a ski slope. Getting down a black run with no sense of depth is not much fun…
So what effect can an Aimpoint have on this? With no magnification at all, and a short tube, it’s more like using an open sight. But where it differs is that, thanks to the illuminated red dot, your rifle eye naturally takes over. There are plenty of low-mag scopes on the market for driven shooting these days, with the lowest setting giving a fairly good field of view, but the dilemma remains: your field of view may be improved with a magnification of, say, 1.8x, but it is limited, as you are looking through a tube, meaning you are only using one eye. Some Shots may keep both eyes open when using a scope, but the eye not being used will pick up very little, with all the focus going through the scope. Aimpoint has no magnification at all — and with its tiny size, the whole point is to use it with both eyes open. An illuminated red dot draws the focus of your eye, and all you need to do is place the red dot on the point at which you wish the bullet to strike. As long as it is correctly zeroed, that’s where it will hit. Thanks to Aimpoint’s clever double-lens system , you do not need to centre the illuminated dot to the glass.
 In practice
I joined a team of gundealers at a range near Cirencester, where Eric Ås, Aimpoint’s instructor-in-chief, and Daniel Adolfsson, senior regional sales director, gave a demonstration and training day. The idea was to take us through a few exercises, finishing with driven targets, demonstrating just how effective the sights are.
Starting with static targets, one of the participants said he was having trouble keeping both eyes open. Eric’s solution was simple, though it sounds counter-intuitive. “Practise this at home: close the cap of the sight, so you cannot see through it, and shoulder the rifle, aiming at a specific point. Do this every day for five minutes, then do it with the cap open. You’ll soon find that you keep both eyes open, but your rifle eye focuses on the target.” After just a few dry runs doing this, the problem was solved.

EXERCISE 1
Set up two targets. Use your breathing and your trigger arm to raise the rifle through the target, shoot a group at the first target, cycling the bolt with the rifle in your shoulder. Lower the rifle, and repeat to shoot a group at the second one. This is all done standing, and freehand, at 50m, and
is a useful gauge of your shooting position. With one or other foot too far in front, the shot string will be on a diagonal, rather than straight. And a shot string is fine, as long as it is within the “kill” zone. Eric’s technique is to use the rise and fall of your breathing, rather than fight it. “Focus on the spot at which you wish to hit, allow the rifle to rise through it, and fire when you are on it, but don’t stop the rifle,” he said. It may sound a little unconventional, but it does make sense.
Once you’ve checked your shot placement on the first two targets, you should be able to judge whether you are achieving a straight string of shots, as well as whether you are shooting consistently high or low. If it is high, you need to adjust your focus to a slightly lower spot on the target. Eric’s technique means that you should, if you practise, instinctively squeeze the trigger when the illuminated dot hits your focus point.
EXERCISE 2
Get a handful of balloons, blow them up, and tie them to strings. Tie their individual strings to a rail or a rope hung between two posts, and spend some time shooting them in sequence, following the same technique as in Exercise 1. These give you a moving target, and allow you to perfect moving swiftly between the various targets.
Next, add in a static target, so that you are first shooting a sequence of balloons, then a group at a target, with reloading in between.
EXERCISE 3
Finally, move on to the driven targets – for this you’ll need to head to a range with a driven boar target. Begin at a range of 50m, and use exactly the same technique as previously, though make sure that you are focusing on the kill zone rather than the traditional “scoring” zone of the image. Start with a lowered rifle, stock to shoulder. When the animal appears, get the sight to the right level, follow through until the red dot hits the focus point and fire. With this, you’ll need to treat the rifle almost like a shotgun, following through and finishing the shot, in order to avoid “stopping” the rifle when you hit your focus point.
Of course all these exercises are more aimed at the driven-game shooter, but nonetheless they are extremely useful to stalkers, too. No boar or deer, whether in a driven or stalking situation, stands entirely still, and the more you try to hold the rifle exactly in place, the more likely you are to pull the shot, especially if you are fighting the natural rise and fall of breathing or your shooting position. Not only that, but for a follow-up shot, should you need it, or if you are trying to cull more than one animal from a herd, these are exercises that will help to improve your skills, and make you a more adept and adaptable rifle Shot.