How to shoot well (Part Two)
The second in our two-part guide written by Mike Yardley on how to become the shooter you've always wanted to be
I am assuming that you have now acquired a shotgun which is a reasonable fit. That you have decided, by thorough testing, whether you will shoot with one or two eyes open when the trigger is pulled. Also that you have read my advice on how to stand and hold your gun comfortably and with good control.
The next step is to discover how to mount the gun, how to swing with it and how to shooting flying birds consistently.
Shooting well is always shooting safely
Accidents are always waiting to happen and the best way of avoiding them is to do everything to prevent them.
All guns should be treated as loaded and you should never point one at something you do not wish to destroy.
When you pick up a gun, put it down or pass it on to another you must always check that the gun is unloaded and unobstructed.
As soon as you pull the trigger you are responsible. So if there is any doubt whatsoever in your mind then don’t pull the trigger. Make absolutely certain you know what you are aiming at and ensure that the shot you take is safe, legal and follows etiquette.
When not to shoot
If the bird is coming towards the line and is rightfully your neighbour’s or would make a better shot for him or her then don’t shoot it. If you are not sure what it is – don’t shoot it. If it’s low – don’t shoot it. And, on the sporting front, if it offers no challenge or is too far away then don’t shoot it.

If you are not sure what it is, don’t shoot it …
The importance of a comfortable stance
Standing comfortably and having the right stance is essential if you want to shoot well consistently. The front shoulder, the front of your leading hip and the ball of your front foot should all be in a straight line.
You should always see sky all around the bird before you pull the trigger – which will prevent you taking the bird too low. Taking a low show can endanger the beaters or any unseen participants on the shoot day.
Do not rush
It is good advice not to shoot under 45 degrees. However sloping ground might change the safety angle so you must not take this as absolute. Take your time and never rush. It’s better to have a name as somebody who misses an opportunity rather than be known as a dangerous shot. Pass on ground game – it is rarely allowed on a driven shoot today anyway. When you commence your sporting career, ignore shots behind the line. Focus on shooting the birds to your front well. That’s quite hard enough.
One of the biggest potential sins when shooting
Be aware of those to your right and left and note the positions of anyone else on the field, remembering they can move, as the advancing beating team definitely will. Keep an eye out for the unexpected. One of the biggest potential sins is to swing through the line or worse, shoot through it. Your normal safe arc of engagement would be, broadly speaking and dependent on the spacing of pegs, something like 45 degrees forward. In the heat of the moment it is all too easy to move out of this invisible zone. You must learn to control yourself and the gun. Safety, like shooting, is an active process.

The stock should always be lifted to the face
What you are aiming for, in every instance, is a gun mount with an unhurried, fluid and rhythmic movement. Make a particular effort to control the tip of your gun with your front hand.
One of the great mistakes of the novice shooter
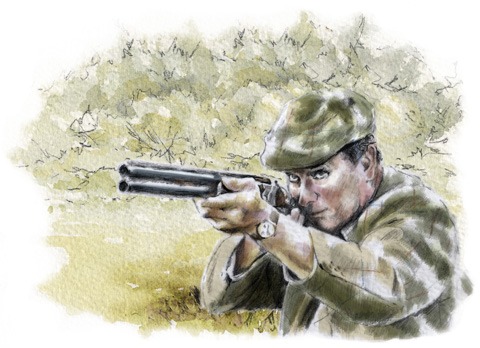
Once again I am going to talk about the mechanics of basic shotgun shooting and specifically the gun mount. One of the great mistakes of the novice is to bring the gun up to or near the shoulder then to bring the head down on to the stock. Wrong! The stock should always be lifted to the face, with the comb tucking under the cheekbone with positive but unforced pressure.
The shoulder comes in behind to provide further support and to help manage the recoil. The heel of the butt should be in line with or just below the shoulder line. This all establishes a stable firing platform. The head stays in a constant position and creates, effectively, a back sight relative to the breech/rib. Unlike rifle and pistol shooting, though, one does not focus on the foresight, but on the target, the front sight remaining an almost imperceptible blur in peripheral vision.
Some state that the end of the butt, called the butt sole, should routinely be positioned in the so-called shoulder pocket – the hollow between shoulder joint and collarbone. This is good advice for some, but many good shots mount their guns on or partially on the shoulder joint itself. This can work perfectly well. Mounting the gun on the arm, however, as may happen if the stock is too long or technique is poor, may be considered an absolute error.
The starting position advocated by Mr Churchill
Begin the mount with the stock comb roughly parallel to your forearm and the muzzles well up. If you experience issues learning to mount consistently then try placing the butt underneath your armpit and, squeezing it gently. Bring your rear hand and the gun back until the base of the thumb almost touches your chest. This slightly cramped starting position as advocated by Mr Churchill forces you to push the gun out. It almost guarantees that the stock comes up to face and shoulder correctly. This is a good method to practise as a training routine before you go back to the traditional method.
In all cases, the gun mount should be an unhurried, fluid and rhythmic movement. Make a particular effort to control the tip of the gun with the front hand. Do not dominate the mount with your rear hand, otherwise the gun may cartwheel about the axis of the front hand and the barrels will rise and fall – zigzagging above and below the line of sight. Your hands work act in unison.
Onto the shooting field
Now you have arrived at the shooting field with a slipped gun at your peg. Check that you have enough suitable cartridges and that you are wearing ear and eye protection. Remove your gun from its slip, breaking it before it leaves the cloth or leather. Check the gun barrels for any obstructions and make sure you can see daylight through them. When you are in position safely and ready, load a cartridge that matches the quarry for pellet and payload. If in doubt go for 30gram No.6s for normal driven work.
Keep your muzzles up when you are waiting for the birds. My usual preference is for something in the region 45-60 degrees – nothing too high. I reserve a near vertical hold for when the beaters are getting close, or in situations where I want to make it absolutely clear to my companions that safety is paramount. The barrels should always be pointing safely above the horizon, however.
Remain alert
Keep your body relaxed while you are waiting for birds and keep two hands on the gun whenever possible. Stay alert, scanning to the front of you, looking just above and sometimes through the muzzles. You’re looking for anything out of the ordinary – not just quarry. That might be walkers and their dogs, courting couples, the odd vulture. The first rule of gun safety is never to point your gun at something you don’t wish to shoot. The second rule is that you must never assume anything.
The trigger finger should be extended along the trigger guard in the address, the safety must be engaged, and the thumb should be well wrapped around the grip rather than riding the thumb-piece. When should you disengage the safety? Only remove it once a safe and legitimate shot is identified, momentarily before the gun is raised to it (not during the mount). The trigger finger should only be brought on to the trigger after the safety is removed and as the gun rises.

The stock should always be lifted to the face, with the comb tucking under the cheekbone with positive but unforced pressure. The shoulder comes in behind to provide further support and to help manage the recoil
Practise at home
Pick up a gun. Check it is empty and unobstructed. Adopt your stance. Imagine a bird coming straight towards you. Bring the weight onto the front foot. Lock focus onto the bird, find its line, and take the as yet unmounted gun to the tail feathers. Now mount smoothly, push through the bird and on. The front hand keeps lifting/directing, the head stays down, and focus remains glued on the bird. Pull the trigger as a bit of daylight becomes apparent between gun muzzles and bird and keep moving. Don’t mount early (especially fatal on long birds), but do form a relationship early between muzzles and bird. Do push through the imaginary ‘smoke-trail’ and continue onward without check or hesitation.
Now, let’s take a bird breaking right of centre. Directing the barrels with the front hand, and rotating the body slightly, find the line, ‘touch’ the muzzles of the unmounted gun to the tail feathers again. Keep the muzzles up and on line. You may need to subtly adjust the barrels to match the line of the bird. If the opportunity arises, you can take a small step into the bird’s line anticipating where you are going to kill it. The ideal is always to shoot the bird with minimum body tension and in perfect body balance.
The swing should always begin before the gun is mounted as otherwise you will impair both your vision and timing. Mount the gun on to the tail feathers. Don’t dwell, i.e. don’t ‘ride’ the bird. Keep your head down, and, smoothly push the muzzles forward and through. Sweep the bird out of the air in one fluent, decisive, movement.

One thought only should dominate your mind once you have identified a safe shot – locking your vision on to the bird and ‘staring it to death’.
Some people never really master forward allowance. Basically you should always shoot where the bird is going not where it is. It is not just knowing how many feet you need to be in front, but of having some sort of feel for it too. The range of leads required by different birds is much wider than many people realise. Leading a bird often demands that you are a bit adventurous; you have to risk it on occasion – better a bird cleanly missed in front than one missed behind. Some rush in front only to stop. Lack of confidence, or over-thinking will invariably cause the gun to stop, as will any distraction.
Some measure lead deliberately but generally this not to be advised.
It is useful knowledge that a bird 40 yards away (a sensible shooting range) is going to require something over six feet of lead. And a bird at medium range will usually require about half that. If your instinctive response to such a statement is “but I only see a couple of inches” – it is because you are focusing on the front sight and not the bird.
In most situations, I believe an unconscious approach to lead gets the best results and leads to more fluent shooting. One thought only should dominate your mind, once you have identified a safe shot – locking your vision on to the bird and ‘staring it to death’. Focus on this and you will discover your hidden powers of hand to eye co-ordination. Developing these, a stable stance, and rhythmic timing, is the foundation for shooting well.