★ Save on shop price when you subscribe. Pay just £2.80 per issue – 43% cheaper than buying in-store at £4.95! ★

How to make biltong
One of the few advantages of the lockdown has been that many outstanding projects have finally been completed. One of these was to build a permanent drying box to make biltong. Biltong is tasty dried and cured meat that originated as trail food in South Africa at a time when cold storage was not available to preserve it. Vinegar had already been used since the 16th century in the curing process, and the use of spices such as pepper and coriander to combat bacteria has also been long understood. Combined, they enabled the early Boer voortrekkers to produce stocks of dried food to take with them as they journeyed into the interior of southern Africa.
You can make biltong from just about any meat, but it does need to be better quality cuts such as sirloin, fillet or rump; the name, derived from the Dutch bil (rump) and tong (strip), reflects this.
Superior fare
Originally biltong might have been dried hanging from a bush in the open air or from the rafters of a settler’s home. Direct heat is not used, and the secret is ensuring a constant passage of dry air around the meat throughout the slow drying process. It should not be confused with jerky, which is made from thinner strips of meat, preserved in an entirely different manner and often smoked (biltong never is). The taste is very different, and many people consider biltong vastly superior.
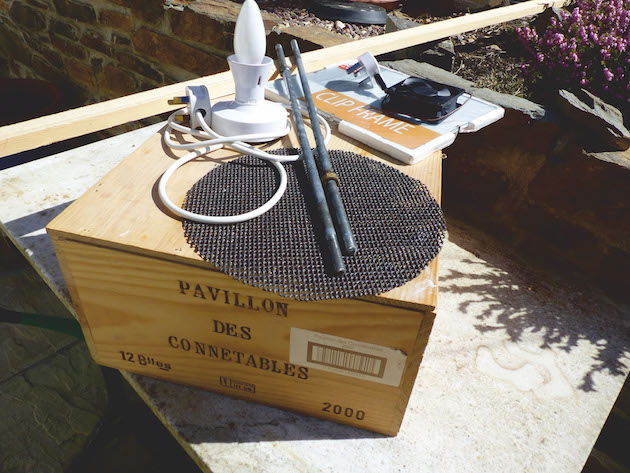
The makings of a permanent drying box for biltong
British weather is far removed from that of the African veldt and seldom offers a warm, dry breeze, so some form of box is needed to create the right conditions. I’ve used cardboard boxes in the past but an old wine crate measuring 20in x 13in x 9in formed the basis for this one (ideally I would have preferred something larger, but being confined to barracks meant that it wasn’t possible to go out looking). As the light lid had warped a little, adding a frame extended the dimensions slightly while strengthening it. Treated wood, which might release tainting fumes when warmed up, should be avoided. I fitted three hanging bars using threaded rod left over from another project, but dowelling or similar would have been fine.
The top was drilled for a small computer fan as an extractor, while a light bulb at the bottom provided gentle warmth. The fan is not essential as heat from the light bulb alone creates air movement, but LED bulbs are not suitable. It should be very low wattage as you don’t want to produce too much heat; 40w is more than enough. Holes at the bottom on the front and sides provide air inlets but need to be covered with mesh to keep insects out. If you are not adding a fan you’ll need more holes in the top to allow the warm air to flow outwards. The viewing window isn’t strictly necessary, but I had an old photo frame glass handy and it’s always nice to see how things are going at a glance.
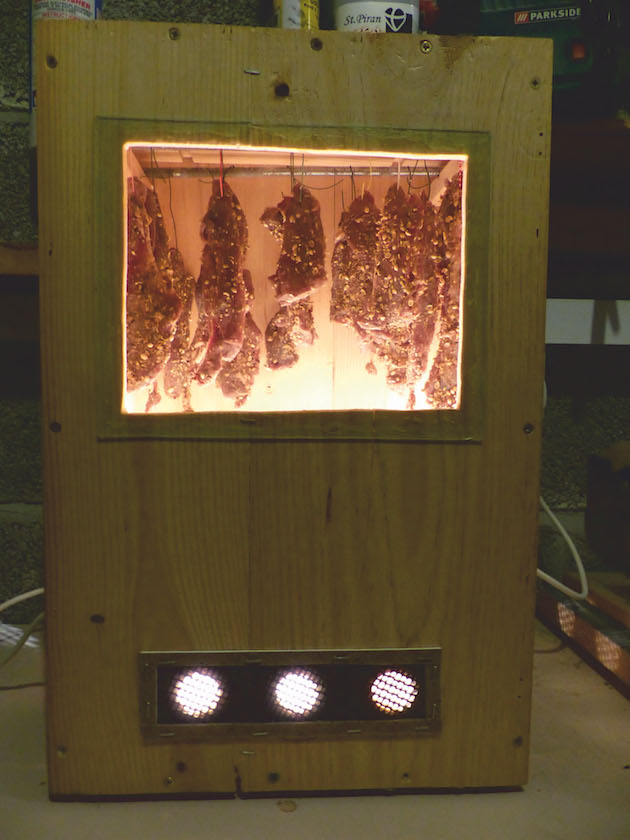
A window lets you see what’s going on
Raiding the freezer
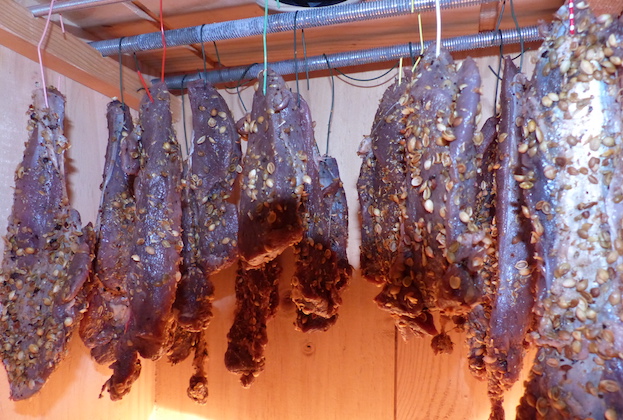
For the first batch I raided the freezer for a 2lb boned muntjac haunch, though any venison makes first-class biltong and larger species allow longer meat strips. If you are using beef you can leave any fat on, as this is itself delicious once dried, otherwise remove it. The box would have accommodated twice this amount in longer strips, or by using longer pieces of hanging wire to make full use of the space available.
It took just three days for the first batch to dry properly, during which time it reduced to well under half the starting weight. This is one of the reasons that commercially produced biltong is so expensive. All that remained was to vacuum pack the finished biltong, though I needn’t really have bothered – in our house it never lasts long enough to go off.
Biltong can be made from just about any meat and is a tasty savoury snack
Basic biltong recipe
There are many recipes to make biltong: this is a simple one which produces great results. Quantities can be adjusted according to the amount of meat used, and you can experiment by adding paprika, chilli flakes, dried garlic or other ingredients to your taste.
Ingredients
- 2lb muntjac haunch, boned
- Cider (or malt or red wine) vinegar
- Worcestershire sauce (optional)
- 5 tablespoons of whole coriander seeds
- 2 tablespoons of crushed or coarsely milled black pepper
- 1 – 2 tablespoons of coarse salt according to taste
- ½ teaspoon bicarbonate of soda (optional, to tenderise the meat)
- 1 tablespoon of brown sugar
Method
- Cut the meat into strips about one inch thick and layer them in a shallow dish. Add just enough vinegar to cover (if using Worcestershire sauce, mix a ratio of 1:4 parts vinegar first). Place in the fridge for 2 – 4 hours to cure. Once complete, remove from the vinegar and dry with kitchen towel. Save the vinegar for later use.
- Roast the coriander seeds in a frying pan to release the flavour then crush them with a pestle & mortar, blender or rolling pin just enough to break them open. Put a tablespoon aside for later use, and combine the rest with the pepper, sugar, salt and bicarbonate of soda (if used). Rub the mix evenly over the meat, lay on a flat dish, cover with clingfilm and refrigerate for a further 6 – 24 hours depending on how deeply you want the spices to be absorbed. 6 hours is enough for a more natural taste.
- Rinse the meat strips in the saved vinegar (you can add a little water if necessary) to remove most of the external spice mix, pat dry and sprinkle the crushed coriander from earlier over them evenly. Press down to ensure that the shells adhere to the meat.
- Attach a hook to the end of each strip (plastic covered paperclips or garden wire are good for this) and hang in the box. Make sure that the meat does not touch or it may go mouldy. Switch on the fan/bulb and leave to dry.
- It should take 3 – 6 days for the meat to dry depending on conditions. Test by cutting a small sample, or by pinching the meat between thumb and forefinger – once there is no ‘give’ all should be ready.
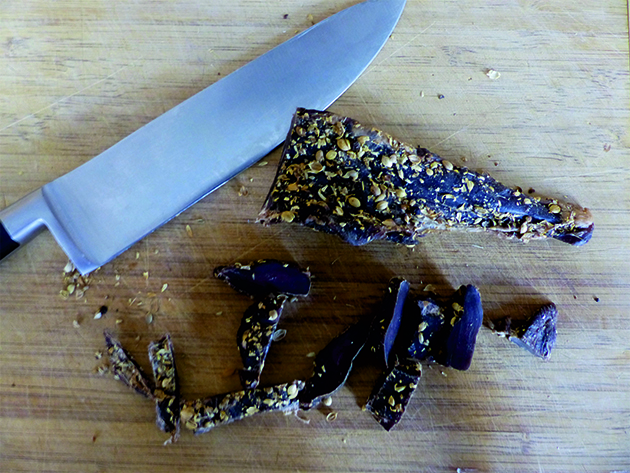
- Cut into thin slices with a sharp knife, or store in the fridge or in vacuum packs.
Related Articles
Recipes
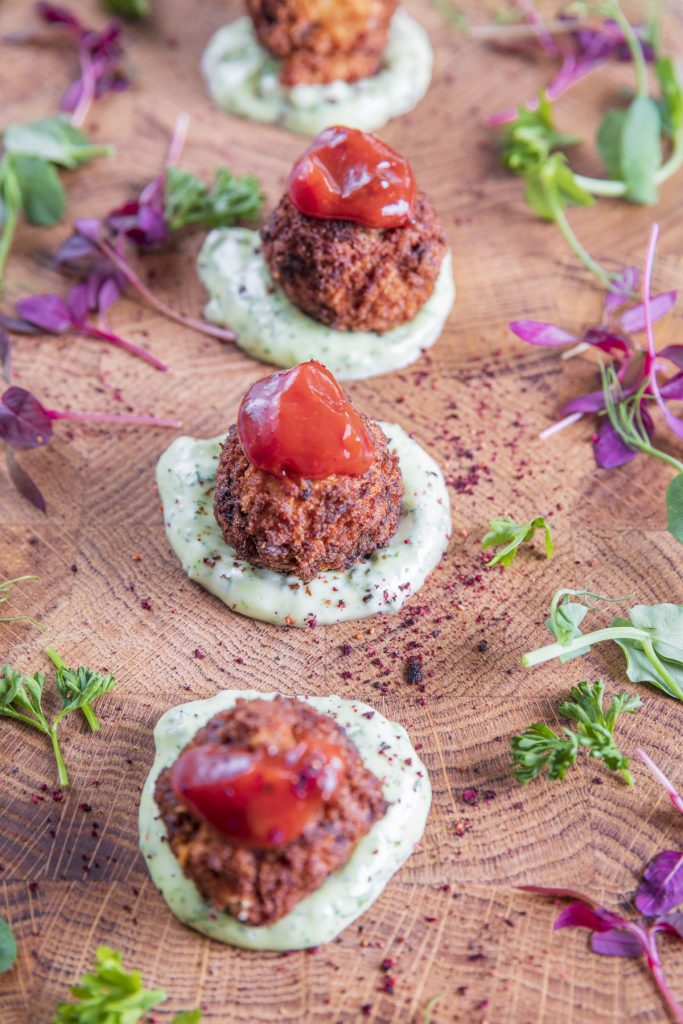
Pulled squirrel bonbons
Grey squirrels threaten songbirds and cause damage to woodland, but they can be a delicious treat when deep-fried
By Shooting Times
Recipes
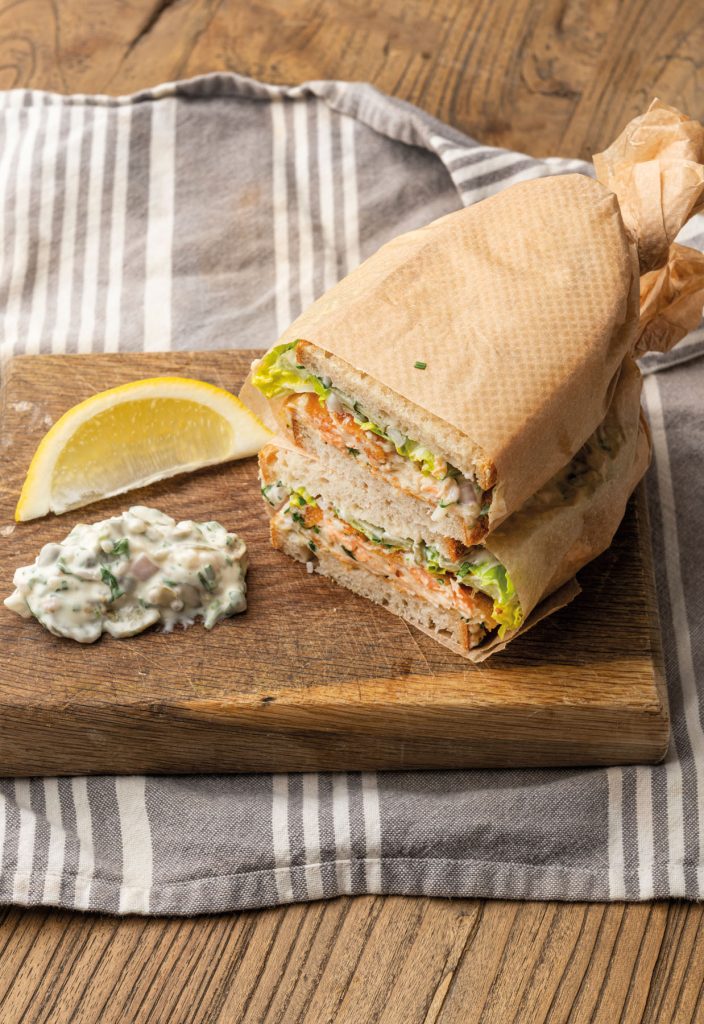
The ultimate trout fish finger sandwich recipe
Upgrade a classic fish finger sandwich with trout, homemade tartar sauce and crisp breadcrumbs in this comforting countryside recipe
By Tim Maddams
Get the latest news delivered direct to your door
Subscribe to Shooting Times & Country
Discover the ultimate companion for fieldsports enthusiasts with Shooting Times & Country Magazine, the UK’s leading weekly publication that has been at the forefront of shooting culture since 1882. Subscribers gain access to expert tips, comprehensive gear reviews, seasonal advice and a vibrant community of like-minded shooters.
Save on shop price when you subscribe with weekly issues featuring in-depth articles on gundog training, exclusive member offers and access to the digital back issue library. A Shooting Times & Country subscription is more than a magazine, don’t just read about the countryside; immerse yourself in its most authoritative and engaging publication.

