


Legislation
News
Mounting a scope – four methods to consider
Would you like to speak to our readers? We offer sponsored articles and advertising to put you in front of our audience. Find out more.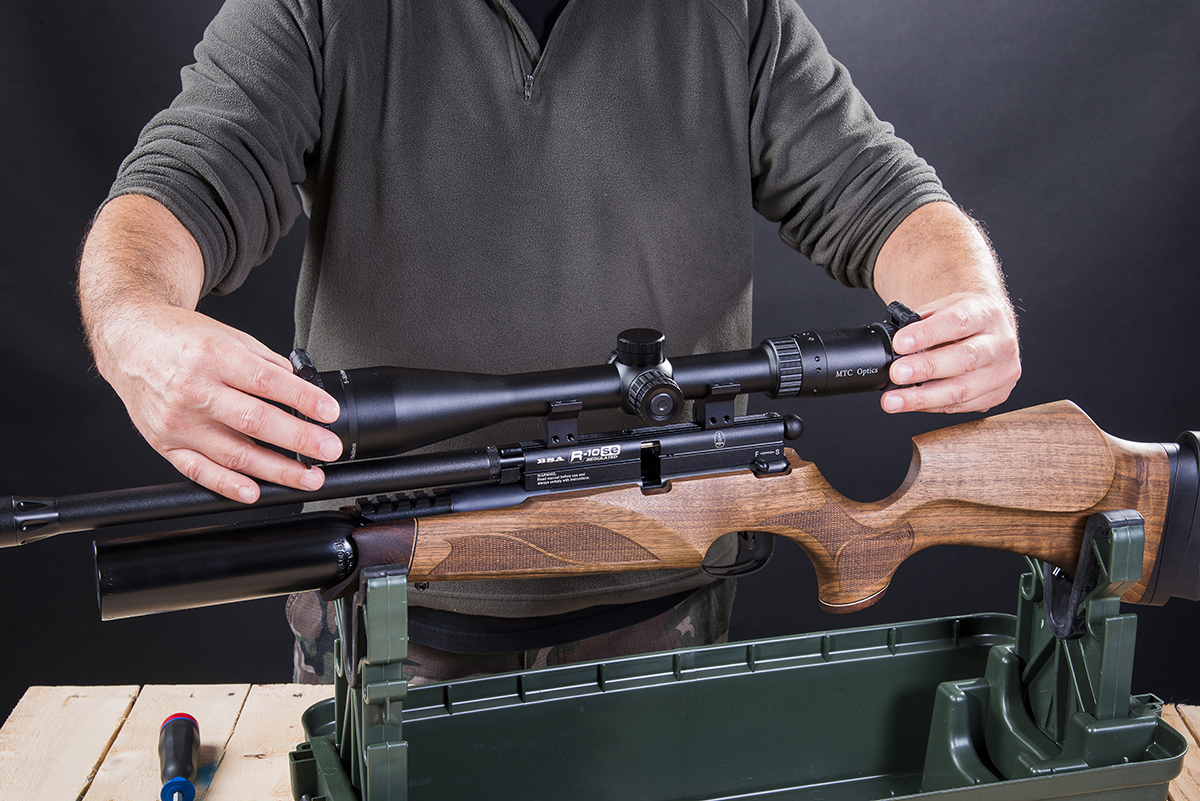
Anyone who’s been shooting air rifles for a while will likely be able to fit a new scope in a matter of minutes. But for anyone starting out, mounting and levelling a scope can be a daunting process.
However, very few tools are needed to fit a scope; sometimes a single Allen key is enough, along with a means of holding your rifle secure. Two more vital components are knowing what you’re trying to achieve and why. With this in mind, it’s high time to shed some light on the subject and prove it’s not a dark art after all, with four alternative ways to get set to go shooting.
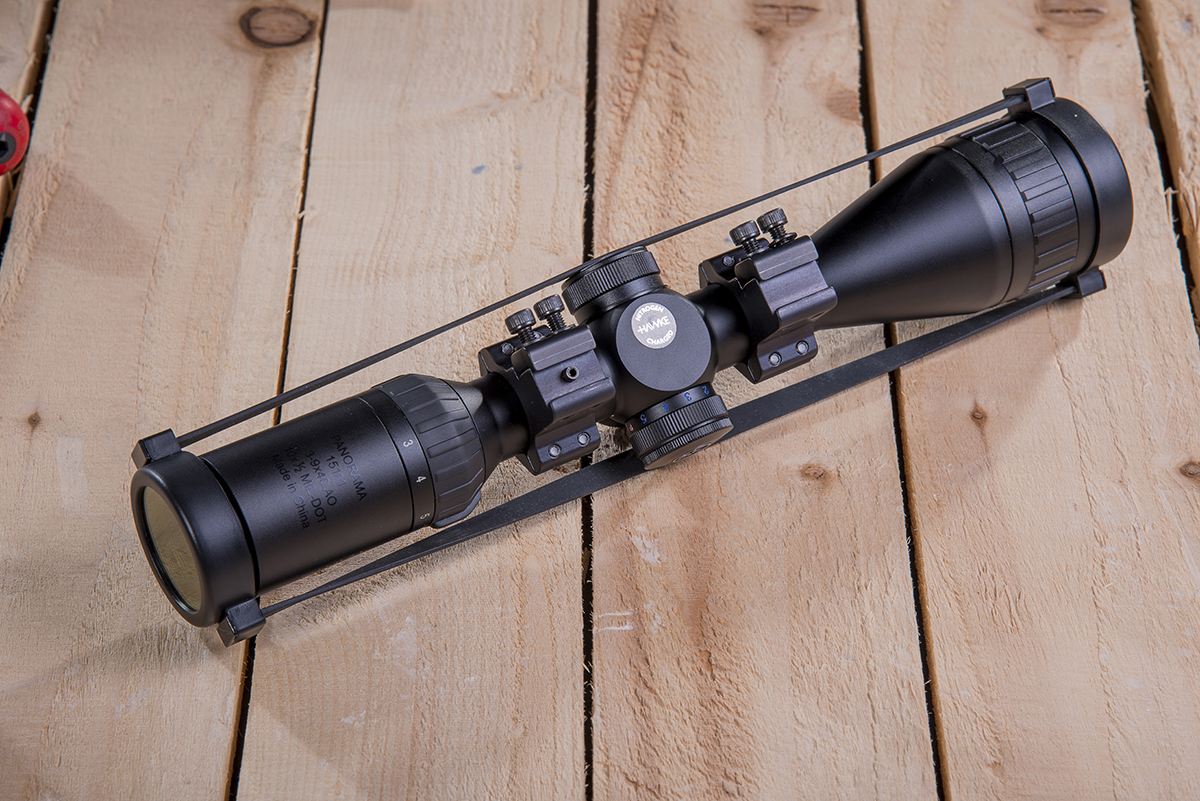
Three main elements come into play when fitting a telescopic sight: the height the scope sits above the rail, the distance the ocular (rear) lens is from your eye, and the orientation of the crosshairs. The height of the scope will largely depend on the physical size of the scope’s objective bell, and consequently the height of the mounts you need to use with it.
It’s wise to buy a set of good quality mounts, as their engineering tolerances will be tighter and more consistent. In terms of what type of mounts to get, it can be a little intimidating when trying to find the perfect ones for your intended set-up, but if you work your way logically through the various options, your choice will be far simpler.
First of all, you need to identify what type of clamping system your rifle uses. Does it have a regular dovetail rail, or a Weaver/Picatinny rail? If it’s a dovetail, exactly what size rail does the rifle have? Dovetail rails are usually 11mm or 13mm wide. Sportsmatch, for example, makes two widths of dovetail mount, the wider being a better fit for some BSA, Diana and older Weihrauch rails. If you try to fit a set of narrow mounts to a wide rail, you may not be able to fit the mounts at all, or, at best, the mounts will sit skewed to one side instead of being perfectly level with the rail.
Mounting up so many types
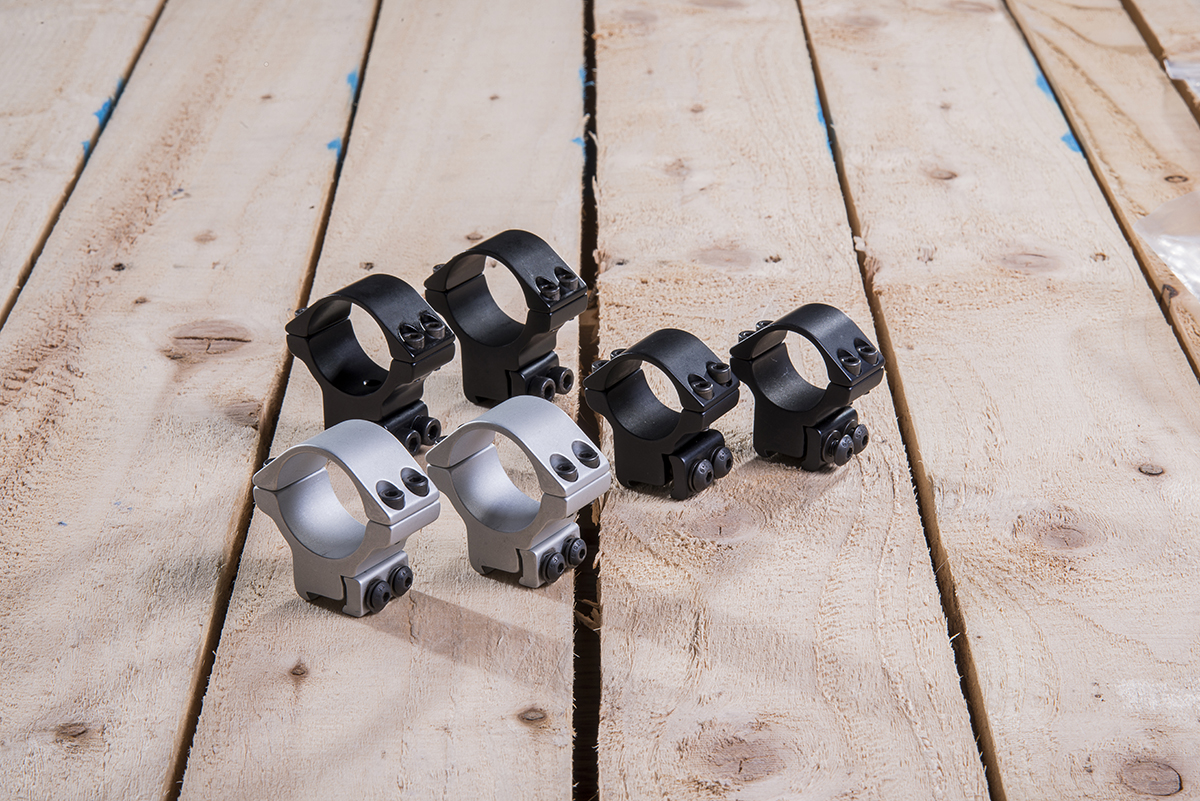
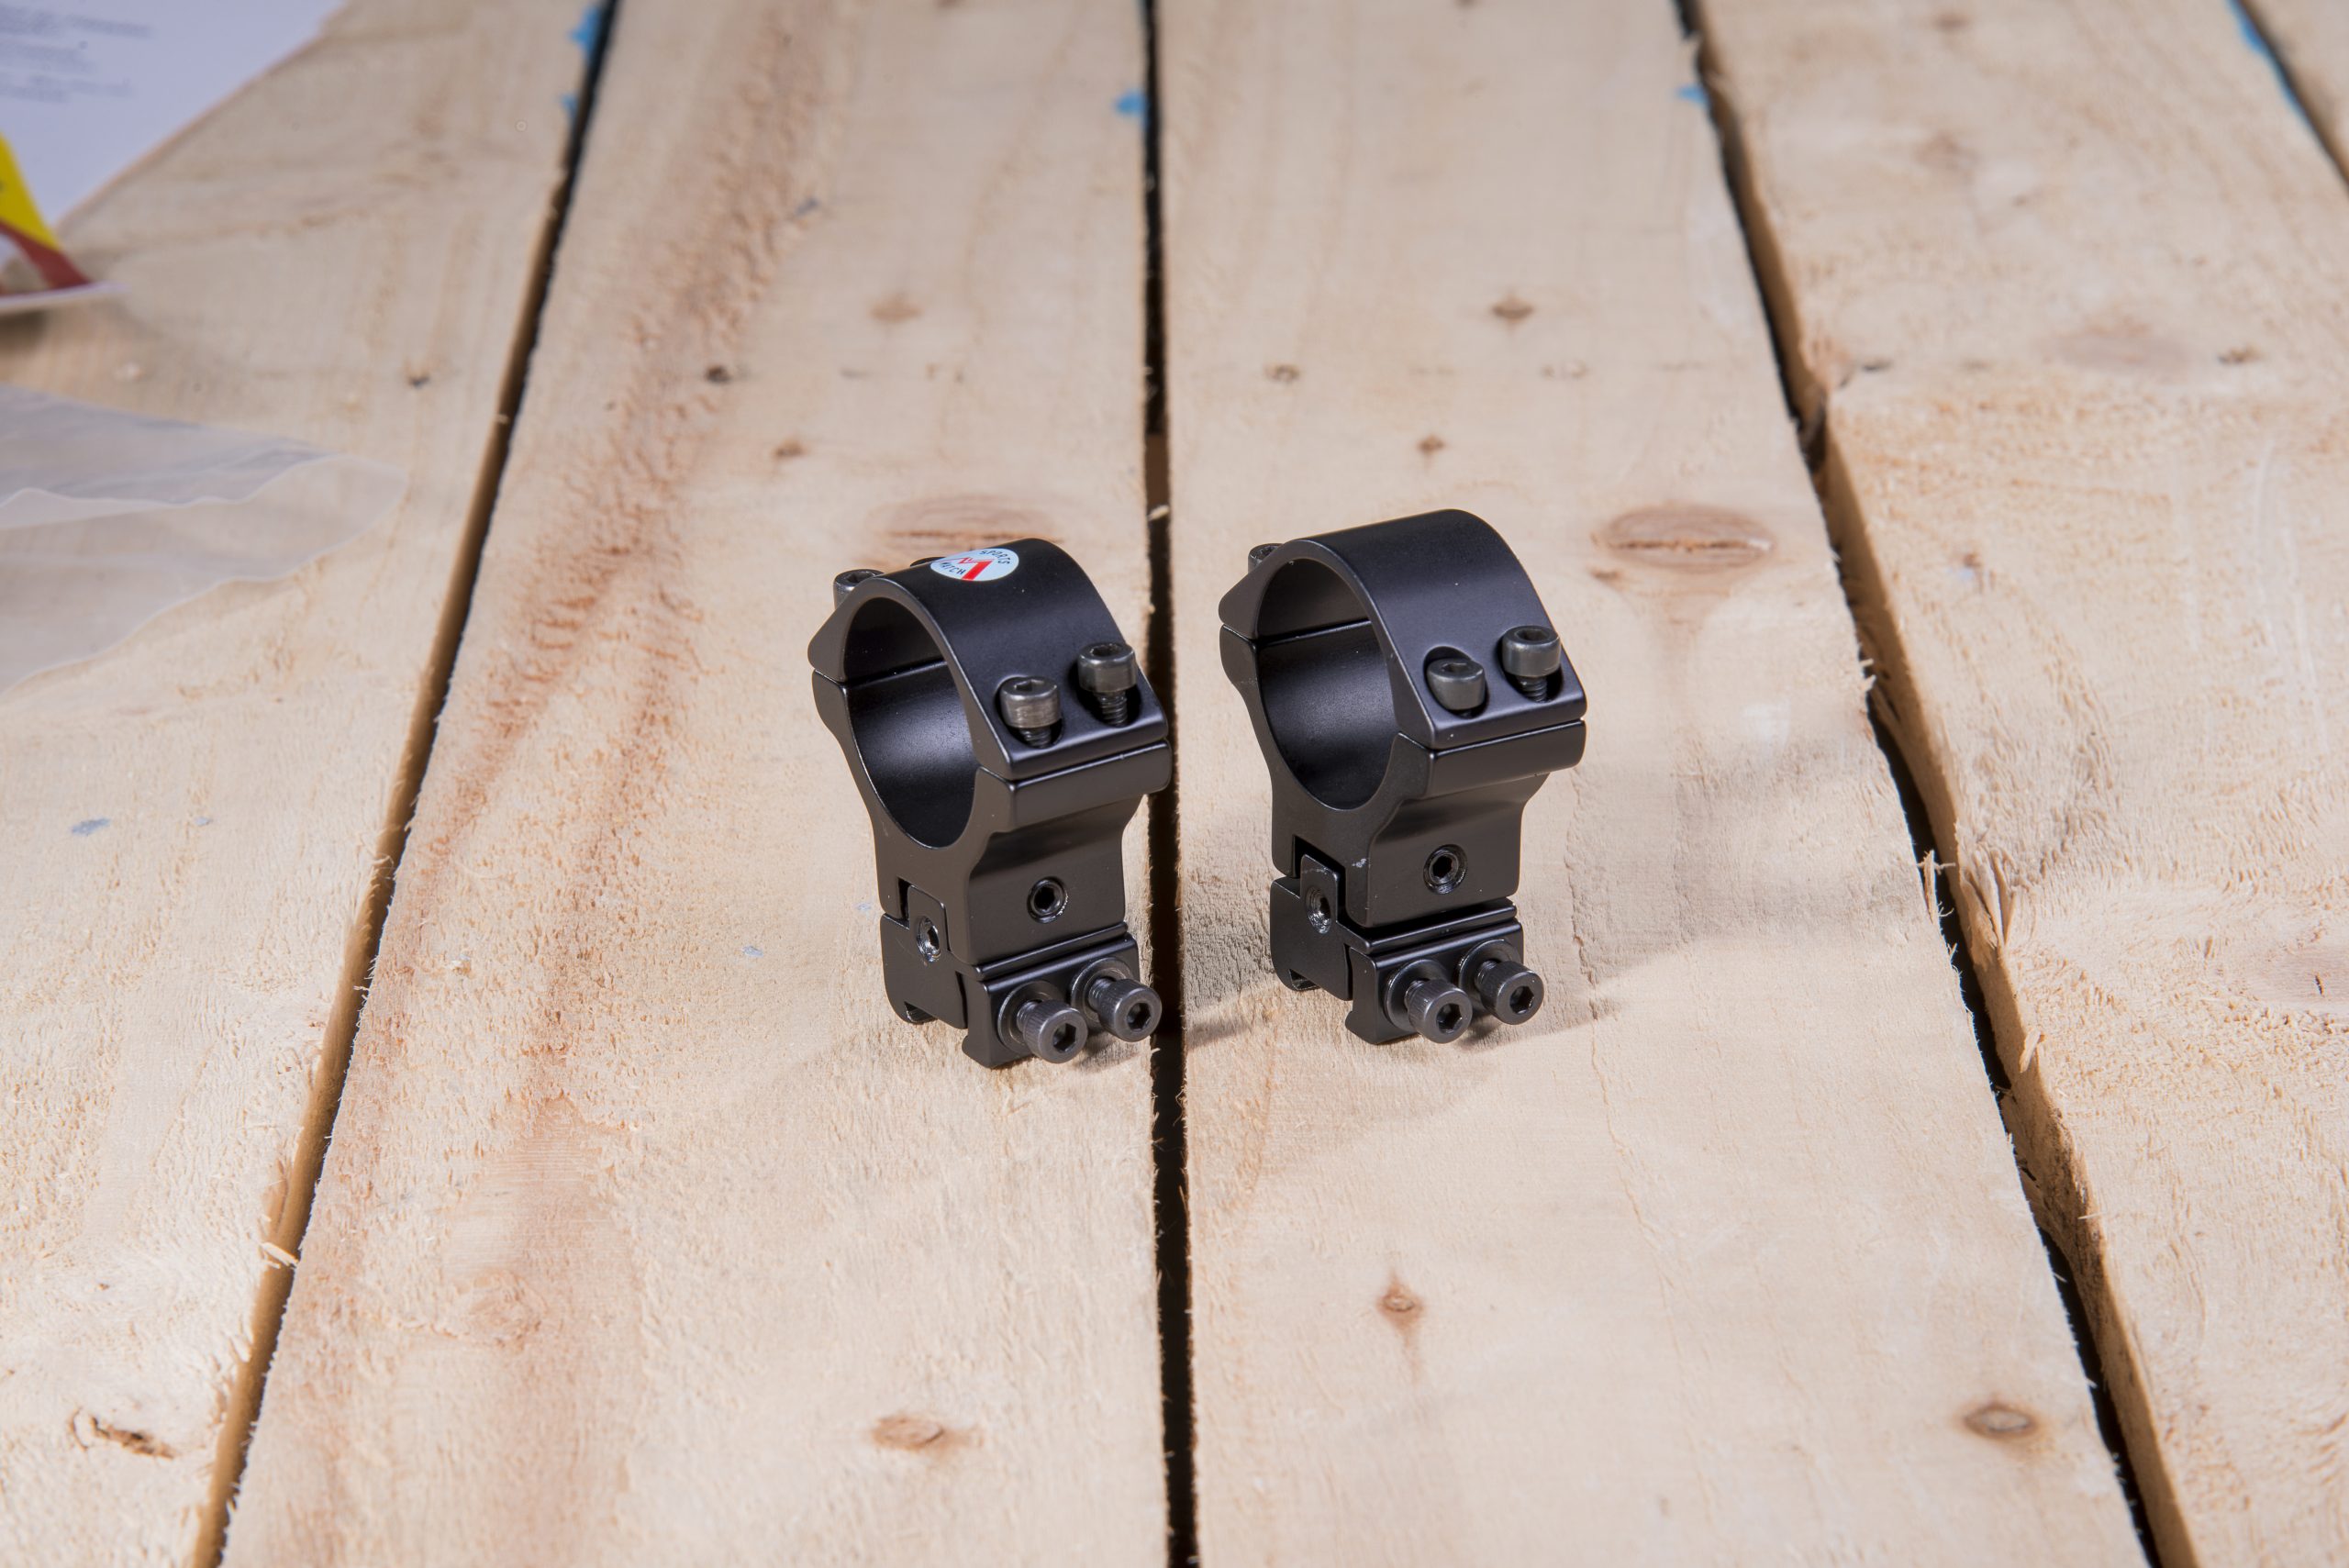
Lots to choose from: There are numerous configurations of mount heights, base widths, tube diameters and even colours – so do your research before you buy
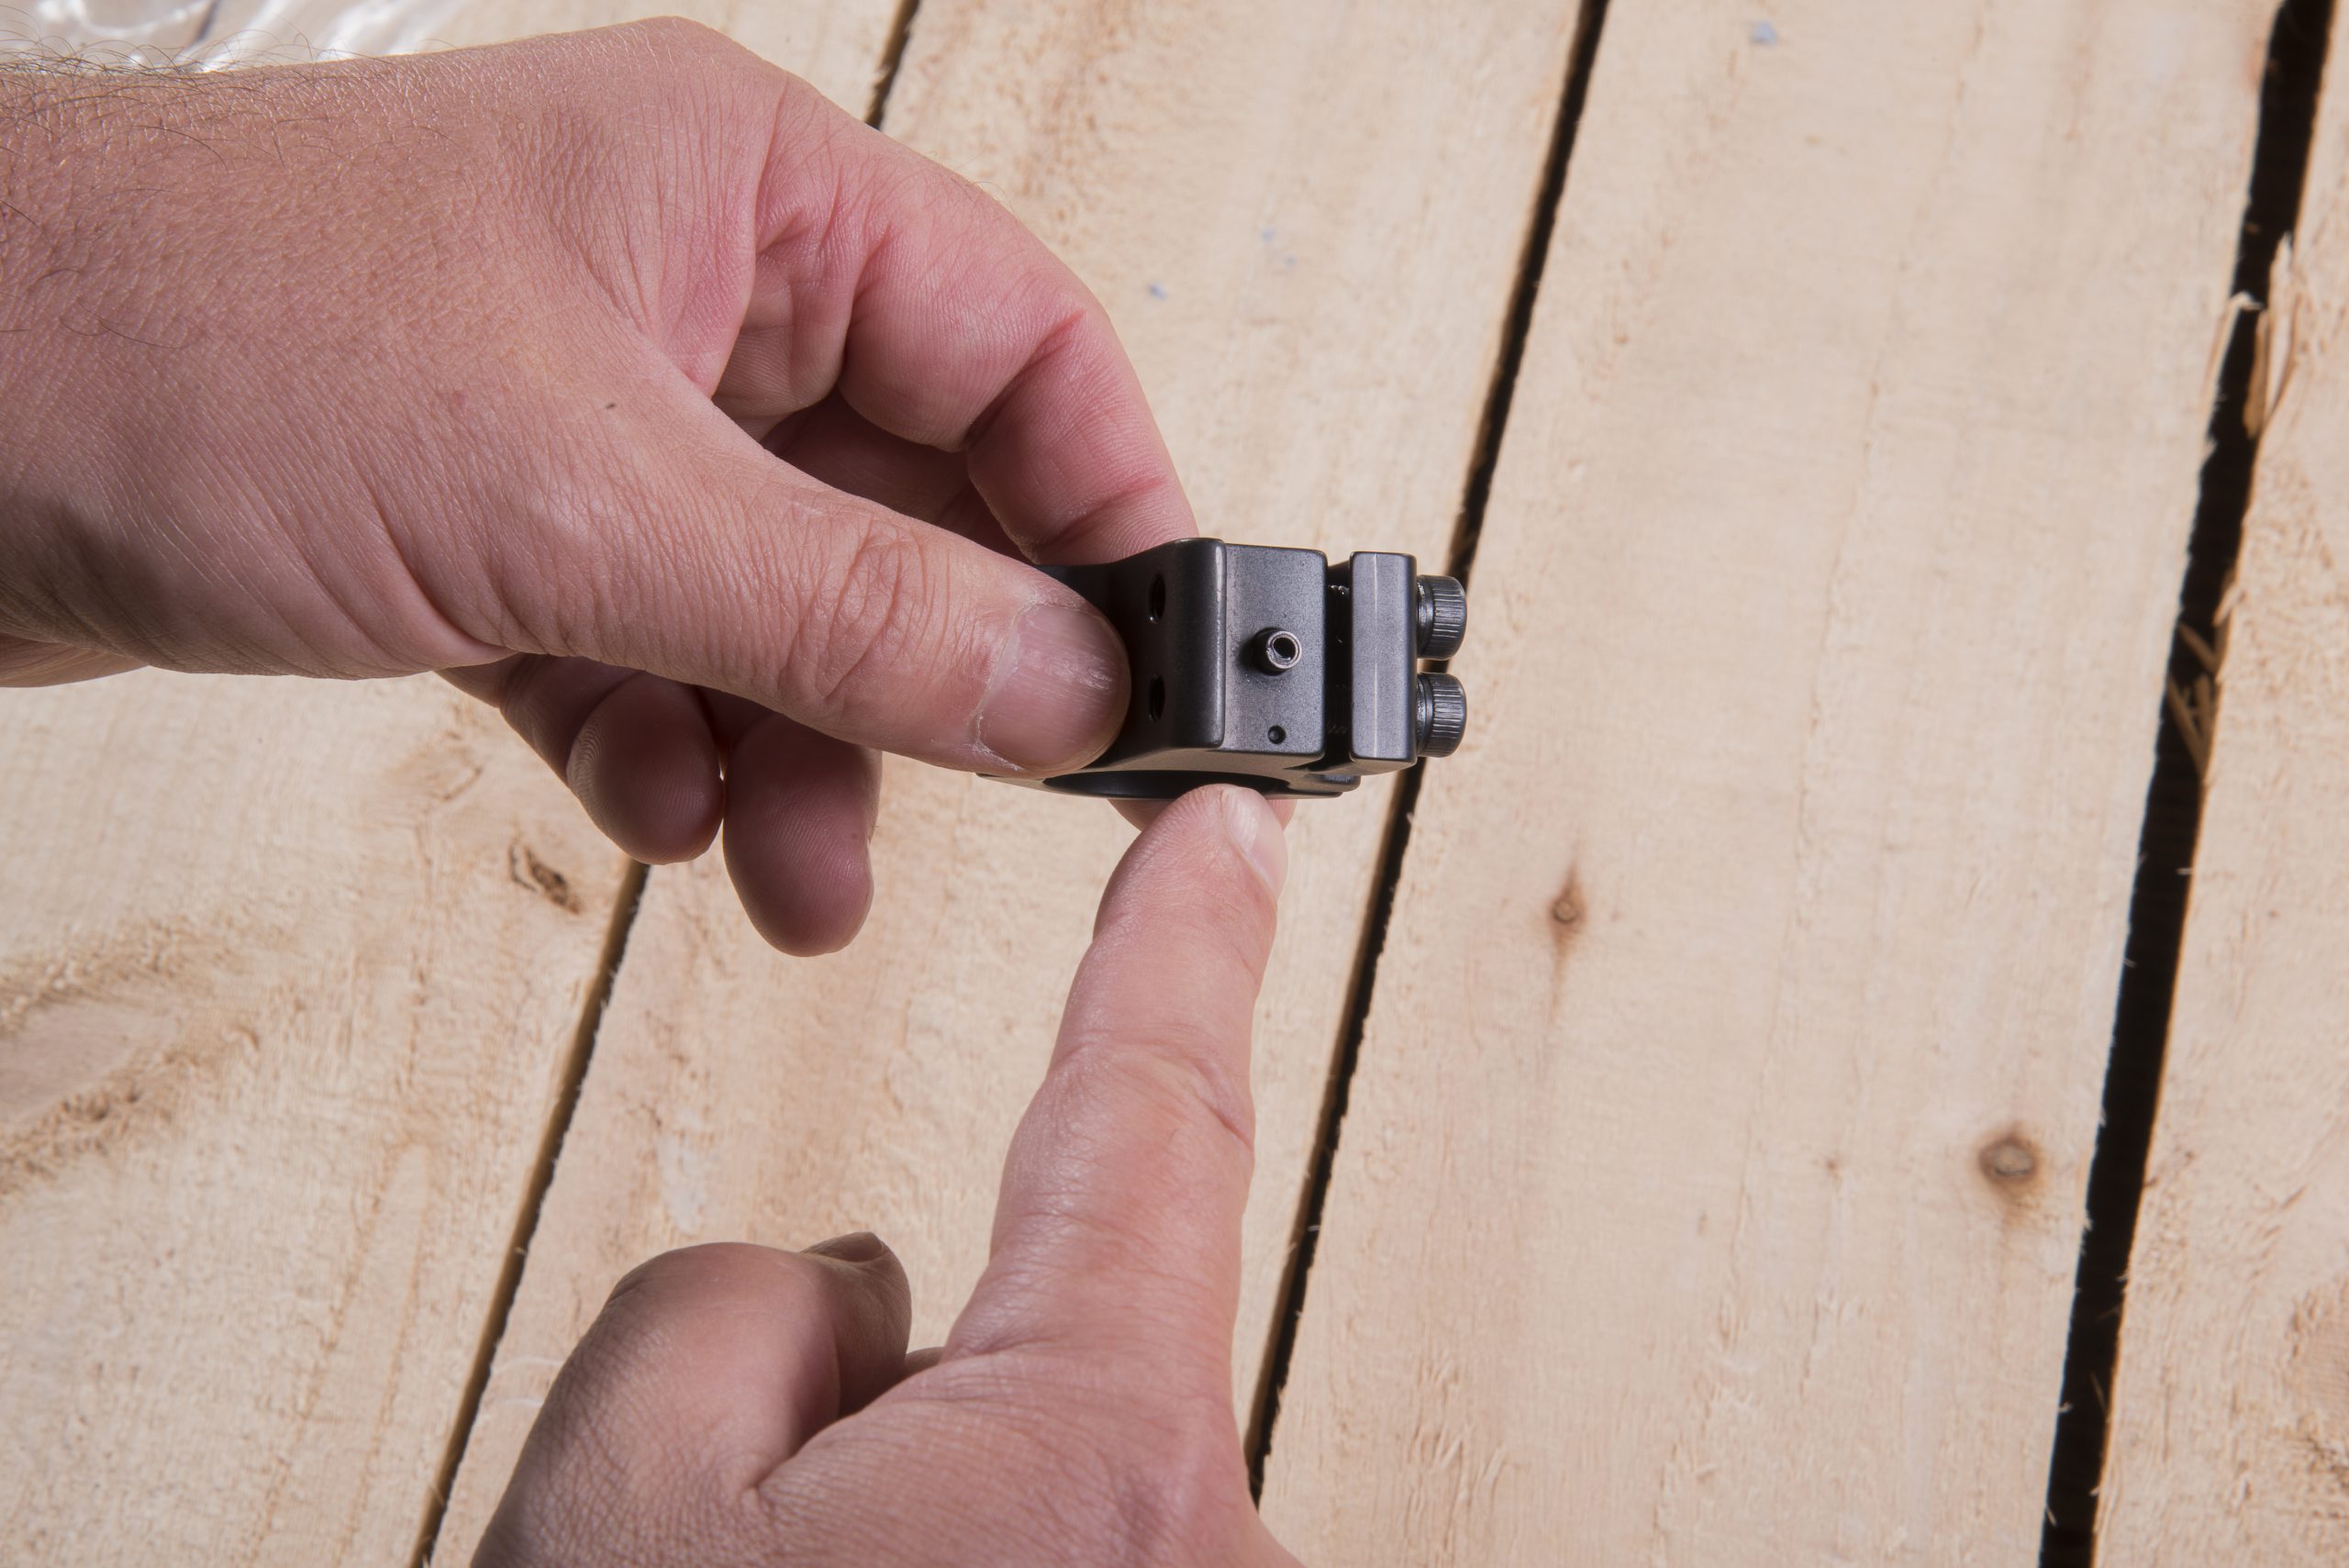
Width matters: Some dovetail rails are slightly wider than others. Sportsmatch makes a range especially for this wider size, indicated by the dot
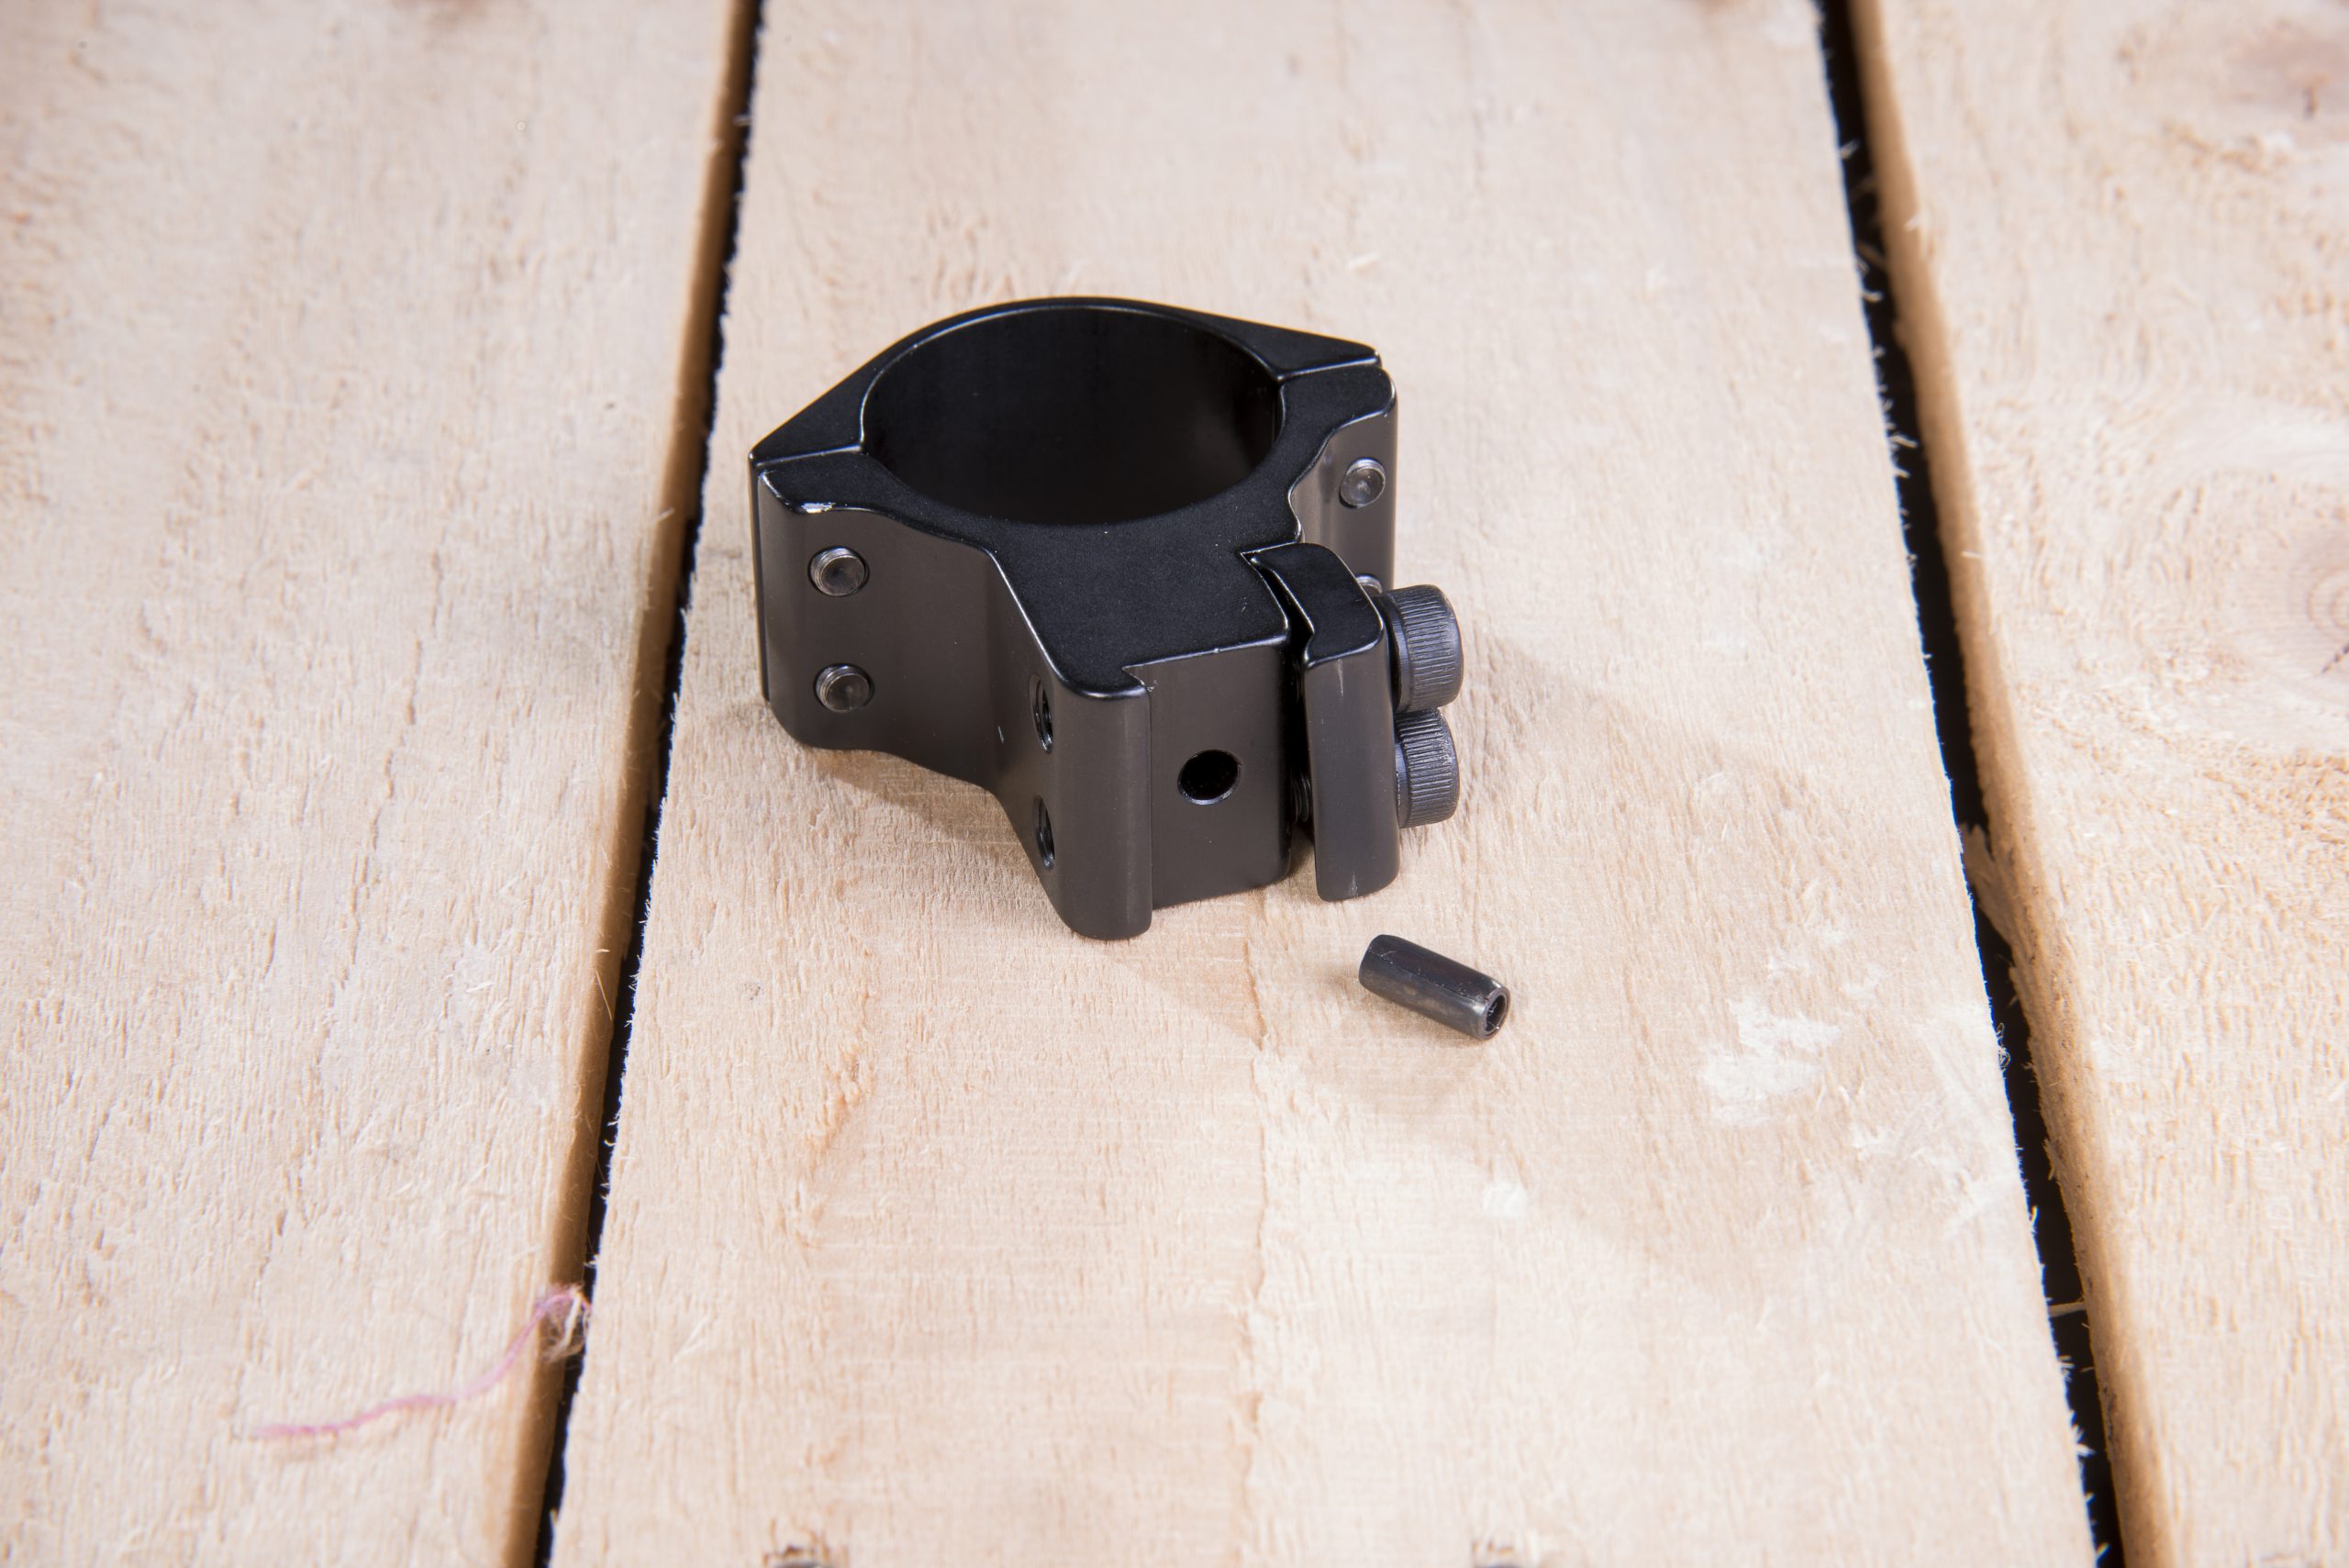
Keep it steady: Mounts can often be fitted with a pin that slots into the rail on many springers and gas-rams, stopping the scope from creeping under recoil
While the dovetail rail still reigns supreme – at least for now – the slotted Weaver and Picatinny rails are rapidly gaining momentum. The Weaver and Picatinny systems look similar, and in airgun terms can pretty much be treated the same way. The difference between the two concerns the width of each slot and the spacing between the slots, but in practice most mounts are sized so they can slot into either system.
Your next consideration is the size of your scope tube. Is it 1in, 30mm or one of the more exotic sizes such as 34mm? You’ll need mounts with this specific ring size. You’ll also need to factor in the size of the objective lens, which is usually anywhere from 24mm to 60mm. You’ll need mounts that can accommodate this size of objective lens, as well as lifting the scope high enough off the rifle so no parts come into contact with the barrel, the barrel band, magazine or action.
Fitting a sight
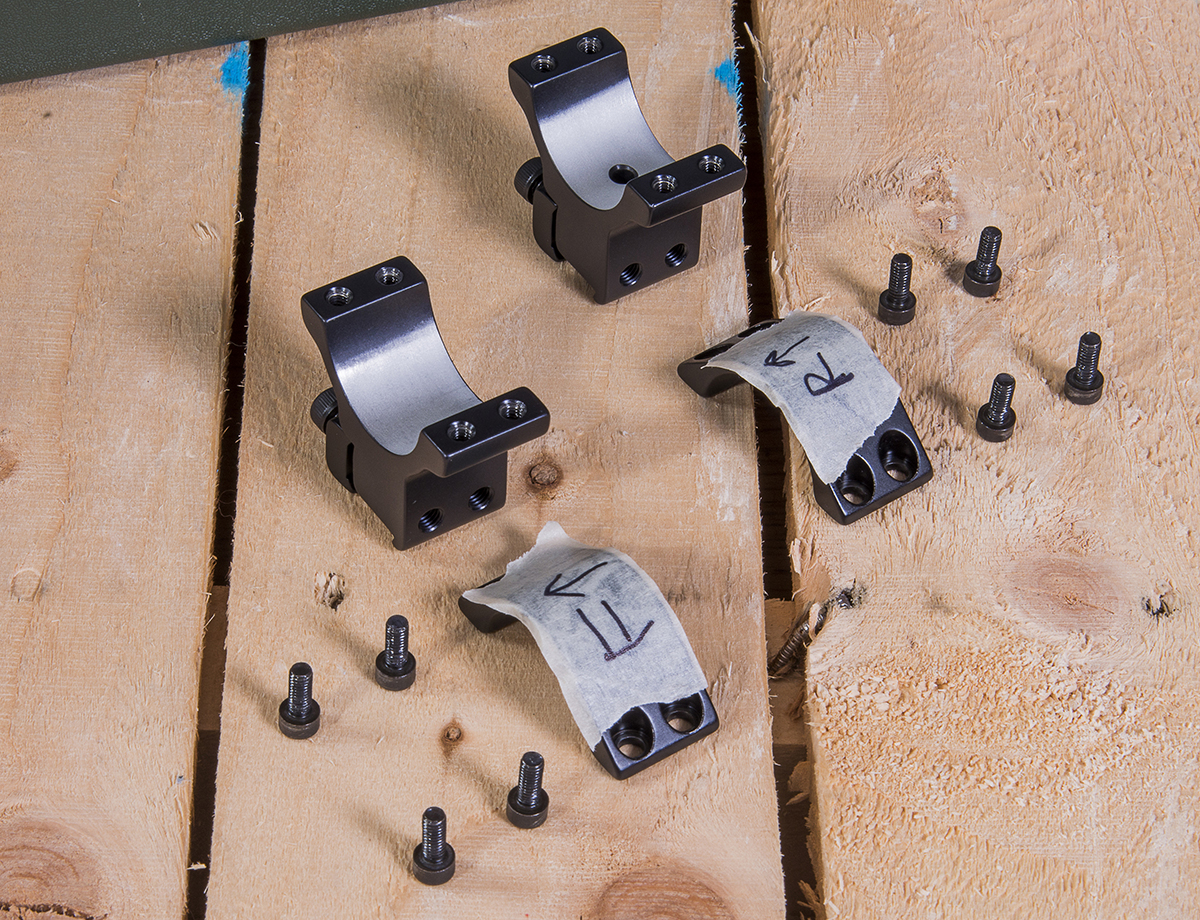
1. Dismantle the mounts before installation, taking note of the orientation of the lowers, uppers and screws – masking tape is useful for this
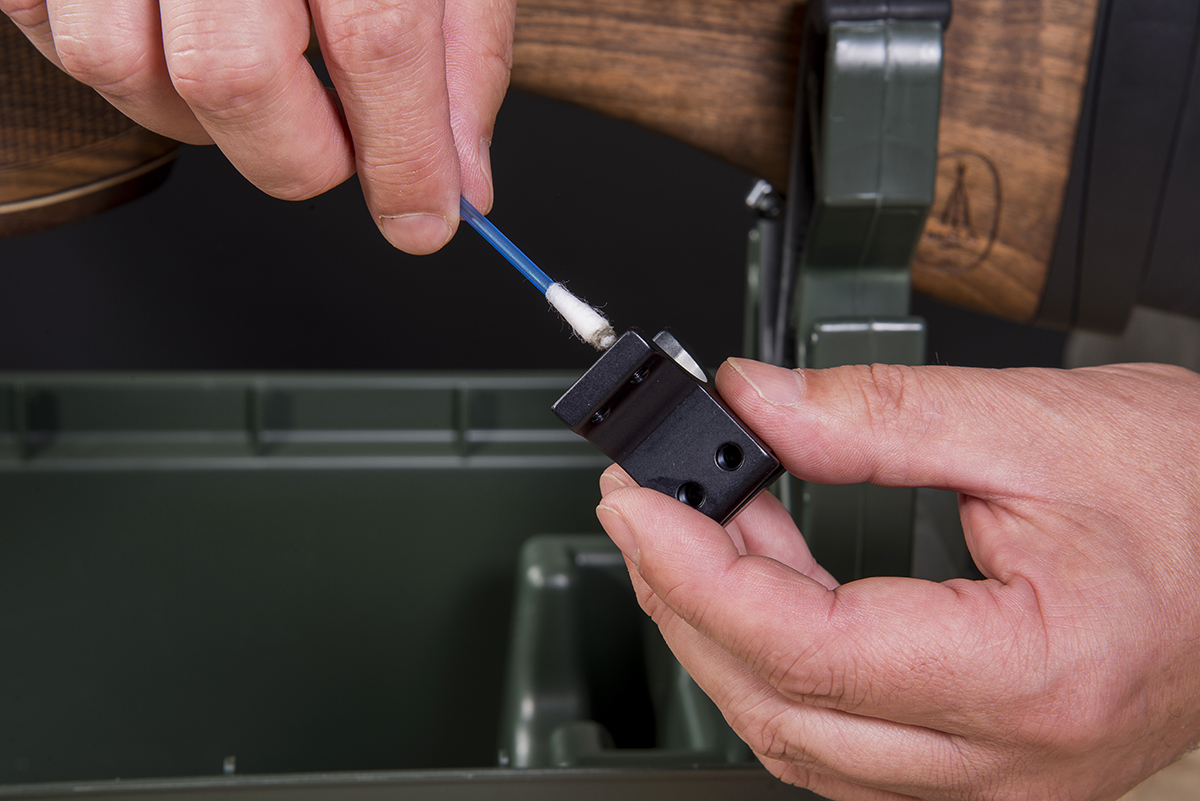
2. Whether the mounts are new or used, it’s a good idea to de-grease the threads, especially if you’ll be using threadlock later on
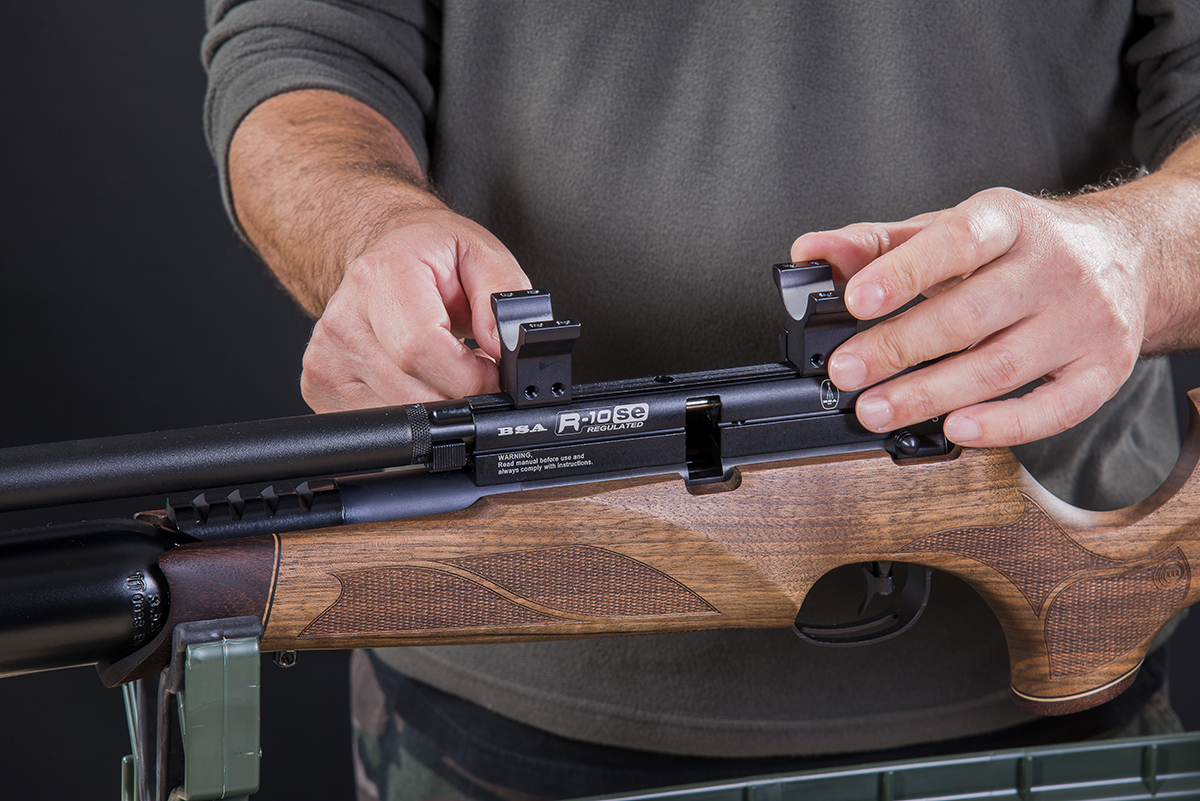
3. Fit the lowers to the rail, but only loosely for now as you may need to reposition them to ensure you get good eye relief with the ocular lens
4. Lay the scope gently in the mounts and check to see if there are any obstructions, especially if lens caps have been fitted

Setting eye relief: 5. Wind down the magnification to its lowest setting – having a scope on low magnification makes it easier to initially adjust for eye relief
Do you want to use two-piece or one-piece mounts? Like one-piece, most two-piece mounts let you fit an arrestor pin to prevent scope creep on recoiling rifles, so it’s not absolutely necessary to use a one-piece mount on a springer or gas-ram. Some shooters do appreciate the extra rigidity and clamping power of one-piece mounts, while others feel the belt-and-braces approach is a bit of overkill.
The final factor to consider if you have a multi-shot rifle is the magazine system. Some magazines, such as the BSA mag used on the R-10 seen here, don’t interrupt the scope rail at all, which is brilliant, while others stand proud. This has several potential repercussions. First of all, it reduces flexibility when positioning your mounts on the rail. You’ll have to fit two-piece mounts, not one-piece, and even though you might have bought the correct mounts for your specific scope, you may need to fit even higher mounts to clear the magazine.
If you’re not absolutely sure what to order, have a chat with the shop selling the mounts to discuss the options for your specific rifle and scope combination.
Having purchased the correct mounts for your needs, it’s time to begin prepping them by unscrewing the upper rings and loosening the base screws. I always like to put the ring screws back in exactly the same holes they came out of, and also take care to match the upper rings to the bases they came off, even going so far as to keep the direction the same. It can help to use a piece of masking tape to do this, marked ‘F’ and ‘R’ for front and rear, along with an arrow that shows which is the front face of each upper ring. This way, everything will be reassembled exactly the way it came. In theory, the parts should be interchangeable, but depending on make, they won’t necessarily fit perfectly if they’re moved around.
I like to position the bases on the rail finger-tight at first, leaving a little wiggle-room at either end for final adjustment. Lay the scope into the bases and test for any obstructions, such as the objective bell of the scope touching the barrel, the saddle interfering with the magazine, or the magnification ring interfering with the sidelever or bolt. Do this test with lens caps on, if you intend you use them.
Once the scope and mounts have passed this test, you need to set the correct eye relief. You can gently shoulder the rifle with the scope loosely laying in its mounts, or for extra security you can attach the upper rings. They’re only there to stop the scope from falling off the rifle, so keep them loose as you need to be able to shuffle the scope back and forth.
One or two?
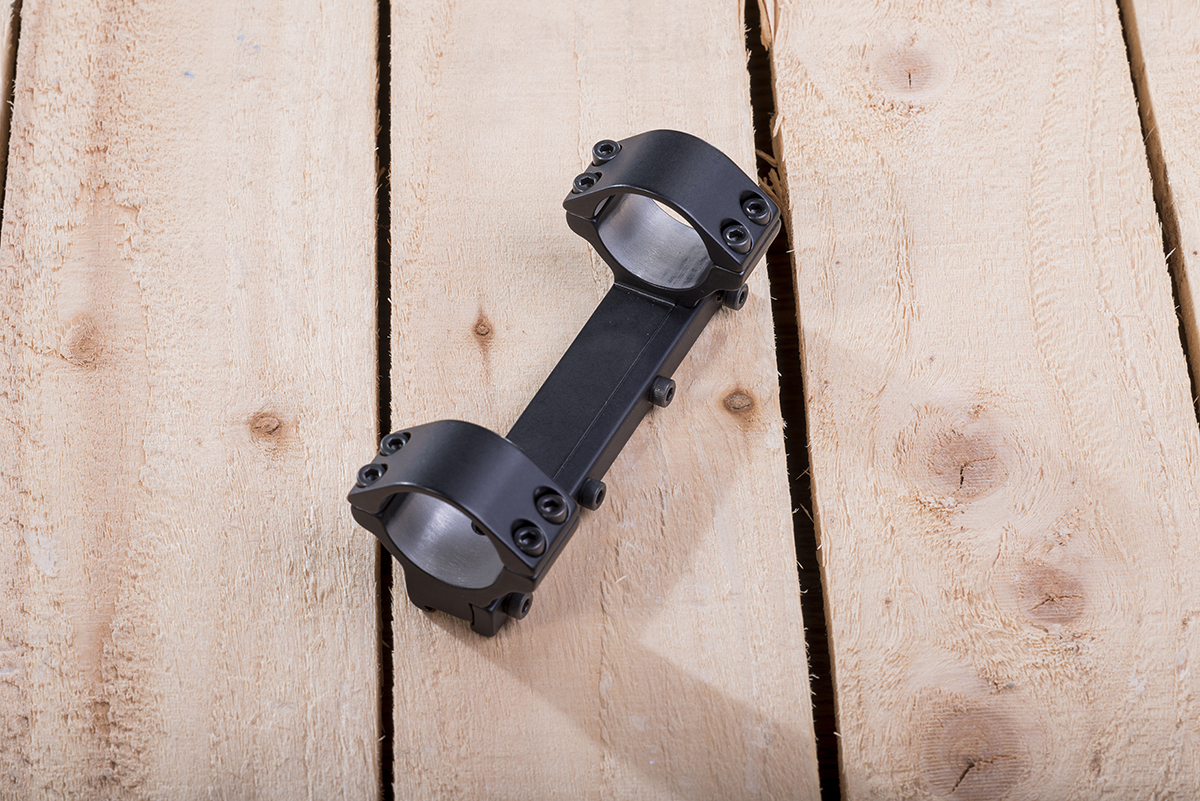
Some shooters prefer to use a one-piece mount with a recoiling rifle for additional security, but two-piece mounts with an arrestor pin are fine
f you need to remove a scope, an arrestor pin makes refitting it a simple task – it goes back in exactly the same place and won’t be far off zero
Adjustable mounts are admittedly a bit more expensive, but do mean you’ll always have enough elevation to properly zero your scope
With the magnification turned down, move the scope either towards or away from you until eye relief is perfect. You may need to reposition the mounts if you run out of room, which is why you left a little wiggle-room earlier. Once you think you’ve got the correct eye relief, turn the magnification up to its maximum and fine-tune the position of the scope if necessary – eye relief is more critical on higher magnification.
You can head straight to this step if you like, but using a low-mag setting to start with makes it easier to get the scope in roughly the right position.
Once you’ve established perfect eye relief, you can secure the base screws. It’s also a good idea to put a piece of masking tape on the scope tube to act as a reference marker for eye relief, because the scope at this stage still needs to be loose in the mounts. You now need to level the crosshairs by rotating the scope tube, while not letting the scope move backwards or forwards in the mounts, affecting the eye relief you’ve taken so much trouble to work out.
Levelling the crosshairs involves not just levelling them relative to the horizontal and vertical planes, but relative to the rifle itself in order to eliminate cant where the rifle ends up being angled to one side. There are a number of ways to do this, depending on how much time you have available – maybe you’re just putting a scope on for a short time to see if you like the reticle – and whether you have access to small bubble levels, a larger spirit level or a plumb line.
Levelling by eye
This method relies on you being able to back away from the scope so you can still see the horizontal crosshair and level it relative to a flat portion of the gun, such as the scope rail or action.
It’s a simple and quick method, and if you have a good eye for angles, this can be all you need to level the scope perfectly. But it can also be very imprecise, and unless you really know what you’re doing, it may be better to use one of the other methods below.
Levelling on a table
It’s actually possible to level the scope in its mounts while they are all off the rifle, but you’ll need to be confident you have enough room on the rail to slide your scope back and forth to achieve eye relief later on.
This time, you need to find a table, kitchen hob or similar flat surface that’s perfectly level – use a spirit level to verify this.
Now fit your scope to your mounts while they’re still on the table, using a small bubble level resting on top of the elevation scope cap to ensure the scope itself is level. Then fit the scope/mount combo to the rifle, adjusting for eye relief.
This method relies on the top of the scope cap being exactly parallel to the horizontal crosshair. It also relies on the mounts being level to the rail once they’ve been attached to the rifle. It’s very quick and easy to work on the scope and mounts this way when they’re off the rifle, but it’s not necessarily the most precise method.
Double bubble
This method also relies on the fact that most scopes will be machined so the top of the elevation turret cap will be parallel to the horizontal crosshair. This is usually the case with well-made scopes, but there can be a discrepancy between the two, so this method isn’t guaranteed to be perfect.
As before, this method relies on a bubble level being placed on the elevation cap, but this time a second bubble level is used to ensure the rifle itself is level. This needs to be placed on a flat spot such as the rail or action block, and you may need to use a piece of masking tape or Blu Tack to keep it in place. It’s then a case of rotating the scope until the two levels coincide.
Plumb line or spirit level
The most foolproof method for levelling a scope is to use a plumb line or a horizontal/vertical cross drawn with a spirit level, which you can use as an accurate point of reference. Look through the scope and rotate it until the vertical crosshair aligns with the plumb line, or both crosshairs align with the cross drawn using the spirit level. For this method to be truly accurate, the rifle itself still needs to be held level, with the help of a small bubble level placed on the rail or action. While the club or range is probably the most obvious and convenient place to mount a scope this way, you can still do this at home provided your scope can parallax down to indoor distances so you can still clearly see your reference marker.
Whichever method you use to mount and level your scope, it doesn’t mean your mounts and optic have to stay like that forever. When you’ve done a lot of work, it can be tempting just to leave everything as it is, but you may find after shooting your combo for a week or so that your eye relief isn’t quite as good as you thought, or the crosshairs aren’t quite as level. So it really is worthwhile taking the extra time and trouble to make minor adjustments to eliminate these niggles once and for all rather than just put up with them.
A well-mounted scope will let you shoot your rifle better, unlocking the full potential of both the gun and the shooter.
Related articles

News
PETA attacks royal couple for breeding cocker pups
The Prince and Princess of Wales have faced criticism from animal rights group PETA after they had a litter of puppies
By Time Well Spent

News
Farmers launch legal review against Reeves’s farm tax
Chancellor Rachel Reeves faces a judicial review over inheritance tax reforms that could force family farms out of business