★ Beat print – get early access to the news by signing up to the Shooting Times newsletter here ★

Getting started with thermal imagers – An airgunner’s perspective from Mike Morton
 Thermal Sights feature shot in the studio
People forget that the advent of new technology doesn’t make old tech any less capable, and airgunners first getting started with thermal imagers is no different. Lamping works as well as ever, providing the same benefits – and drawbacks. But next-gen tech can offer something more, building on what’s come before and delivering an enhanced shooting experience.
My own experience with night vision is limited. I bought a Gen 1 NV unit almost 20 years ago, and while it worked well enough for its day, it was offputtingly clumsy and power-hungry. I quickly retired the NV sight and went back to lamping, as it was a system I was used to.
I found it more effective and more enjoyable, as I’d lamp with a buddy. In the years that followed, the quality of NV units advanced, with thermal night vision optics starting to make an appearance at consumer level.
However, these were always out of my league, especially the thermal type. More recently, NV prices in general have been dropping in relative terms, and some thermal optics, like the InfiRay Saim SCP19W which comes in at less than £1,200, are deliberately placed at the lower end of the thermal financial spectrum, making them a more appealing proposition for the airgun shooter.
Obvious maybe, but a thermal sight should only be mounted to a rifle that you already know to be supremely accurate with its chosen pellets
And when Highland Outdoors offered to lend me one of these sights, I knew I had to give it a go. So here are my initial findings. I’m hardly a technophobe, but nor do I have any recent experience with digital optical devices, so I’m very much a novice.
And please note that I’m purely focusing on what it’s like to set up and get going with a unit like this, rather than taking it out on a hunt, as that type of scenario has already been covered far better than I could by Mat Manning and Richard Saunders.
Getting Started
I know people who have dedicated night-hunting rifles, and at risk of stating the obvious, if you intend to have a similar setup, then I’d suggest using a rifle and pellet combination that have already proven themselves to be a perfect match when used with a day scope.
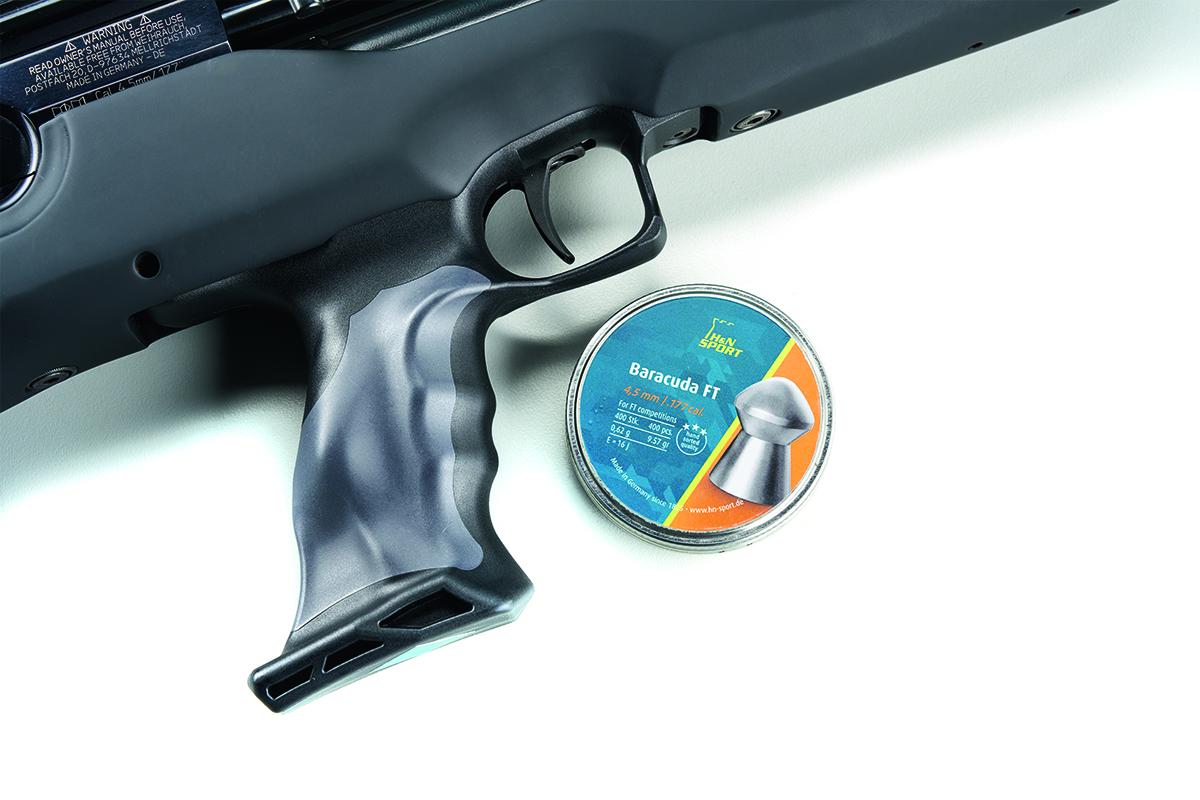
I’d even go one step further than that and suggest you use a particular rifle and pellet combo that you know shoots well at the specific distance you think you’re most likely to shoot over, as some groups can actually be looser at the shorter ranges that are typical of night shooting. In my case I chose my .177 Weihrauch HW100 BP, paired with H&N Baracuda FT pellets.
What’s In The Pouch?
The Saim SCP19W is a small unit and comes in a similarly small pouch, containing the sight itself, with a flip-up front lens cover and rear concertina scope enhancer already attached, a long Picatinny mount and a small adjustment tool, along with a micro USB cable and several thermal pads to help with zeroing (Read how to zero a scope).
No manual is included, but a guide can be downloaded from infirayuk.co.uk/pages/manuals. I’d recommend printing off the manual, as I was constantly referring to this during the set-up and zeroing phases, and trying to read it on the small screen of my phone proved hopeless.
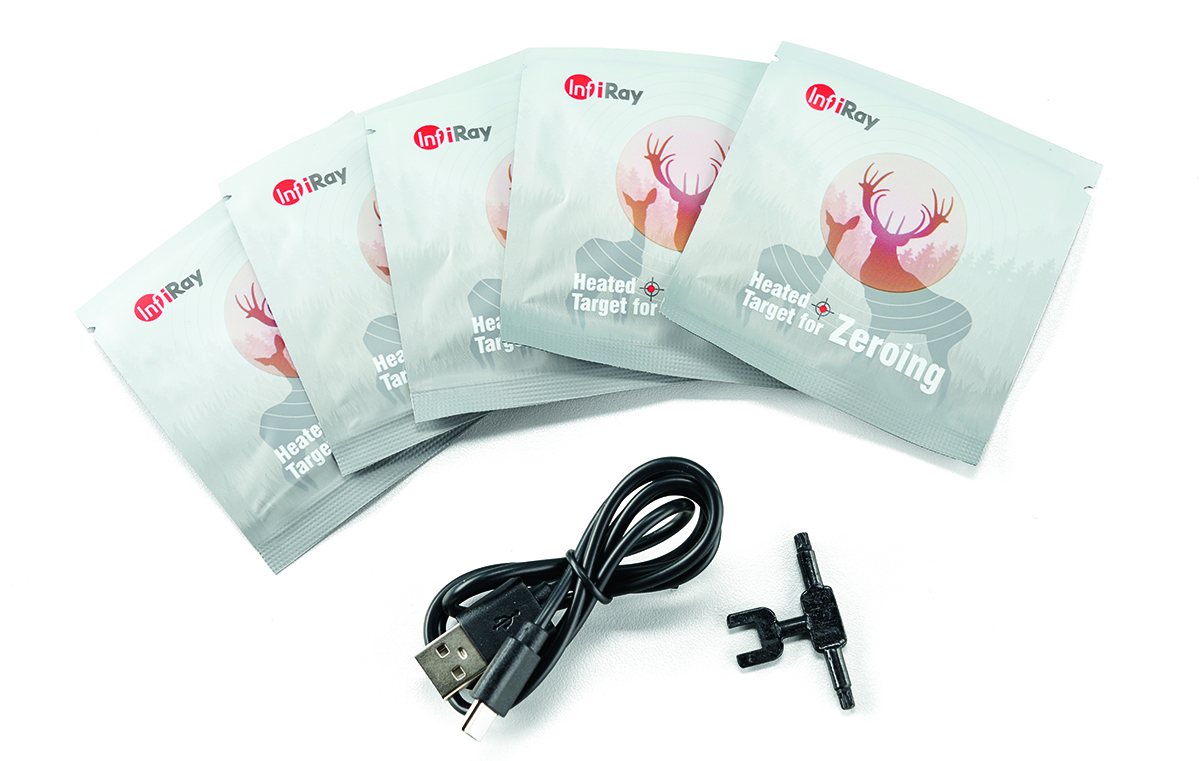
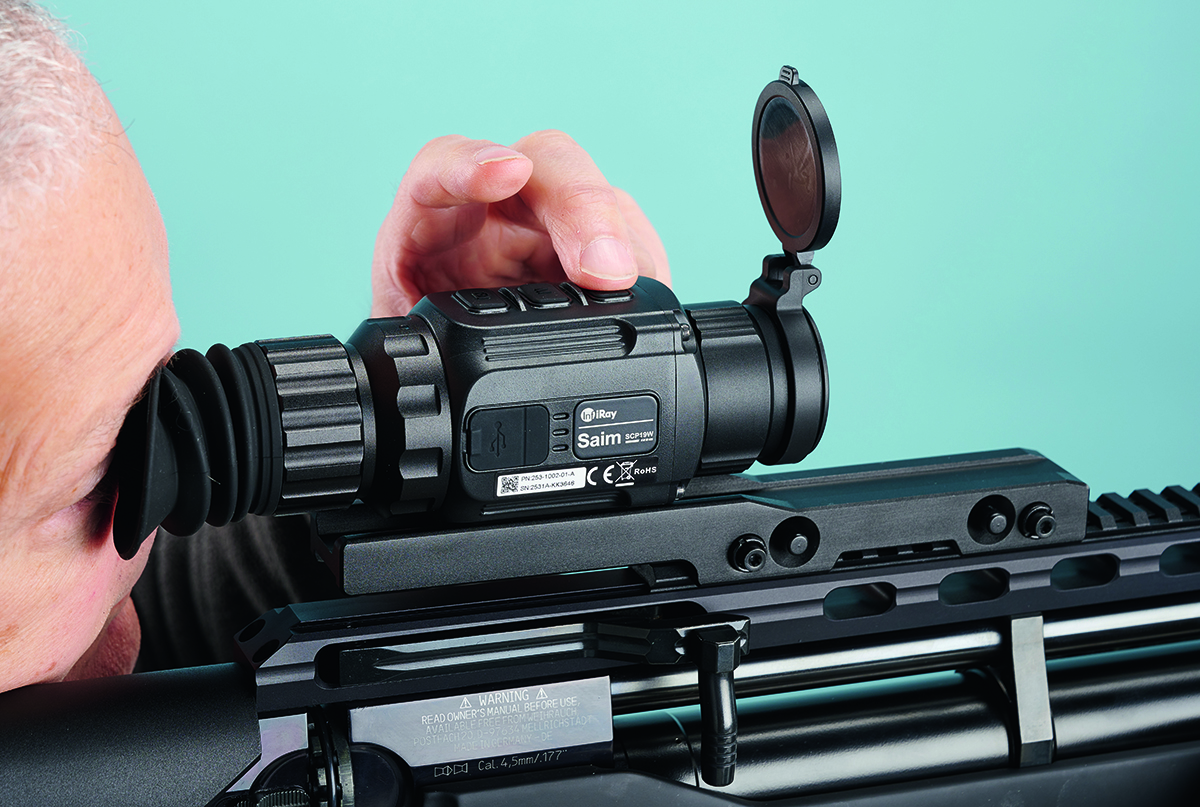
The Saim SCP19W comes with various accessories, including mounting hardware, a power cable and even some thermal pads for zeroing
Something else that wasn’t provided was a power source. The SCP takes two CR2 lithium batteries, so I immediately logged on to Amazon to order some.
In the short term I made use of the supplied micro USB power cable, but even though it measures 1.2m it was a bit too short to be truly useful. Luckily, I already had a USB extension cable, so was able to do my initial set-up this way while waiting for the batteries to arrive.
These may be small gripes, but they do represent the reality of dealing with unfamiliar equipment.
Mounting Up
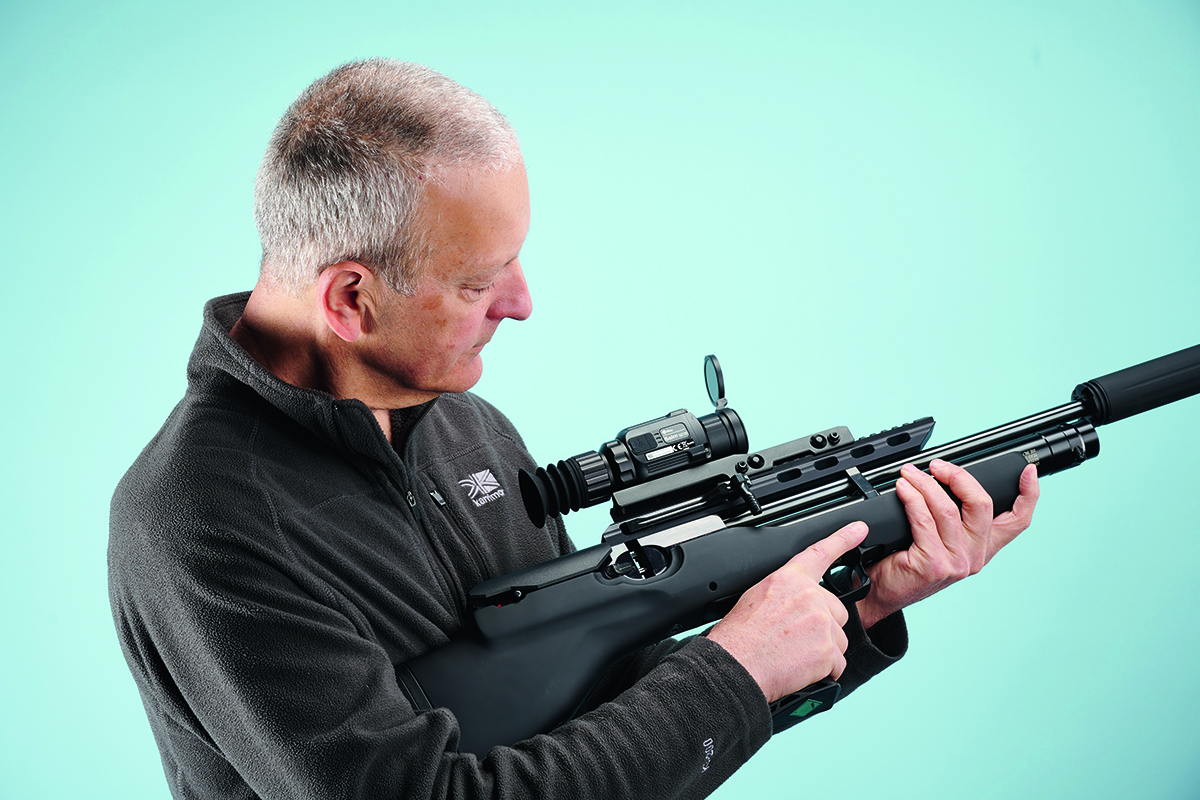
The Saim SCP19W comes with a tool-free reach-back Picatinny mount. It’s secured to the rail via two spring-loaded cams, making it ideally suited to rifles like the HW100 BP.
Better yet, the optic can be attached to the mount in a variety of locations, using two hex screws underneath.
These two methods of adjustment made it easy to set perfect eye relief, which in my case saw the edge of the scope enhancer kissing the socket of my shooting eye. This is a good thing, as it means my head position is easily repeatable, especially when adopting different stances.
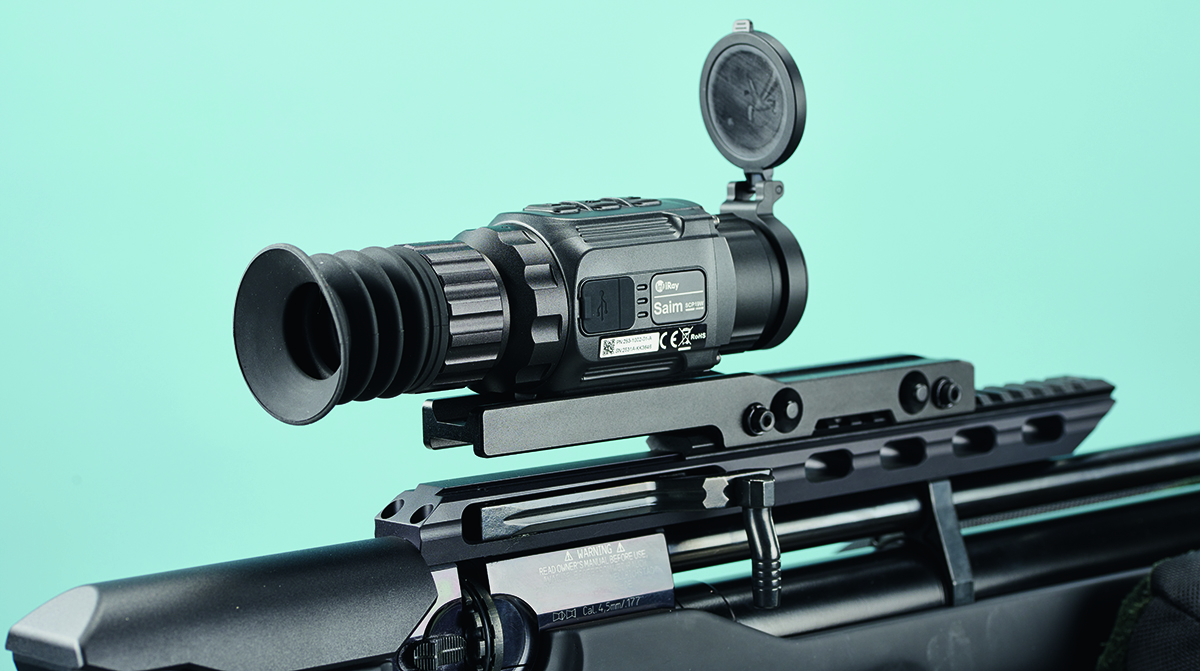
In keeping with many optics of this type, the SCP19W is attached to the rifle with the supplied Picatinny mount and remains quite low profile
Some Things Don’t Change
This may be a thermal sight, but in terms of its basic operation it still functions much like a regular telescopic sight.
And that means the reticle, or in this case the digital screen with all the information it displays – which happens to include the reticle, must be dialled in to suit the user’s eyesight so it appears crisp and clear.
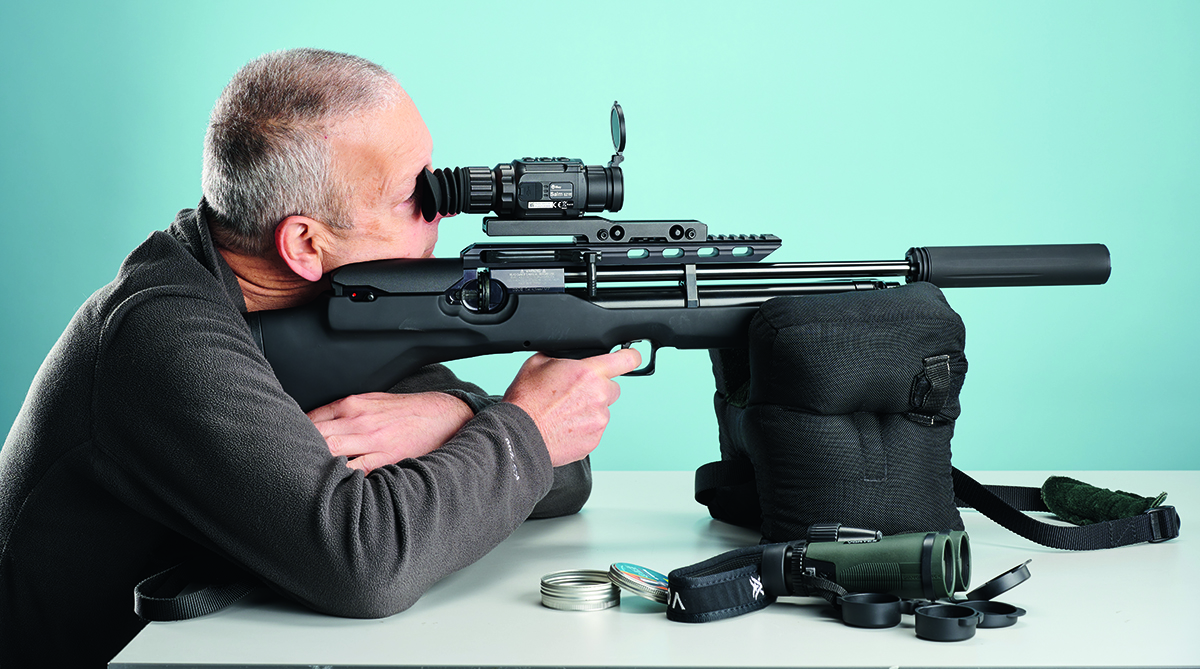
It’s also worth pointing out that the optic still needs to be focused, again like a regular telescopic sight, which in the case of the Saim SCP19W is achieved by using a front focus ring, much like the adjustable objective on many other kinds of scopes.
But unlike many AO scopes, focus on the Saim is easy to adjust when in the aim. Because the unit is so short, you don’t need to stretch forward to reach the control.
Light ‘Em Up
But I’m getting a bit ahead of myself, as of course the first thing that needs to be done is switch on the unit. And that involves buttons.
I have a Casio G-Shock. It’s a brilliant watch, but it’s complicated. It’s solar-powered and Bluetooth-enabled, which means I don’t need to touch it just to tell the time, and it even does the transition from GMT to BST automatically.
But woe betide me if I do mess about with it, because the more advanced functions are accessed via a complex combination of short and long presses of the watch’s four buttons.
It’s a similar thing with the SCP19W, and I’m sure most other thermal sights of this nature too. Here, there are only three buttons to concern ourselves with, these being, from front to back, the Power (P) button, Menu (M) button and Calibration (C) button.
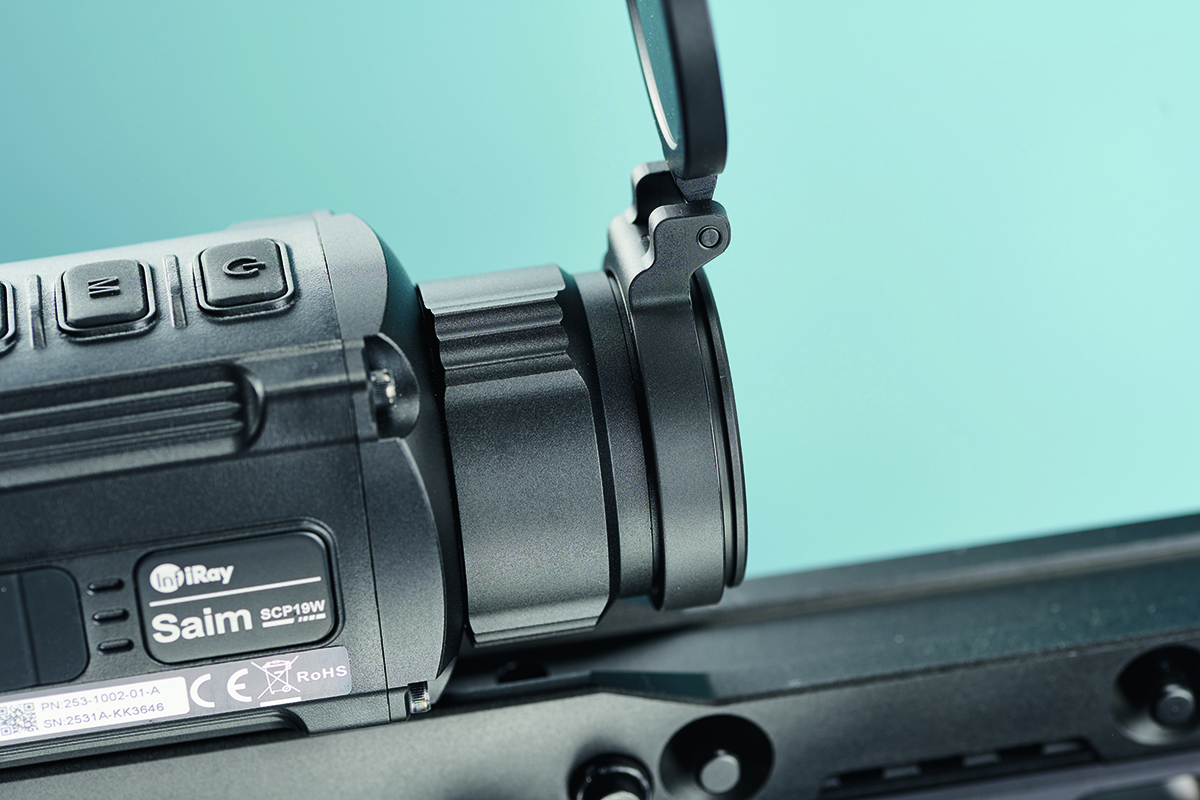
A thermal sight needs to be adjusted for focus just like a regular telescopic sight, in this case using a front focus ring
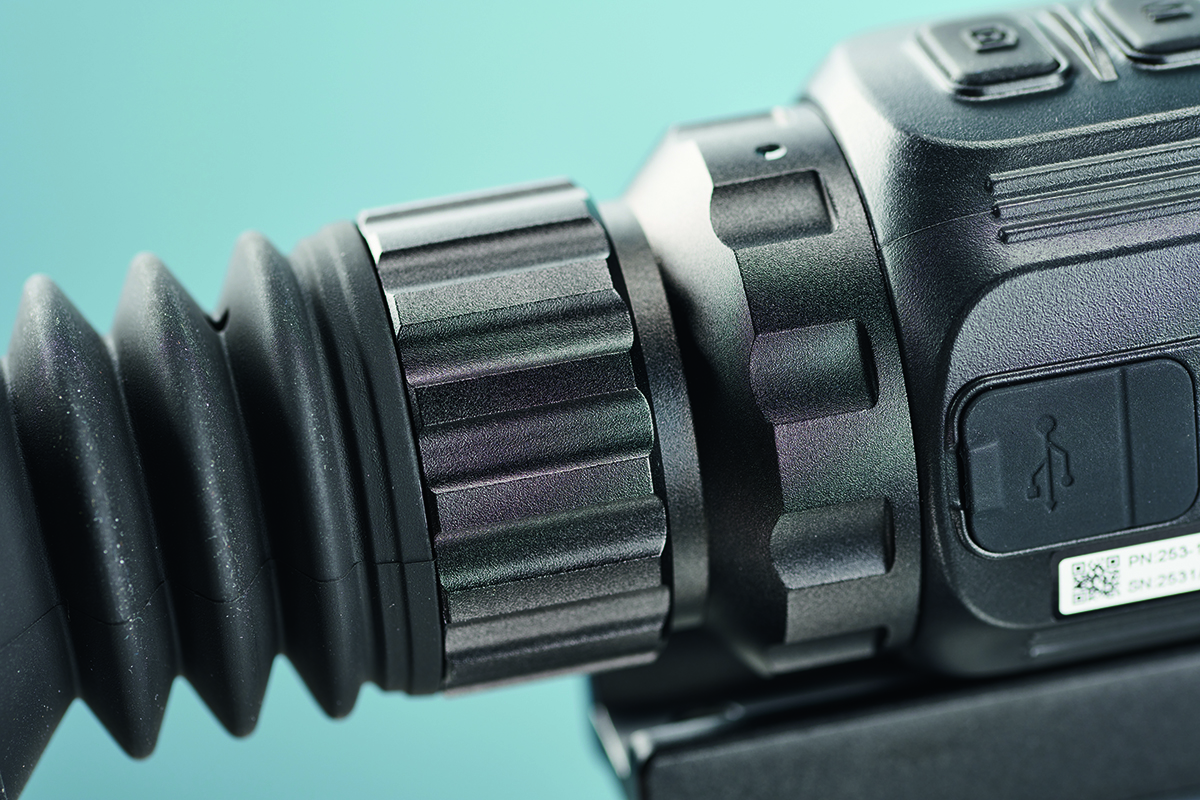
The eyepiece adjustment control is used to ensure all the information being displayed on the screen is crisp and clear
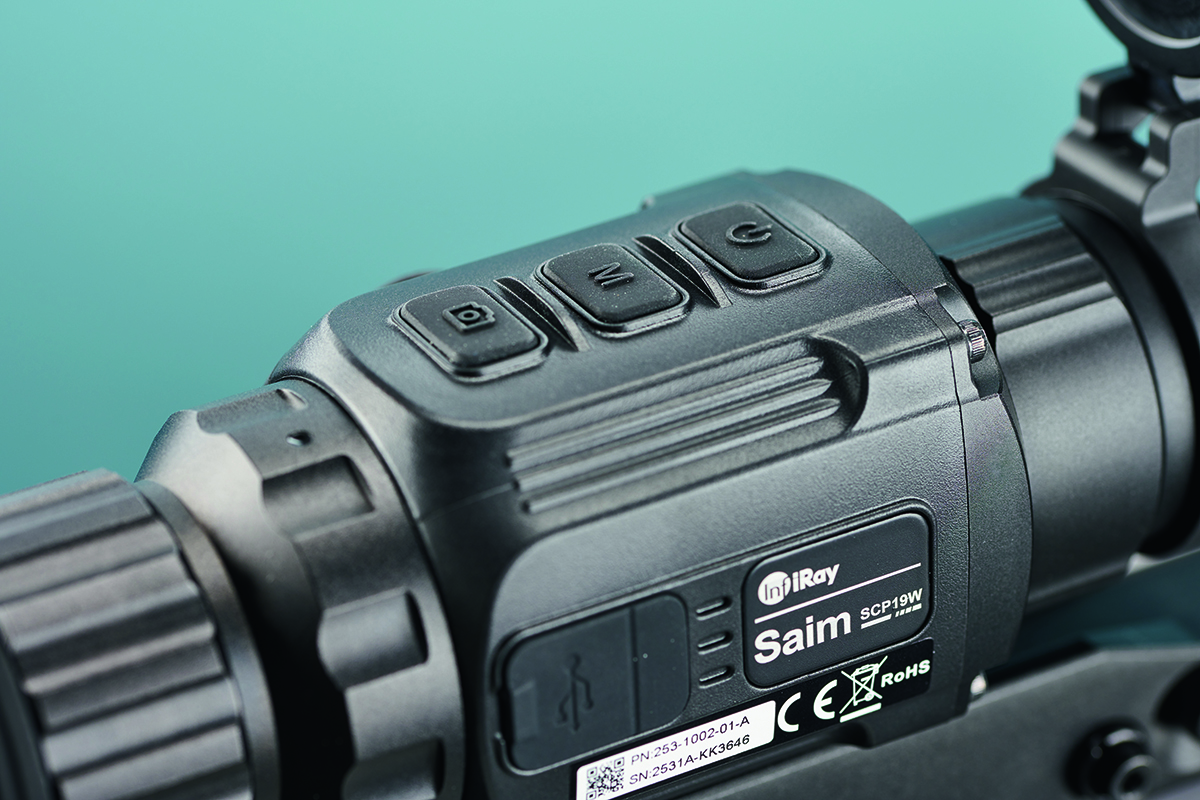
This optic’s many and varied functions are all accessed through a sometimes complex combination of button presses
To help me remember the order of letters like these I like to use a suitable mnemonic. A quick search of the internet for “what does PMC stand for” came up with Private Military Company, Power Management Control and Potential Man Candy (yes really).
I understandably stuck with the first example, using it to help remember the order of the buttons. It’s important to be able to locate these quickly, preferably by touch alone, when operating the sight.
Another tip that greatly helps when setting up a unit like this is to have a buddy sit with you and read out the instructions. That leaves you free to concentrate on looking through and tweaking the sight.
When the SCP19W is first switched on it will display an InfiRay welcome screen, which after a few seconds gives way to an image of what the sight’s pointing at.
If you wait a few seconds longer, the image will then be overlaid by various bits of reference data, as well as the reticle.
A Night Sight For The Day
As many shooters will already know, thermal sights aren’t the exclusive preserve of the night hunter, and all my set-up and zeroing work was carried out by day.
I was unprepared for what this sight could deliver, however, as the default black and white image showed far more detail than I had been expecting, once the front focus ring had been correctly adjusted for distance.
This first session was carried out at my garden range, with plants, trees and flowerpots all being clearly discernible at my self-imposed maximum night-shooting distance of 30 yards.
I found it amazing how heat must be absorbed and emitted or reflected in so many different ways. I’d done some research on the internet about how to zero a thermal sight, and there were some weird and wonderful methods, but I think the airgun shooter is at a real advantage due to what many other shooters believe is our greatest disadvantage – the modest distances we restrict ourselves to and how relatively clear things appear.
Some thermal zeroing methods include placing a small candle underneath a metal target to warm it up, placing a small candle inside a cardboard box and poking a hole in it, revealing a warm halo, and taking entirely the opposite approach and shooting at a cold target like an ice cube.
Mike’s not used to using sights like this, and did find the controls a bit fiddly at first, but soon learned the layout of the buttons
Successful zeroing calls for the rifle to remain motionless while the crosshairs are adjusted, so shooting bags or a bipod are a must
Another popular method is to make a cross out of metallic tape, which will either warm up in the sun or can be gently warmed with a heat gun. I wasn’t sure which of these methods I’d need, but in the end the solution was very simple: I used the same methods I would for a regular telescopic sight.
I usually carry out an initial zero at 15 yards using a Birchwood Casey Shoot-N-C target stuck to a piece of cardboard, which in turn is stuck to my homemade pellet-catcher. The Shoot-N-C is one of those dayglo yellow targets that’s covered in matt black paint.
This flakes off when hit, revealing a ring of yellow. Amazingly the target showed up perfectly clearly against the white card, even though they had both been stored indoors in exactly the same place.
The Saim is capable of being operated at 1x, 2x, 3x or 4x magnification, and while I tested all four, I eventually did all my remaining shooting at 1x as it was the clrearest. There are also four levels of brightness, and I chose the third brightest as it was sunny.
I expect level 1 would be the best at night. I also experimented with the various colour palettes, but stuck with the default.
Zeroing depends on seeing the fall of shot, and this wasn’t possible using the sight. However, a pair of binoculars was all that was needed to spot the pellet strikes and zero the thermal sight accordingly.
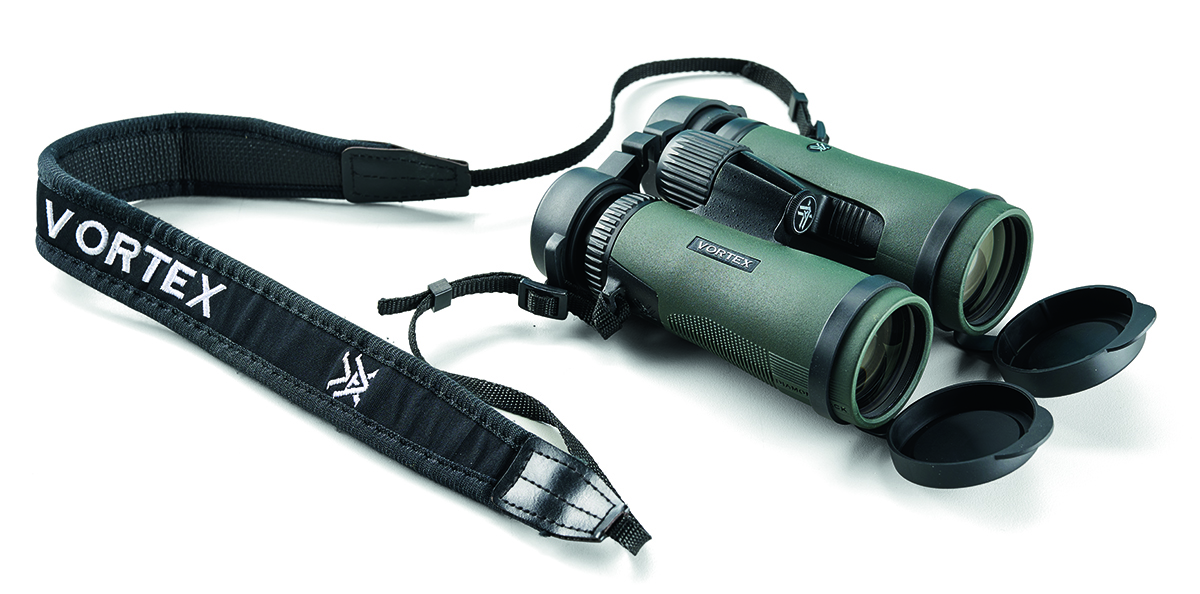
Mike couldn’t see the pellet strikes through the thermal sight, so used a pair of binoculars instead to determine his fall of shot
If you know where the pellet has hit, it’s possible to hold the rifle perfectly still, take a “snapshot” of the image, then move the crosshairs over the actual point of impact.
This did take me a while to do, which was mostly due to my unfamiliarity with the button presses required to enter the correct mode and make adjustments, but I got there in the end.
It was then a case of repeating the process at 30 yards, initially with another Shoot-N-C and then with my standard 1” Target Spots. These little targets were still visible against the white card at 30 yards and at 1x magnification. Quite incredible!
I wasn’t really able to fine-tune my zero for any sort of pellet-on-pellet type of accuracy, but was still able to reliably see, aim at and hit the Target Spots.
A Spinnner’s Not Just For Plinking
With the rifle zeroed, I was confident enough to take on different types of target at different distances, which in this case was a selection of spinners that I set up around my garden.
I thought I’d try one technique I’d seen on YouTube, heating the pigeon part of my dual rabbit’s head/pigeon’s head spinner with a heat gun. This worked well, with the pigeon’s head showing up white.
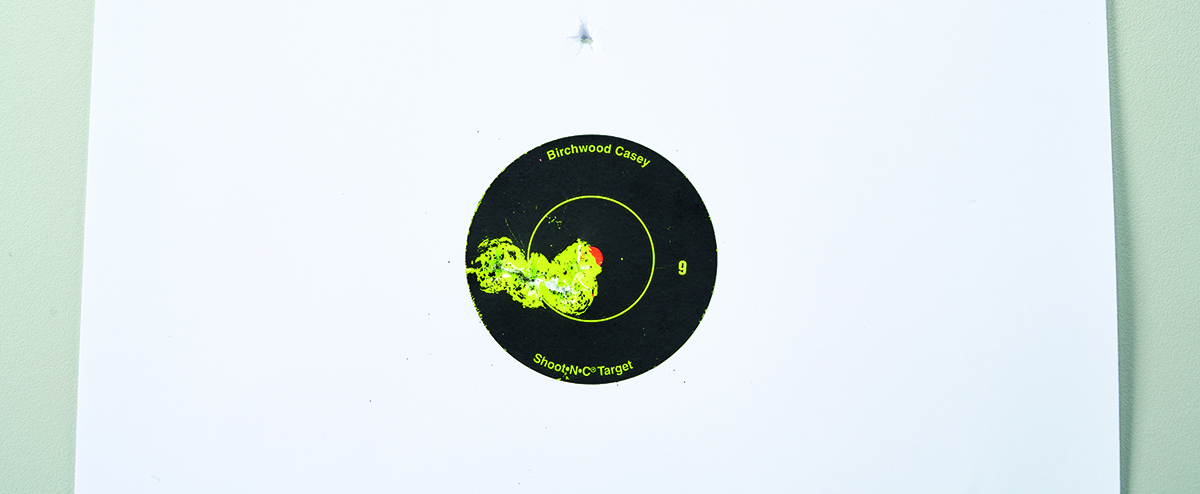
Mike was pleasantly surprised to find that his Birchwood Casey Shoot-N-C targets showed up clearly against the white card
But what worked even better was leaving well alone, as the cold metal of the rabbit’s head showed up black, and this was even clearer to see than the hot white glow of the pigeon.
I was then able to get a buddy to randomly move the spinners to different locations, all with a safe backstop of course, after which I’d try to locate and shoot them.
This worked really well, and wasn’t that different to using a regular telescopic sight, relying on the size of the targets and the parallax adjustment required to see them clearly to work out the distances and therefore my aim points.
Final Thoughts
I’ve had a few daytime sessions like this with similar results, and it’s been great to be able to just set up targets and shoot them without having to resort to any kind of weird science to make the targets show up in the thermal.
I’m now confident to repeat the process after dark, with my aim being to take on rats. While thermal sights can be used by day, they aren’t a substitute for a dedicated day scope. But as a night hunting device? The heat is on!
Related Articles

Gear
Optics
Benchmark redefined – the world’s best low-light digital scope just got better
Discover the HIKMICRO ALPEX PRO digital hunting scope, delivering unmatched low-light clarity, instinctive handling, and trusted performance
By Hikmicro
Get the latest news delivered direct to your door
Subscribe to Shooting Times & Country
Discover the ultimate companion for fieldsports enthusiasts with Shooting Times & Country Magazine, the UK’s leading weekly publication that has been at the forefront of shooting culture since 1882. Subscribers gain access to expert tips, comprehensive gear reviews, seasonal advice and a vibrant community of like-minded shooters.
Save on shop price when you subscribe with weekly issues featuring in-depth articles on gundog training, exclusive member offers and access to the digital back issue library. A Shooting Times & Country subscription is more than a magazine, don’t just read about the countryside; immerse yourself in its most authoritative and engaging publication.

