★ Win a Schöffel Country shooting coat for everyone in your syndicate worth up to £6,000! Enter here ★

How to choose the right air rifle bipod for you
An air rifle bipod is a fantastic piece of equipment. Early examples of two-legged props date back to the mid-19th century where they were used to support heavy guns. Later on, bipods were pressed into military service with guns that were expected to deliver sustained levels of fire. One other helpful benefit – and something that’s especially useful to us airgun shooters – is the fact that a stable and supported rifle allows us to take far more accurate shots.
So if you are happy to go prone to bolster support, stability and accuracy then it’s time to splash out on an air rifle bipod.
But buying one of these is a little bit like buying a telescopic sight as you’ll need to make a number of important decisions in order to get one that fulfils your needs.
You’ll need to be able to attach it to your rifle – and that’s not as obvious as it might sound – it’ll need to offer a useful amount of height adjustment, and you’ll need to know what other features a particular bipod may offer and understand which ones you may or may not need.
(Need more advice on all things airguns? Check out our tips on buying your first PCP rifle, PCP vs springers and which is better to start out with, zeroing a scope, or how to improve your airgun marksmanship).
Fixtures and fittings
With the exception of some specialist bipods that have their own dedicated fittings, like the Javelin bipod from Spartan Precision Equipment, most air rifle bipods are attached underneath the forend of the rifle using either a standard sling swivel stud or Picatinny connector.
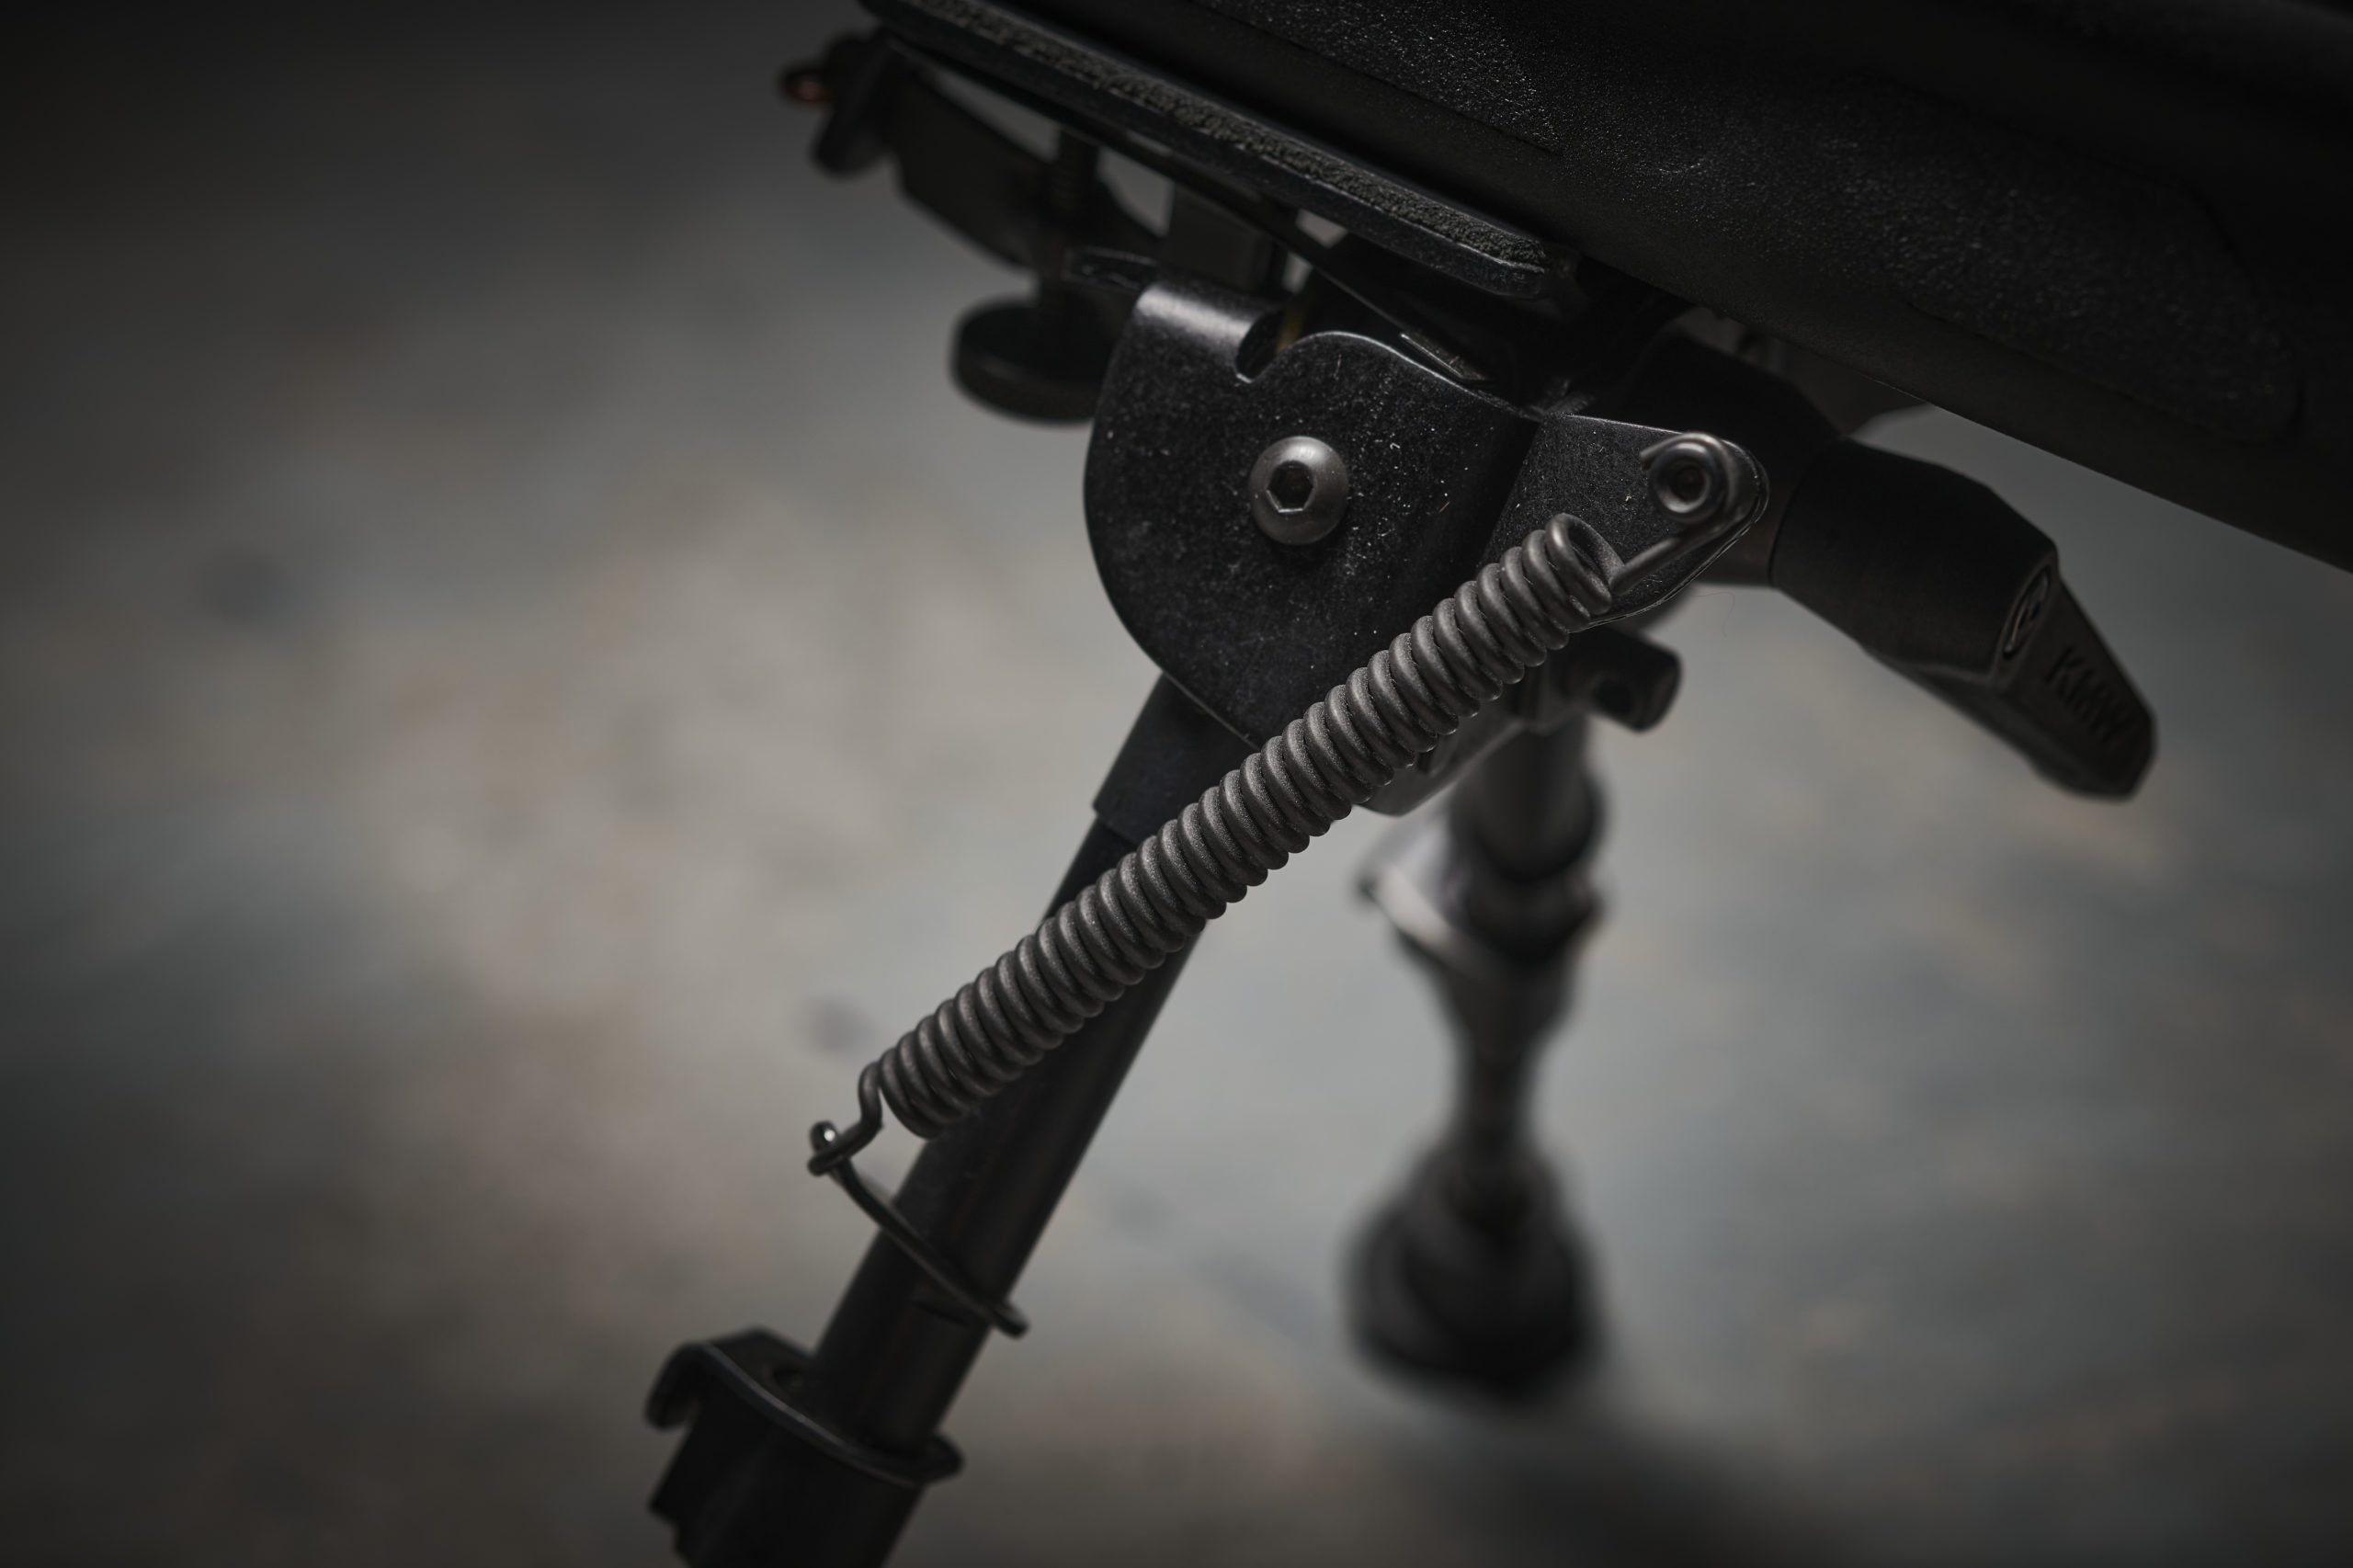
Let’s look at the Harris bipod first. Although this US company now offers bipods with a Picatinny fitting, the initial model was designed to be attached to a sling swivel stud. It was first patented in 1965 and almost single-handedly popularised the use of bipods among sporting shooters rather than just the military. The Harris has two pins attached to opposing metal plates that click into the hole that goes through the sling swivel stud.
In order to fit the bipod, the bottom of each of the plates must be pinched together to widen the gap between the pins at the top, allowing them to be more easily fitted into the hole in the stud.
After this has been done, any slack can be taken up by turning a screw that will exert pressure on the base plate, tensioning the bipod against the forend.
This might sound complicated, but the method is straightforward. In practice it can be a bit of a juggling act to support the rifle in one hand and hold the bipod in the other, all while trying to spread the locator pins and wiggle them in place. I find it helps to slacken the tensioning wheel as much as possible and, like anything, practice makes perfect.
If you have a rifle and bipod with mismatched fittings, you can use an adaptor – this one lets a sling swivel bipod be used with a Picatinny fixture
The baseplate of the bipod features two pads to prevent any marring of the stock. Older Harris bipods have leather pads, while newer ones have synthetic pads.
Both are glued to the metal baseplate, and the bond may weaken over time. The pads will work themselves out of alignment or come off, so you need to keep an eye out for this and glue them back on if necessary.
It always amazes me how secure the sling swivel stud system is though, as it relies purely on the integrity of the small amount of stock material that the sling swivel stud has been screwed into.
The other main way to attach a bipod is via a Picatinny rail. Some US firms looked for a way to secure optics, accessories and air rifle bipods with a universal slot and bar system, resulting in the Weaver rail.
While the size of the slots and bars was standardised in the Weaver system, there was no uniformity regarding the spacing of the slots on the rail.
This was solved by the Picatinny system developed for the US military, which standardised the spacing of slots, the size of the slot and the size of the bar that fits into the slot. In airgun terms there’s little to worry about, as most of the products we use can be freely mixed and matched whether they are marked as “Weaver” or “Picatinny”.
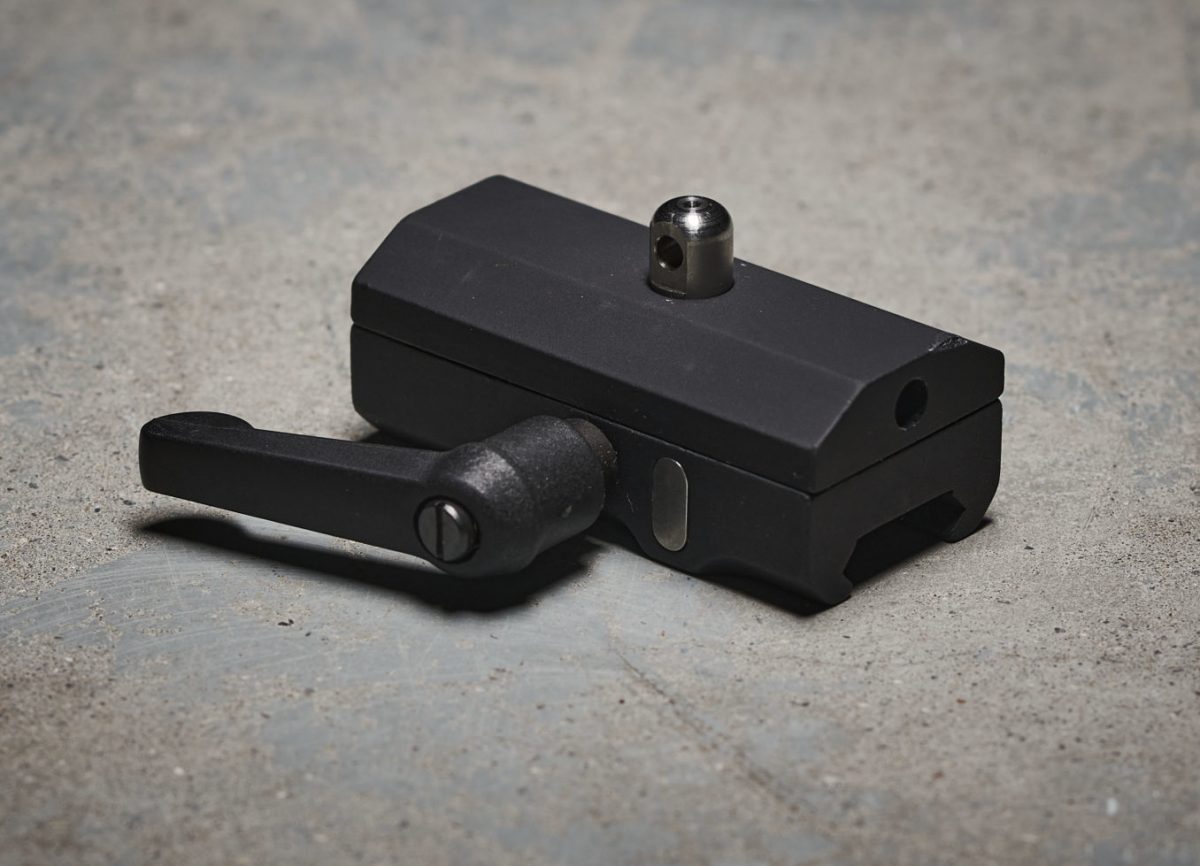
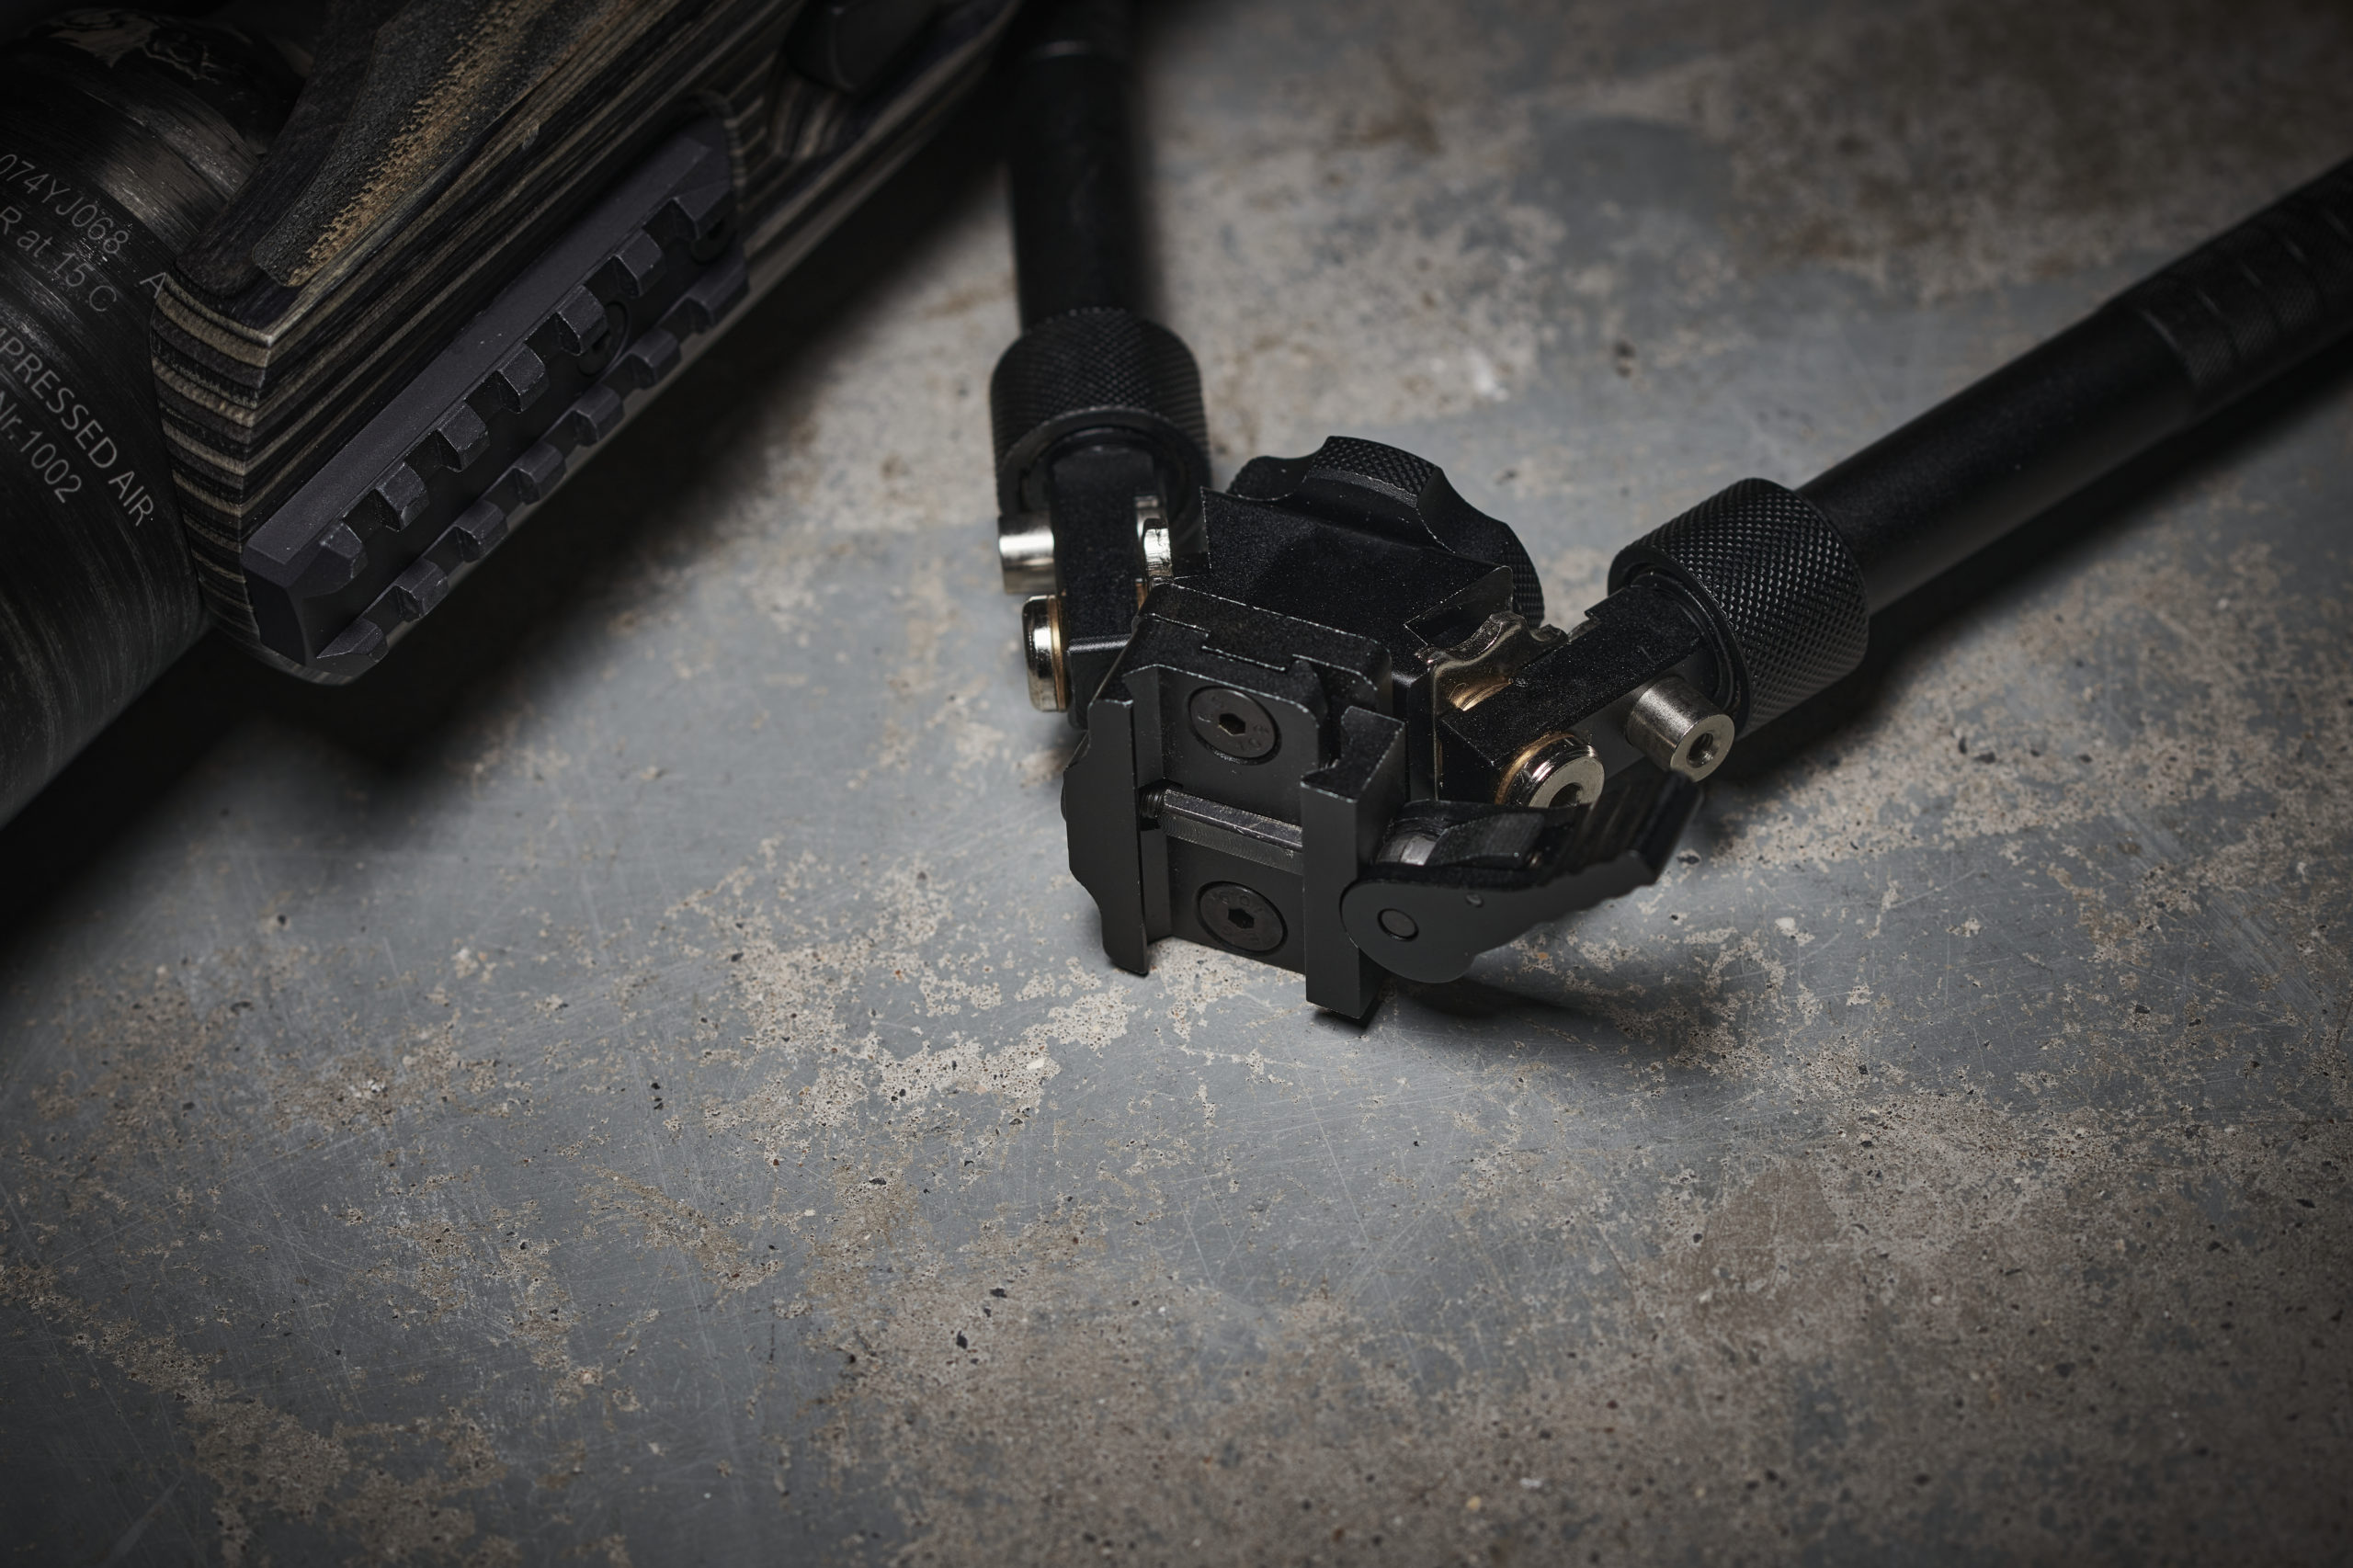
A good example of a bipod using the Picatinny system is the initial-model Adras. This, like the US-made Atlas on which it’s based, requires the user to operate a small lever to loosen a spring-mounted sideplate, after which the bar in the mounting system can be dropped into one of the slots on the rail underneath the forend.
The lever is then closed to hold the bipod secure. While this mounting system is simpler than the Harris, it can still be fiddly, especially in the field, so it pays to practise attaching and detaching the bipod at home or the range under controlled conditions until you’ve perfected your technique.
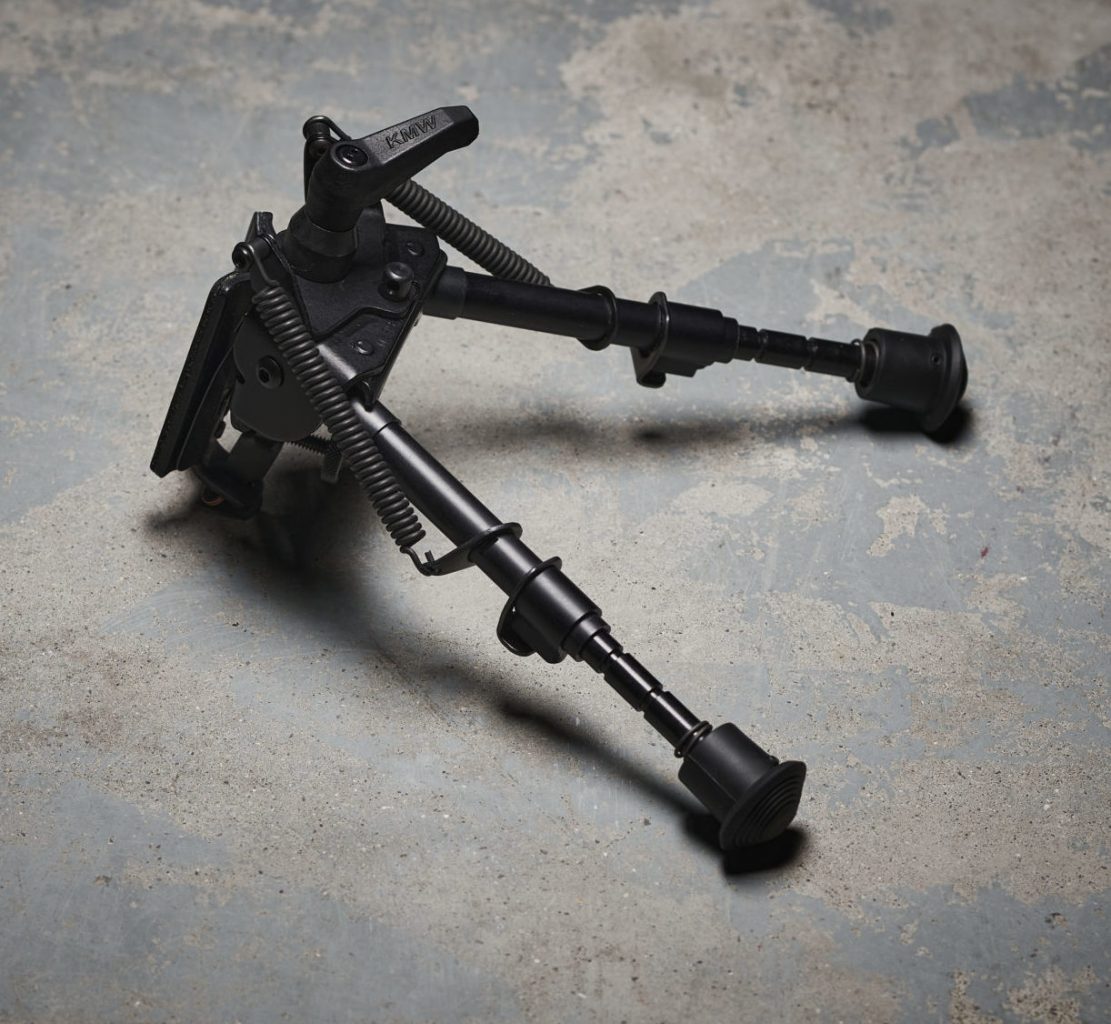
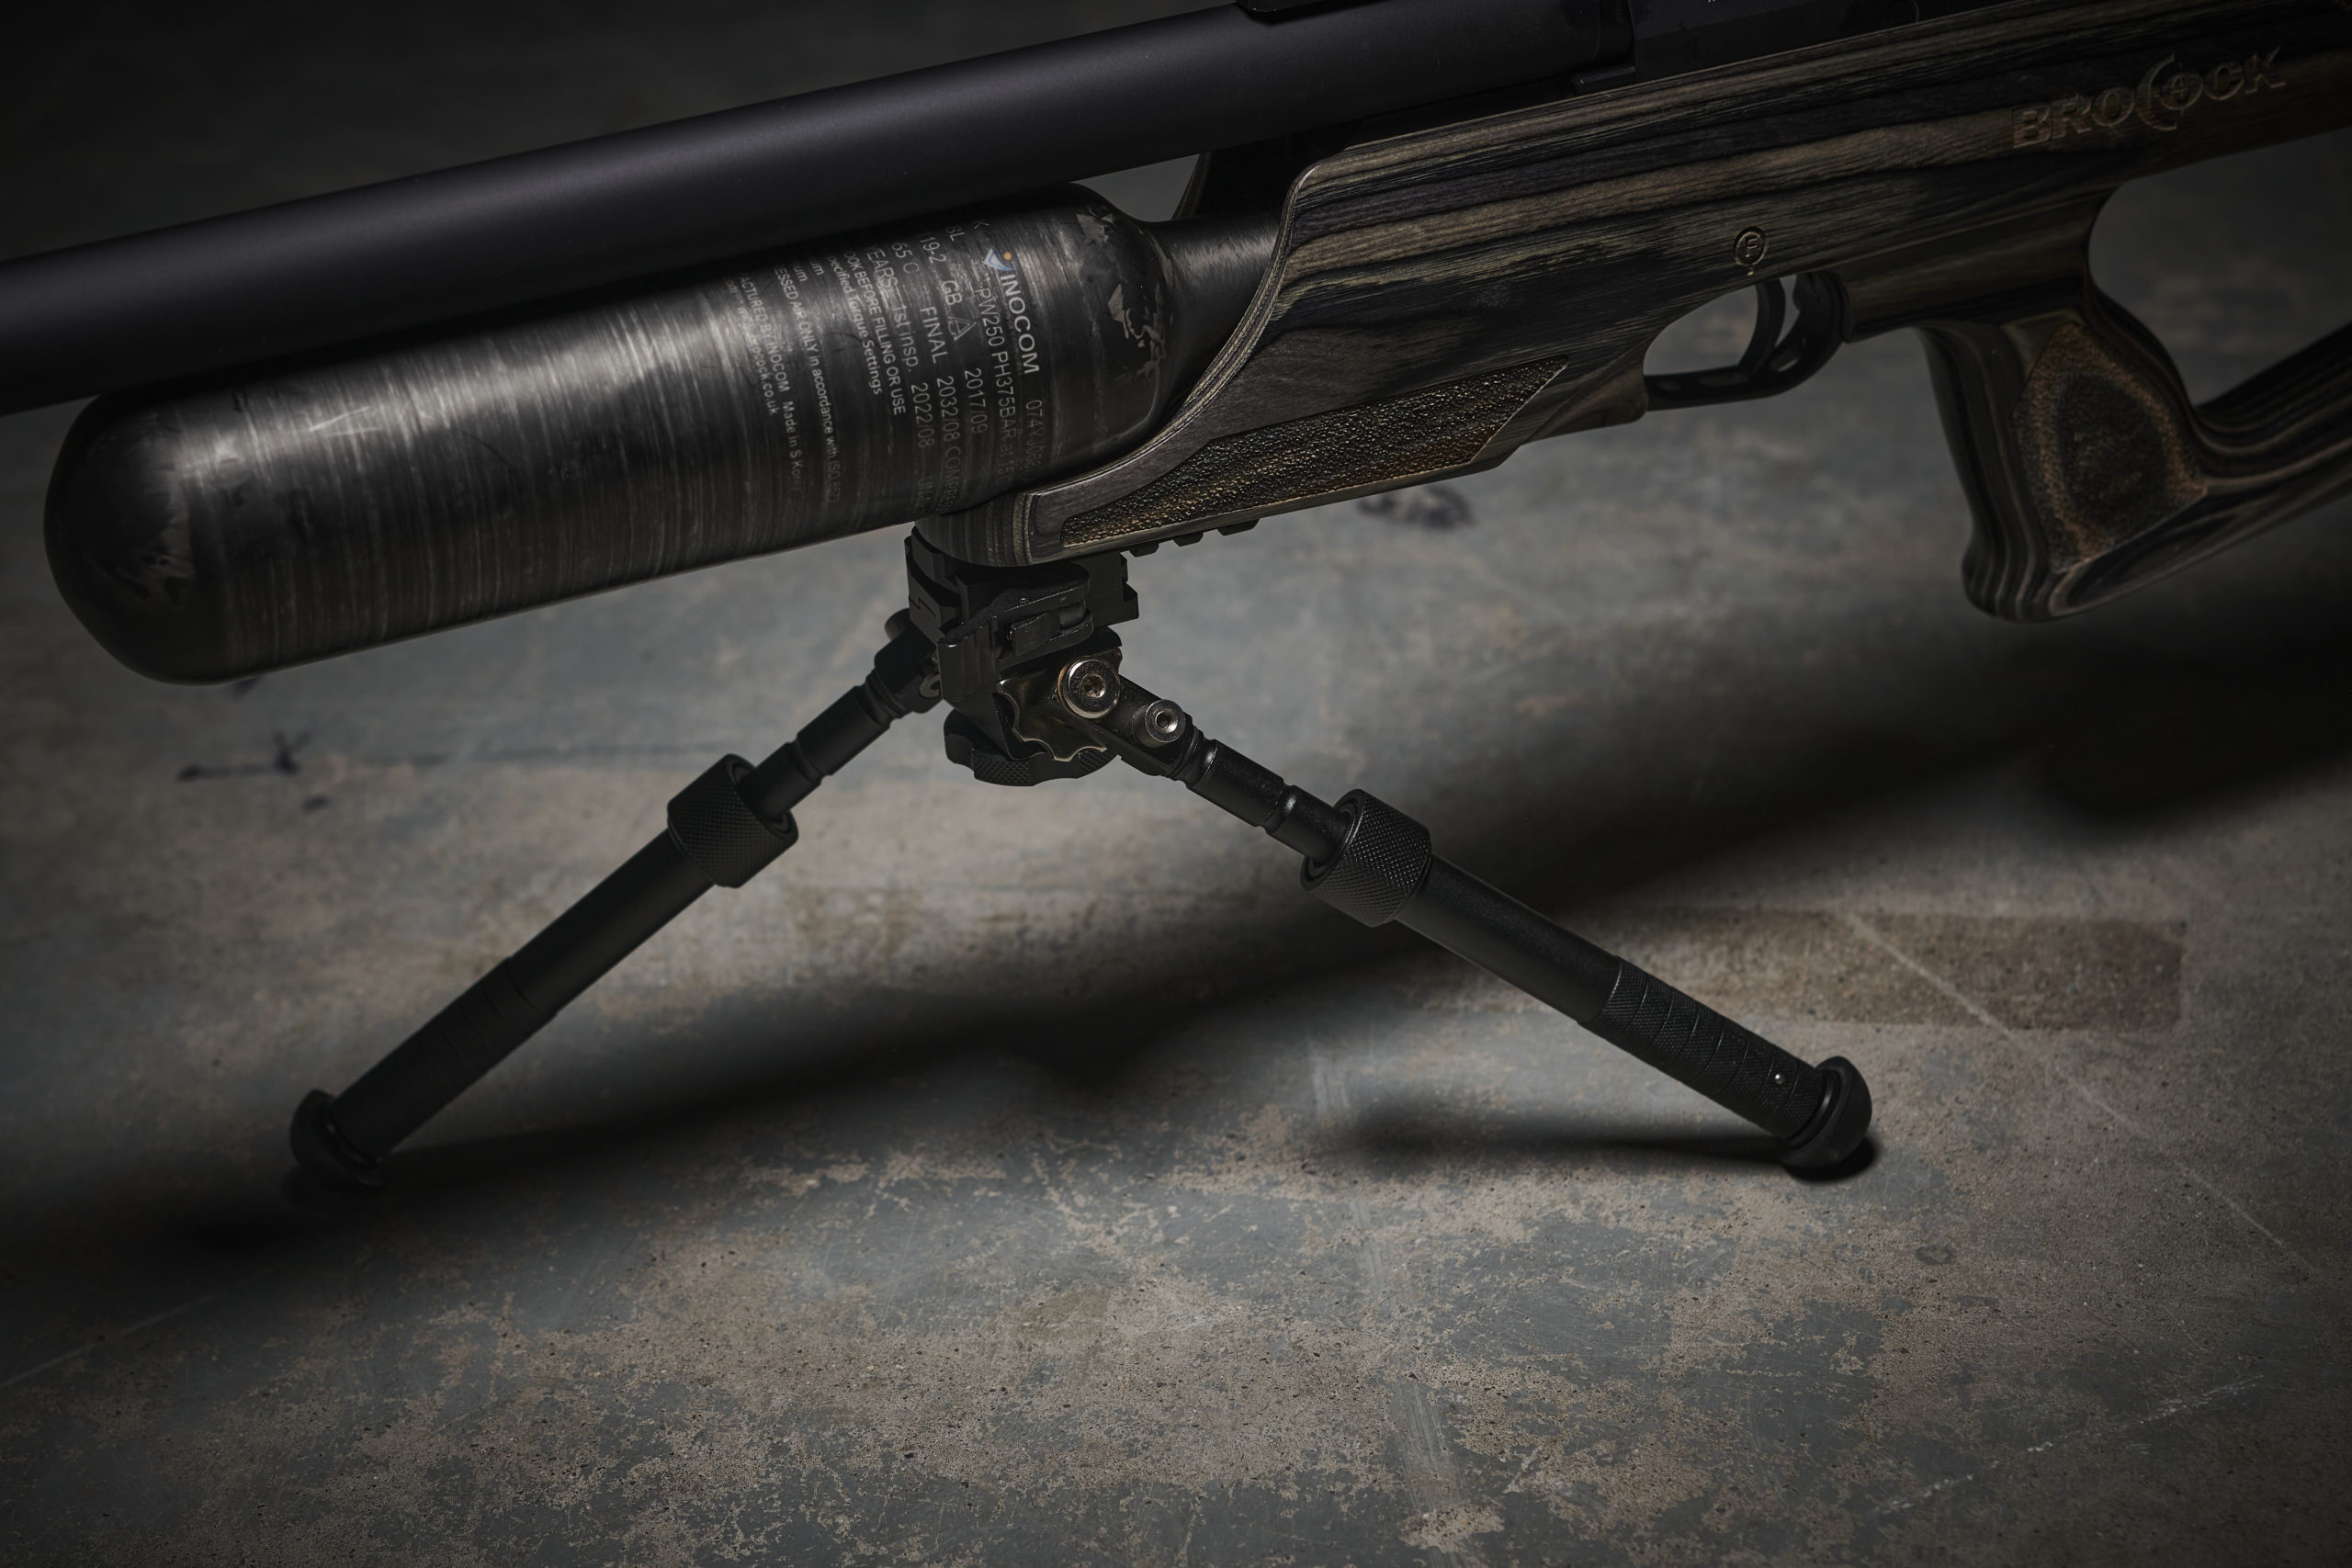
The Harris bipod is used worldwide and has been around for decades, and while it’s been tweaked over the years it’s still the same basic design
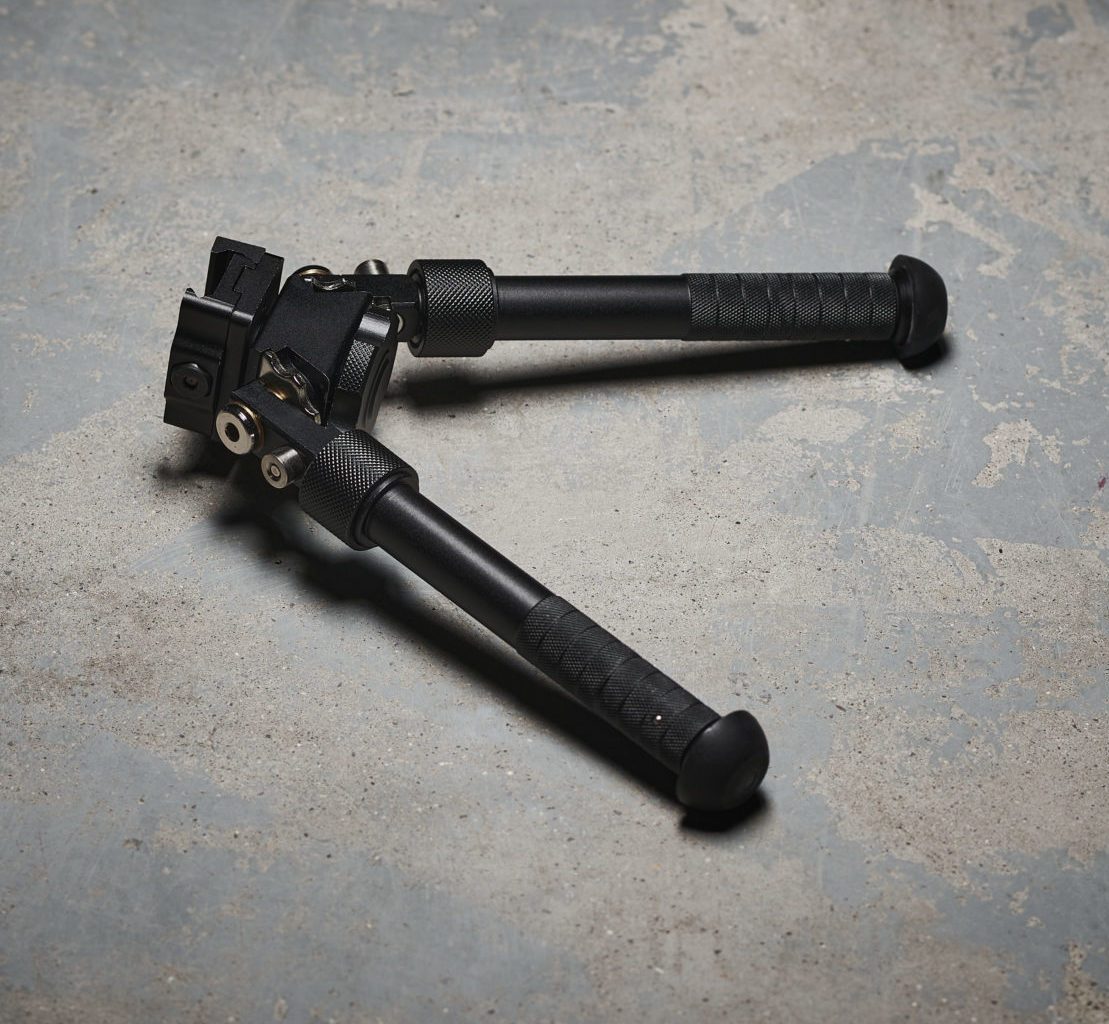
The Adras bipod is available with either a sling swivel stud or a Picatinny fixture, with this particular model being the initial Picatinny offering
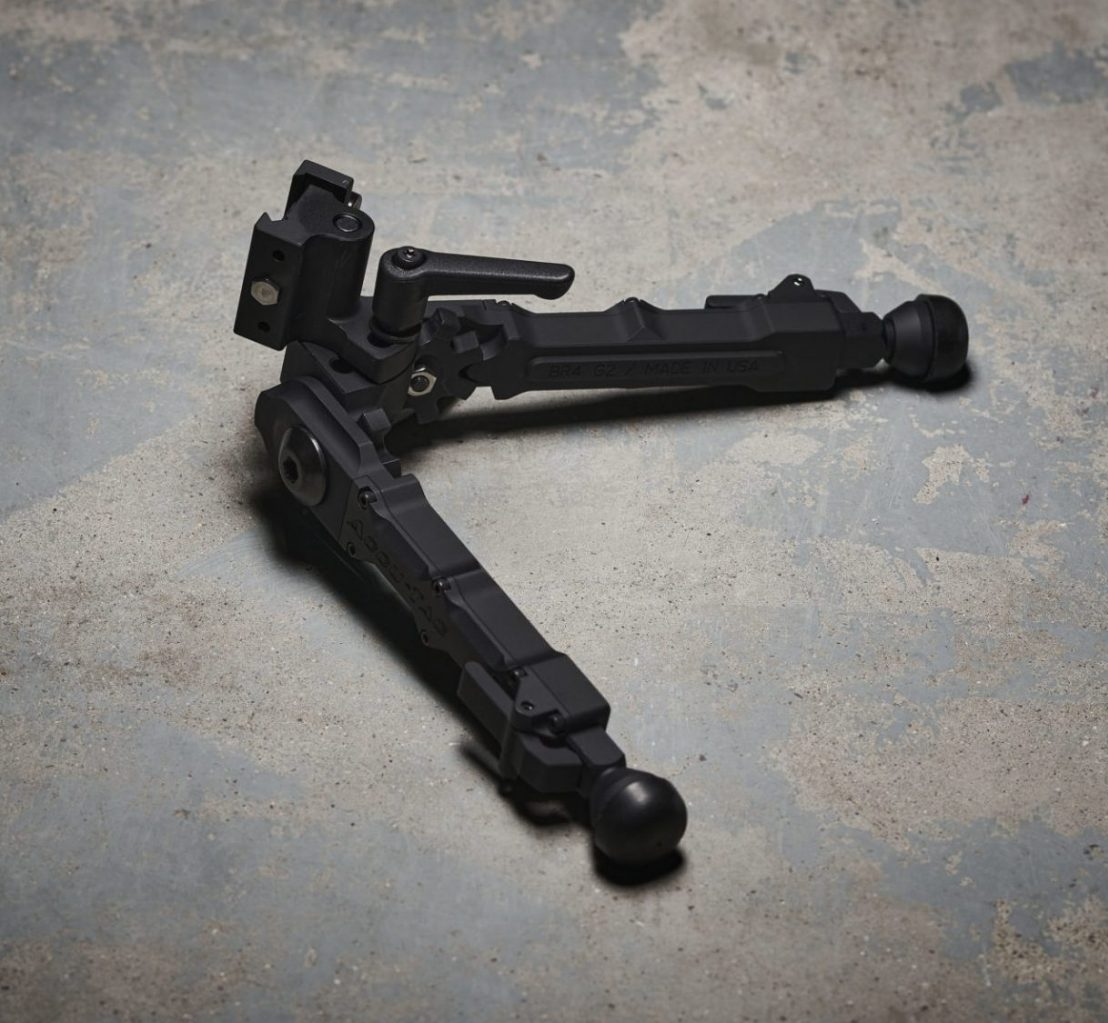
This Accu-Tac is pricey, but it’s a rugged and dependable bipod and offers a wide footprint, making it the most stable of the three bipods here
Adapt and overcome
Suppose you have two or more rifles with different forend fixtures and want to mount an air rifle bipod on each gun. One option would be to buy a dedicated bipod for each rifle, but that’s a bit of an unnecessary expense.
Instead, use an adaptor, meaning you could get away with buying just one bipod and sharing it between all your rifles.
You can get an adaptor to convert a sling swivel stud bipod so it can be fitted to a Picatinny rail, and you can similarly get an adaptor which will allow you to fit a bipod with a Picatinny fitting to a rifle with a sling swivel stud in the forend. Other adaptors also exist that will let you use your bipod with two new standards – M-Lok and KeyMod. These US military fixtures haven’t really made their way to air rifles just yet, but I suspect it will only be a matter of time.
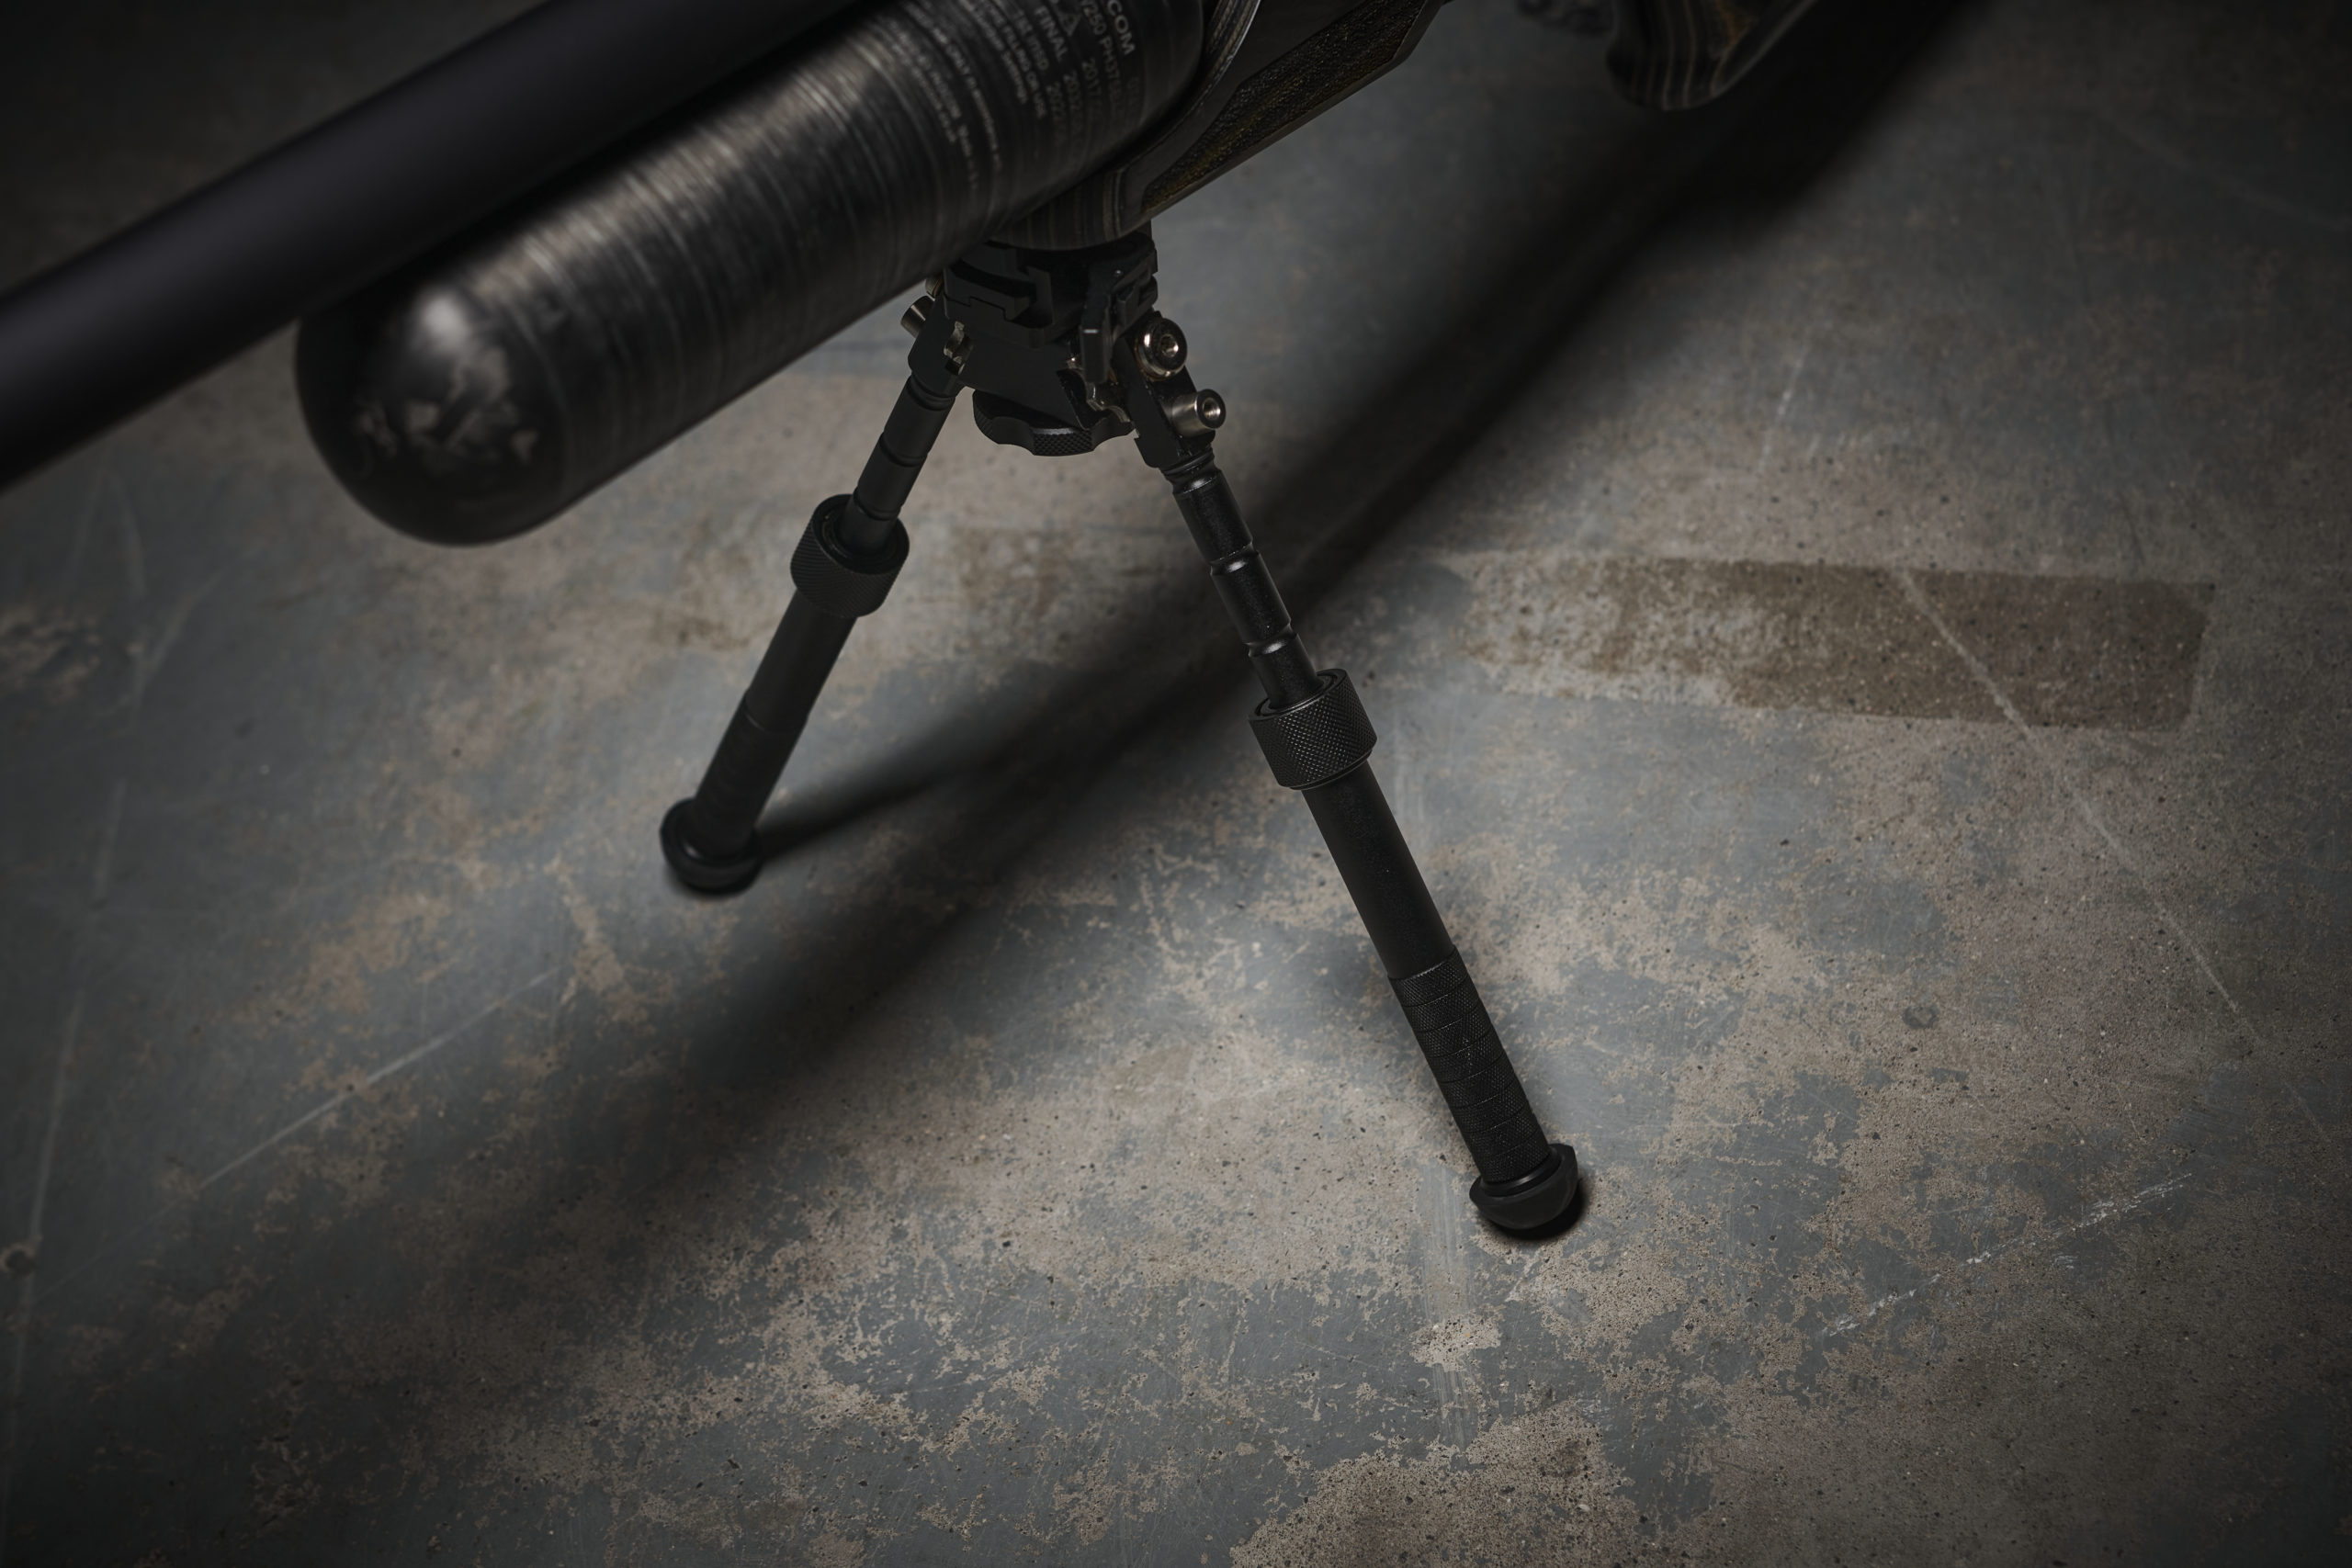
Super-strong springs hold the legs on the Harris firmly open or closed – just keep your fingers clear when deploying them to avoid a painful nip
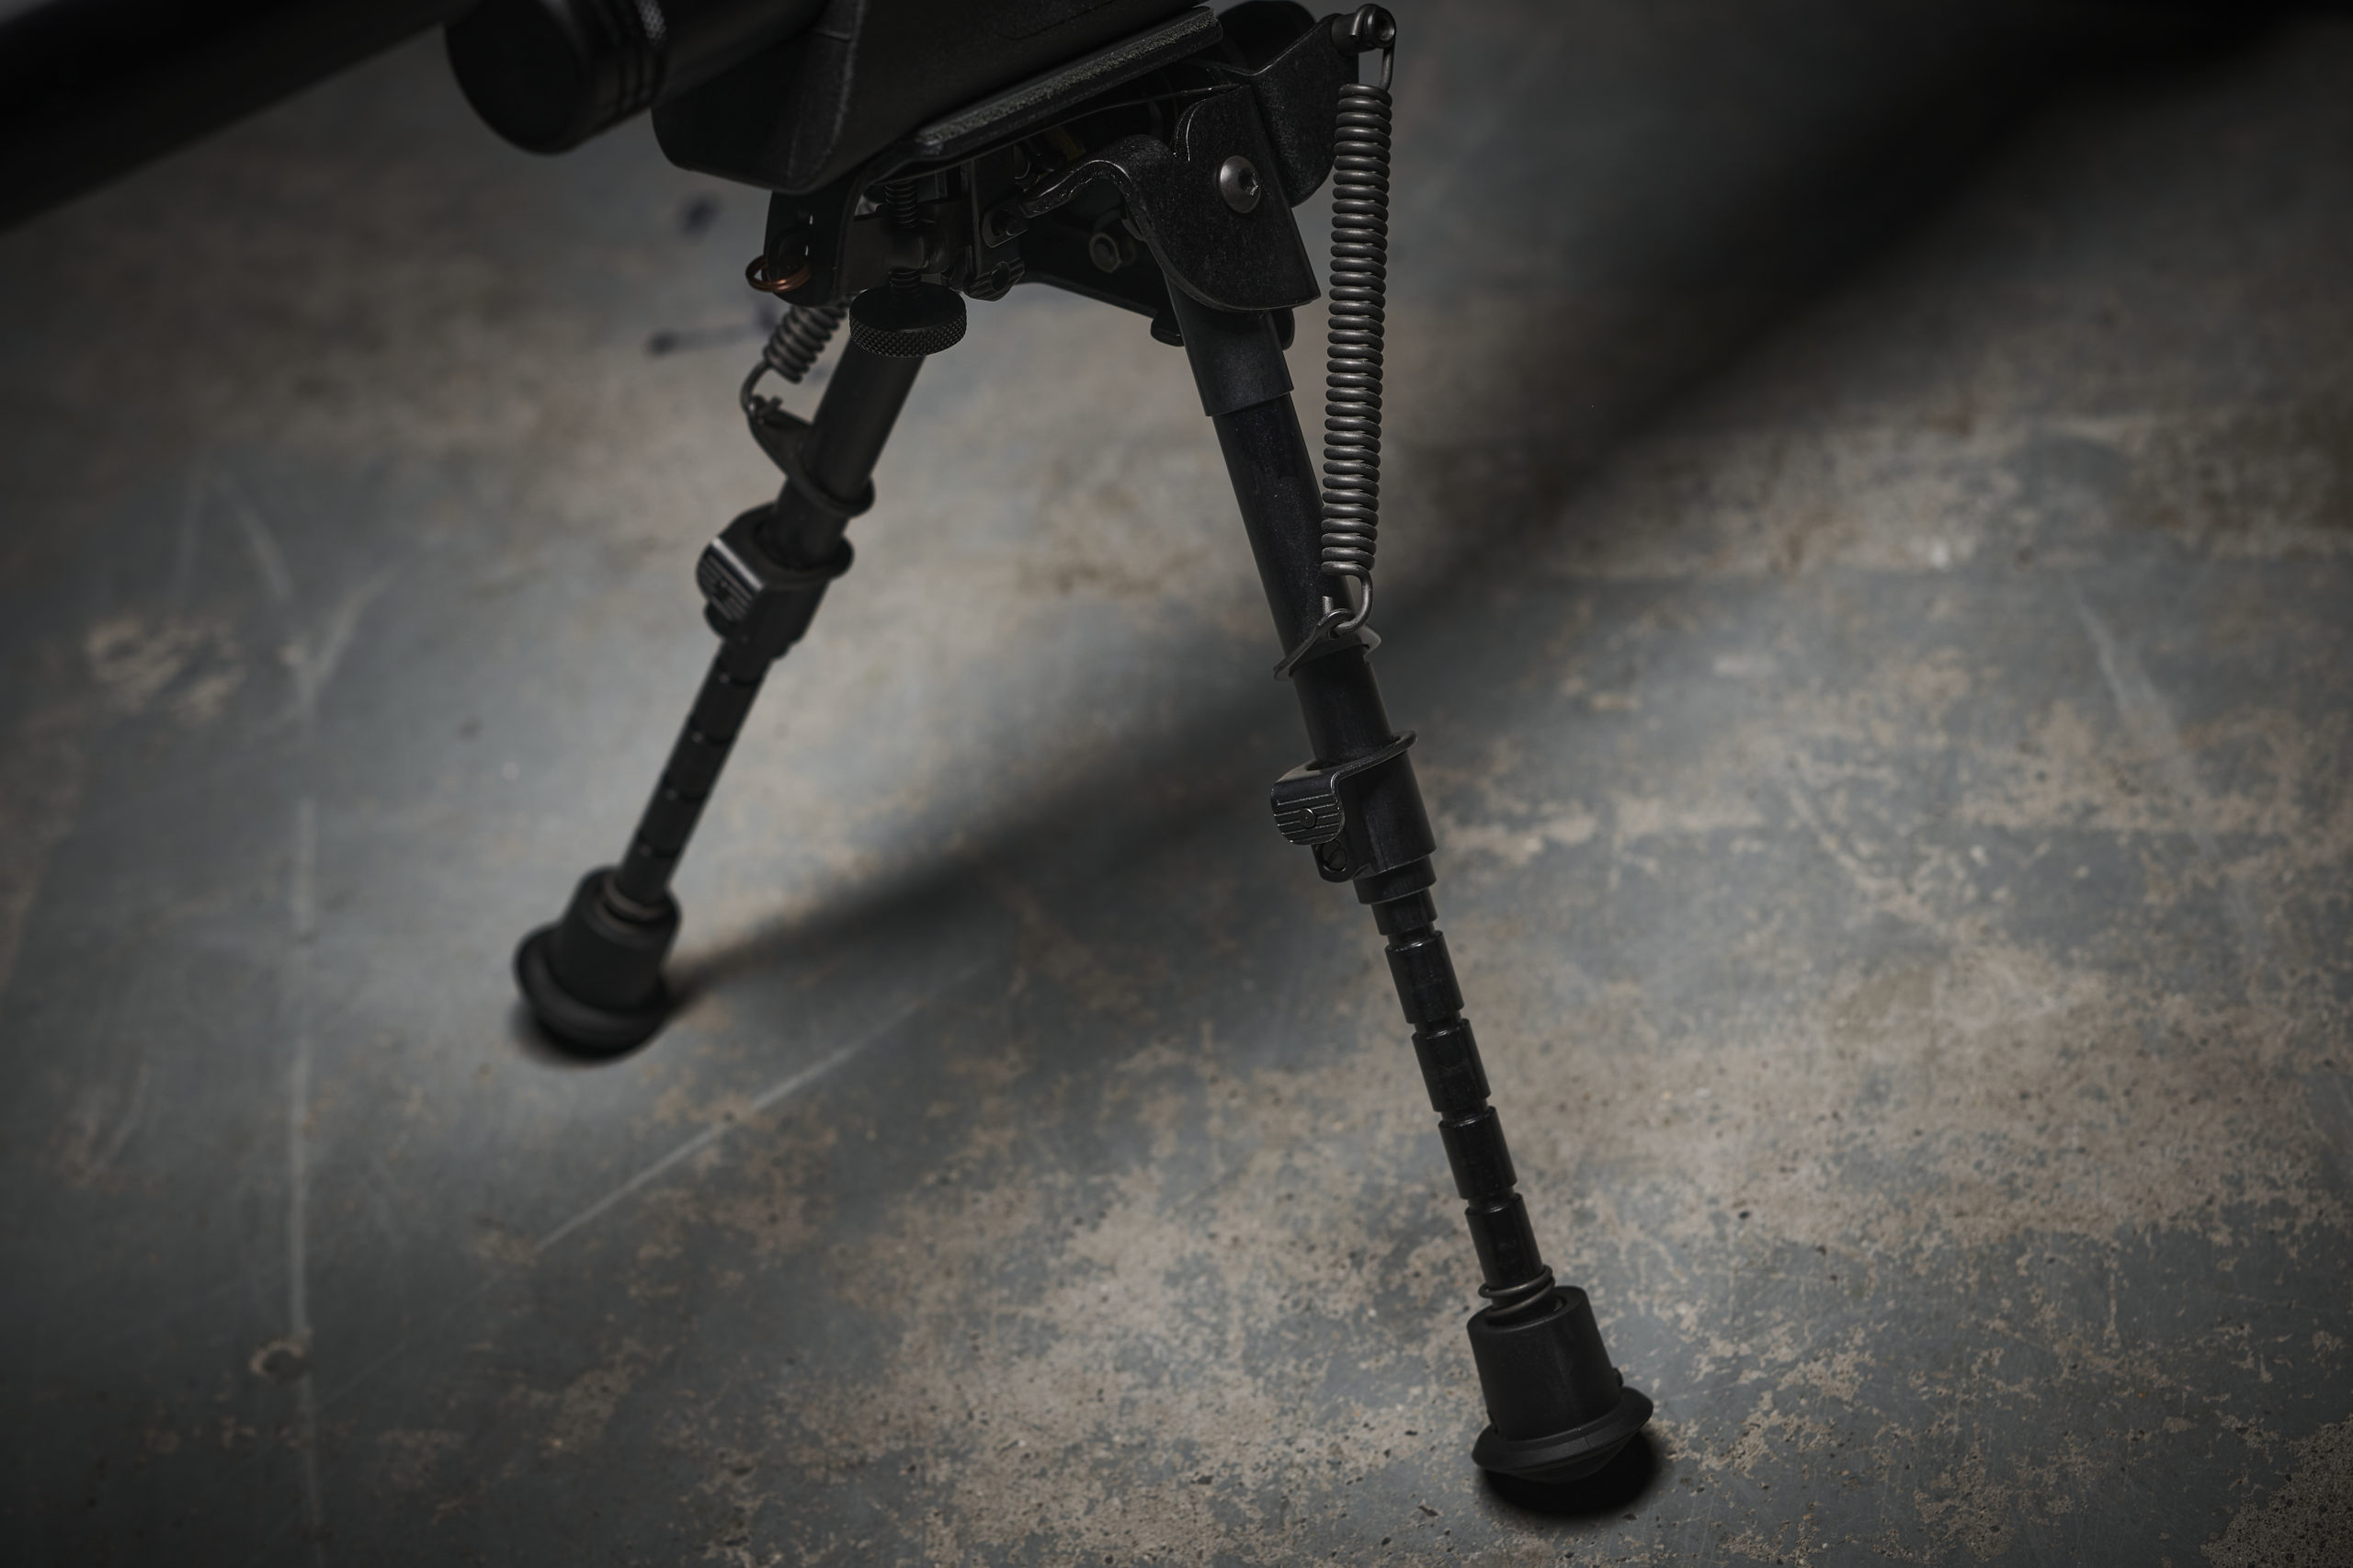
The legs on this Harris are notched, making it easy to extend or shorten them evenly, but some shooters prefer the models with smooth legs
How high is high enough?
Most bipods have height-adjustable legs, so the crucial thing is to find out the minimum and maximum height an air rifle bipod offers.
Your physical build and intended use of the bipod will affect your choice of leg length. Someone going prone at the range and shooting from a prepared firing point won’t need a high bipod. However a hunter who has to lie on uneven ground, lie on a slope or who’s shooting over tall grass will need a greater amount of extension and total height. The rifle and scope combination being used will have an effect too. Harris, for example, has a wide selection of leg lengths that can accommodate a variety of shooting positions ranging from bench to sitting.
The company’s smaller BR series of bipods have a leg extension from 6” to 9”, which makes them ideal for shooting from a bench, but they also work very well when shooting prone over flat ground.
But the 6” to 9” leg height is not so useful when the ground slopes up or down and there’s grass or other foliage that needs to be cleared. And larger shooters may find the bipod sits too low, even on flat ground with the legs at full extension.
The legs on Harris’s L range of bipods, on the other hand, extend from 9” to 13”, making them a better all-round choice for the field. The downside here is that they may be a little too high to use from a perfectly flat firing point over level ground, and smaller shooters may struggle with them.
In a best-case scenario you’d be able to choose one leg length or the other and have done with it, but that doesn’t always work. I’m very much “Mr Average” in terms of my height and build, but nevertheless still need to use bipods with two different ranges of leg extension depending on where I’m shooting.
A Helping Hand
Give a bipod to someone who’s never used one before, and the chances are that they’ll instantly appreciate its benefits, but may not use it in an optimal way. Of all the bipod tips and tricks that a shooter can employ, knowing what to do with the leading or “spare” hand is the one that will have the greatest effect – as long as it’s done correctly.
Many new shooters will instinctively try to use their leading hand as they would with a rifle that does not have an air rifle bipod fitted. Because they can’t naturally lay the belly of the forend in the palm of their leading hand they’ll do what seems to be the next best thing – grab one of the legs instead.
Although this won’t really have any detrimental effect, it’s not helping the shooter take a more accurate shot. There’s a far better way to make use of that spare hand.
The best way to use the spare hand is to tuck it back and underneath the butt of the rifle. The gun’s already being supported up front, and now it’s being supported at the rear as well.
You can even use the hand to fine-tune elevation by making a fist and either squeezing or relaxing it, which will lower or raise the muzzle respectively. If there’s not enough ground clearance to make a fist, then you can simply rest the butt on the back of your hand.
Notched or smooth?
Legs that extend are usually held in position at the desired height in one of two ways. Some legs are smooth and can be set to the desired position then held in place by a friction-fit device, usually by twisting a collar on one part of the leg. The other method is to use a series of notches, which mean the legs extend in a series of increments.
There are pros and cons for both systems and it really comes down to personal preference. Smooth legs can be secured at any point along their length, offering more fidelity, but need to be held in place while they are being secured.
Notched legs are quicker to adjust and it’s easy to see if they have been extended evenly on flat ground just by counting the number of notches that remain exposed.
I’ve heard some hunters claim notched legs are too noisy to use around quarry, but I’d argue they just need to work on their technique and slow down their movements when adjusting leg height.
It’s all about the angles
Bipods with a straightforward design like the Harris offer only two leg positions in terms of deployment – extended or folded – and for most people this is all they will ever need.
However, other bipods like the Adras let the shooter adjust the angle of the legs once they have been deployed. This feature can be used to help give the bipod a better purchase on the ground, but an additional benefit is the fact that by angling the legs forward, the height of the bipod can be lowered.
This is very useful if you find the rifle is still too high with the air rifle bipod legs in their standard lowest position. Some bipods offering this feature, with the Adras yet again being a good example, will even let you extend one leg forwards and one back, which could be useful in providing a stable base on particularly uneven ground.
On the level
If you’re lying on uneven ground you may find your rifle will be tilted, or canted, to one side. This will play havoc with accuracy, as well as any sighting adjustments you need to make, so it’s important to level the rifle so it can be aimed correctly. One way to level a canted rifle is to lengthen or shorten one of the legs.
This method can work very well with smooth legs which are infinitely adjustable. Notched legs will certainly help, but may not let you get your rifle perfectly level.
A more versatile and quicker way to get level is to use a bipod with a tilt capability. This will let you adjust the angle to counteract the terrain you’re on, then lock it in place with a knurled ring or lever.
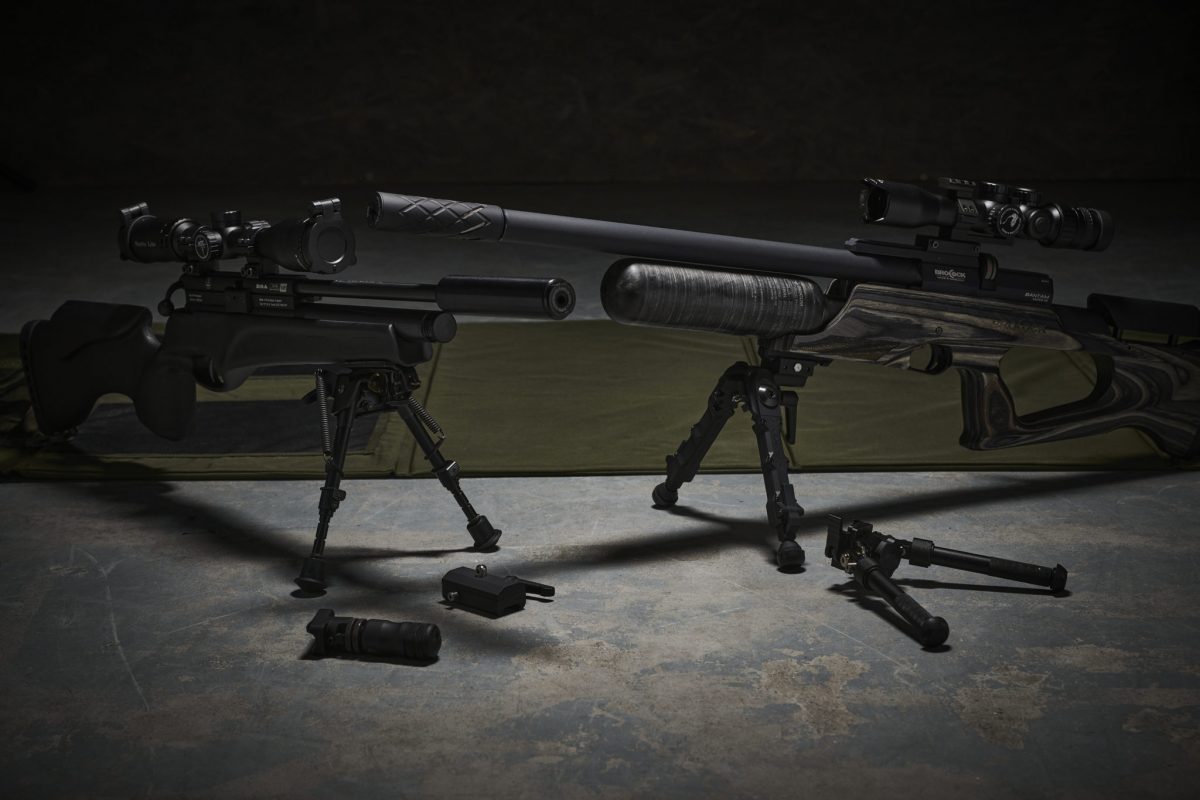
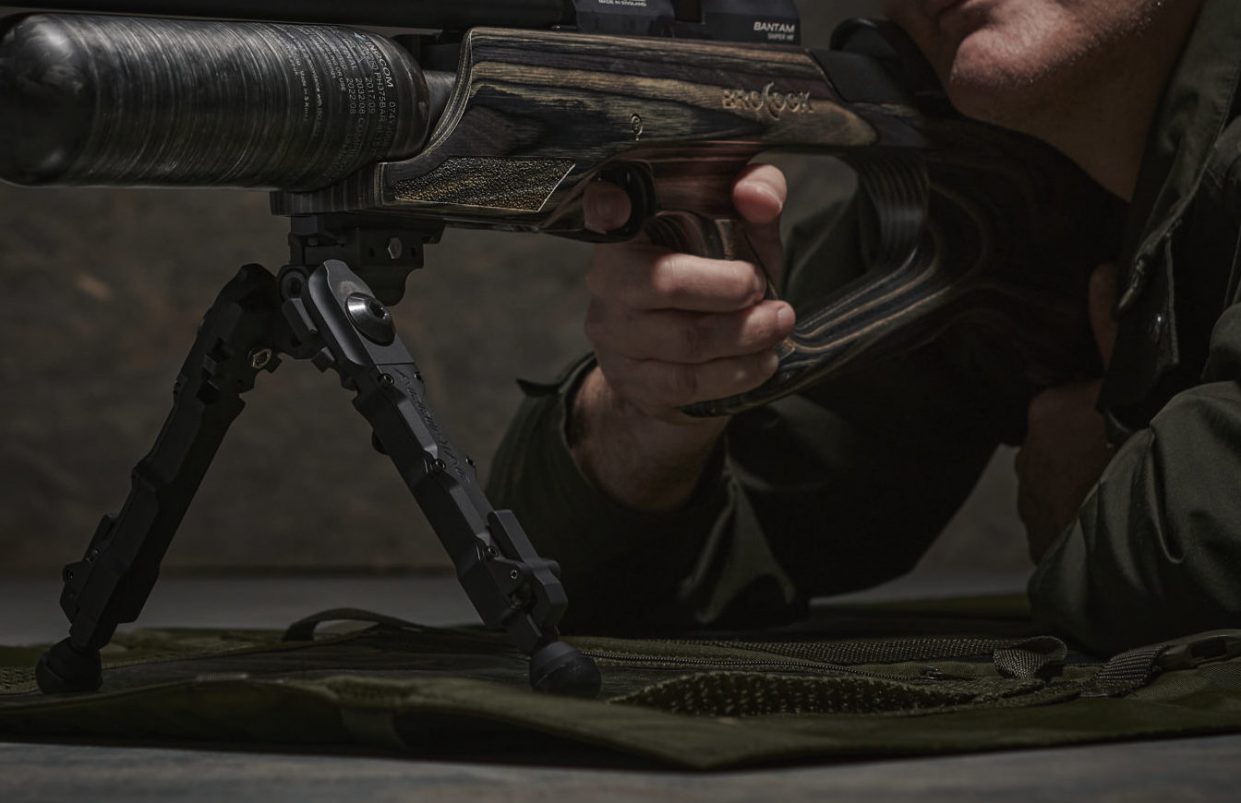
The Brocock Bantam Sniper HR has a Picatinny rail under the forend, which is a perfect match for either the Adras or Accu-Tac bipods
Like the Harris, the legs on the Adras are notched, although the mechanism that’s used to extend or retract the legs is quite different here
The ability to splay the legs of the Adras in opposite directions can be useful when you’re trying to get stable on lumpy and uneven terrain
Panning for a target
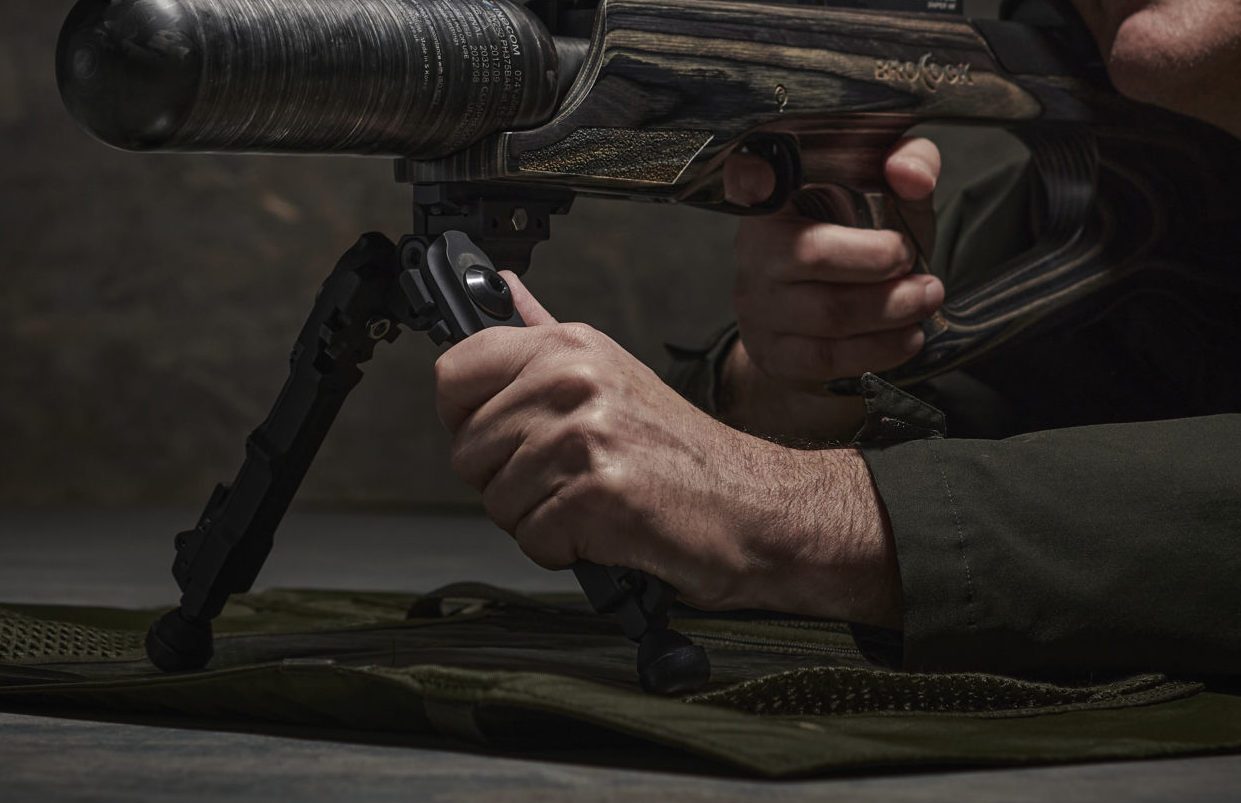
If you are trying to track a single moving target or engage a series of targets, it can be helpful to have a bipod with a panning feature. In this mode, the feet of the bipod will remain in the same place on the ground, but the part of the bipod that connects to the forend will be able to pan left and right.
Because the bipod is now free to move in this axis it won’t be as secure as it would be in the “locked down” position, but does give you more flexibility when in the aim.
If you don’t have a panning feature then the alternative is to raise the bipod legs off the ground and reposition the rifle at a different angle. This is more likely to spook wary quarry, but with care and patience the disturbance can be kept to a minimum.
Useful accessories
A few accessories are available to help you use your bipod more effectively, the first being a locking lever for the tilt function. Harris bipods use a knurled ring to loosen and then set tilt, and quite a bit of physical effort is needed to do this, especially with a heavy rifle and scope combo.
Over the years ,several aftermarket companies have produced a lever to replace the knurled ring, offering more precision and requiring less effort. This is a quality of life improvement that all Harris bipods should have as standard. Harris has picked up on this, and now makes its own “aftermarket” lever.
The majority of bipod legs are fitted with rubber feet, and some can be swapped. You can swap like for like when the original feet get badly worn, but alternative designs are available, notably spiked feet.
These are very useful for shooters hoping to use them in outdoor conditions where rubber feet may simply slide over the ground, but spikes are also surprisingly good at anchoring a bipod to a concrete surface.
What’s better than an air rifle bipod? Why, a tripod of course! A bipod will usually do a great job of stabilising the front end of the rifle and taking most of the weight, but then it’s up to the shooter to support the rear of the gun.
Instead, a monopod can be fitted to the butt end, usually being attached to the rear sling swivel stud, so the rifle is now being fully supported fore and aft.
Bipods do come at a cost, both in terms of financial outlay and in weight, but if you tend to shoot prone on more than just an occasional basis, they’ll prove to be worth their weight in gold. Just make sure you get the right one for you.
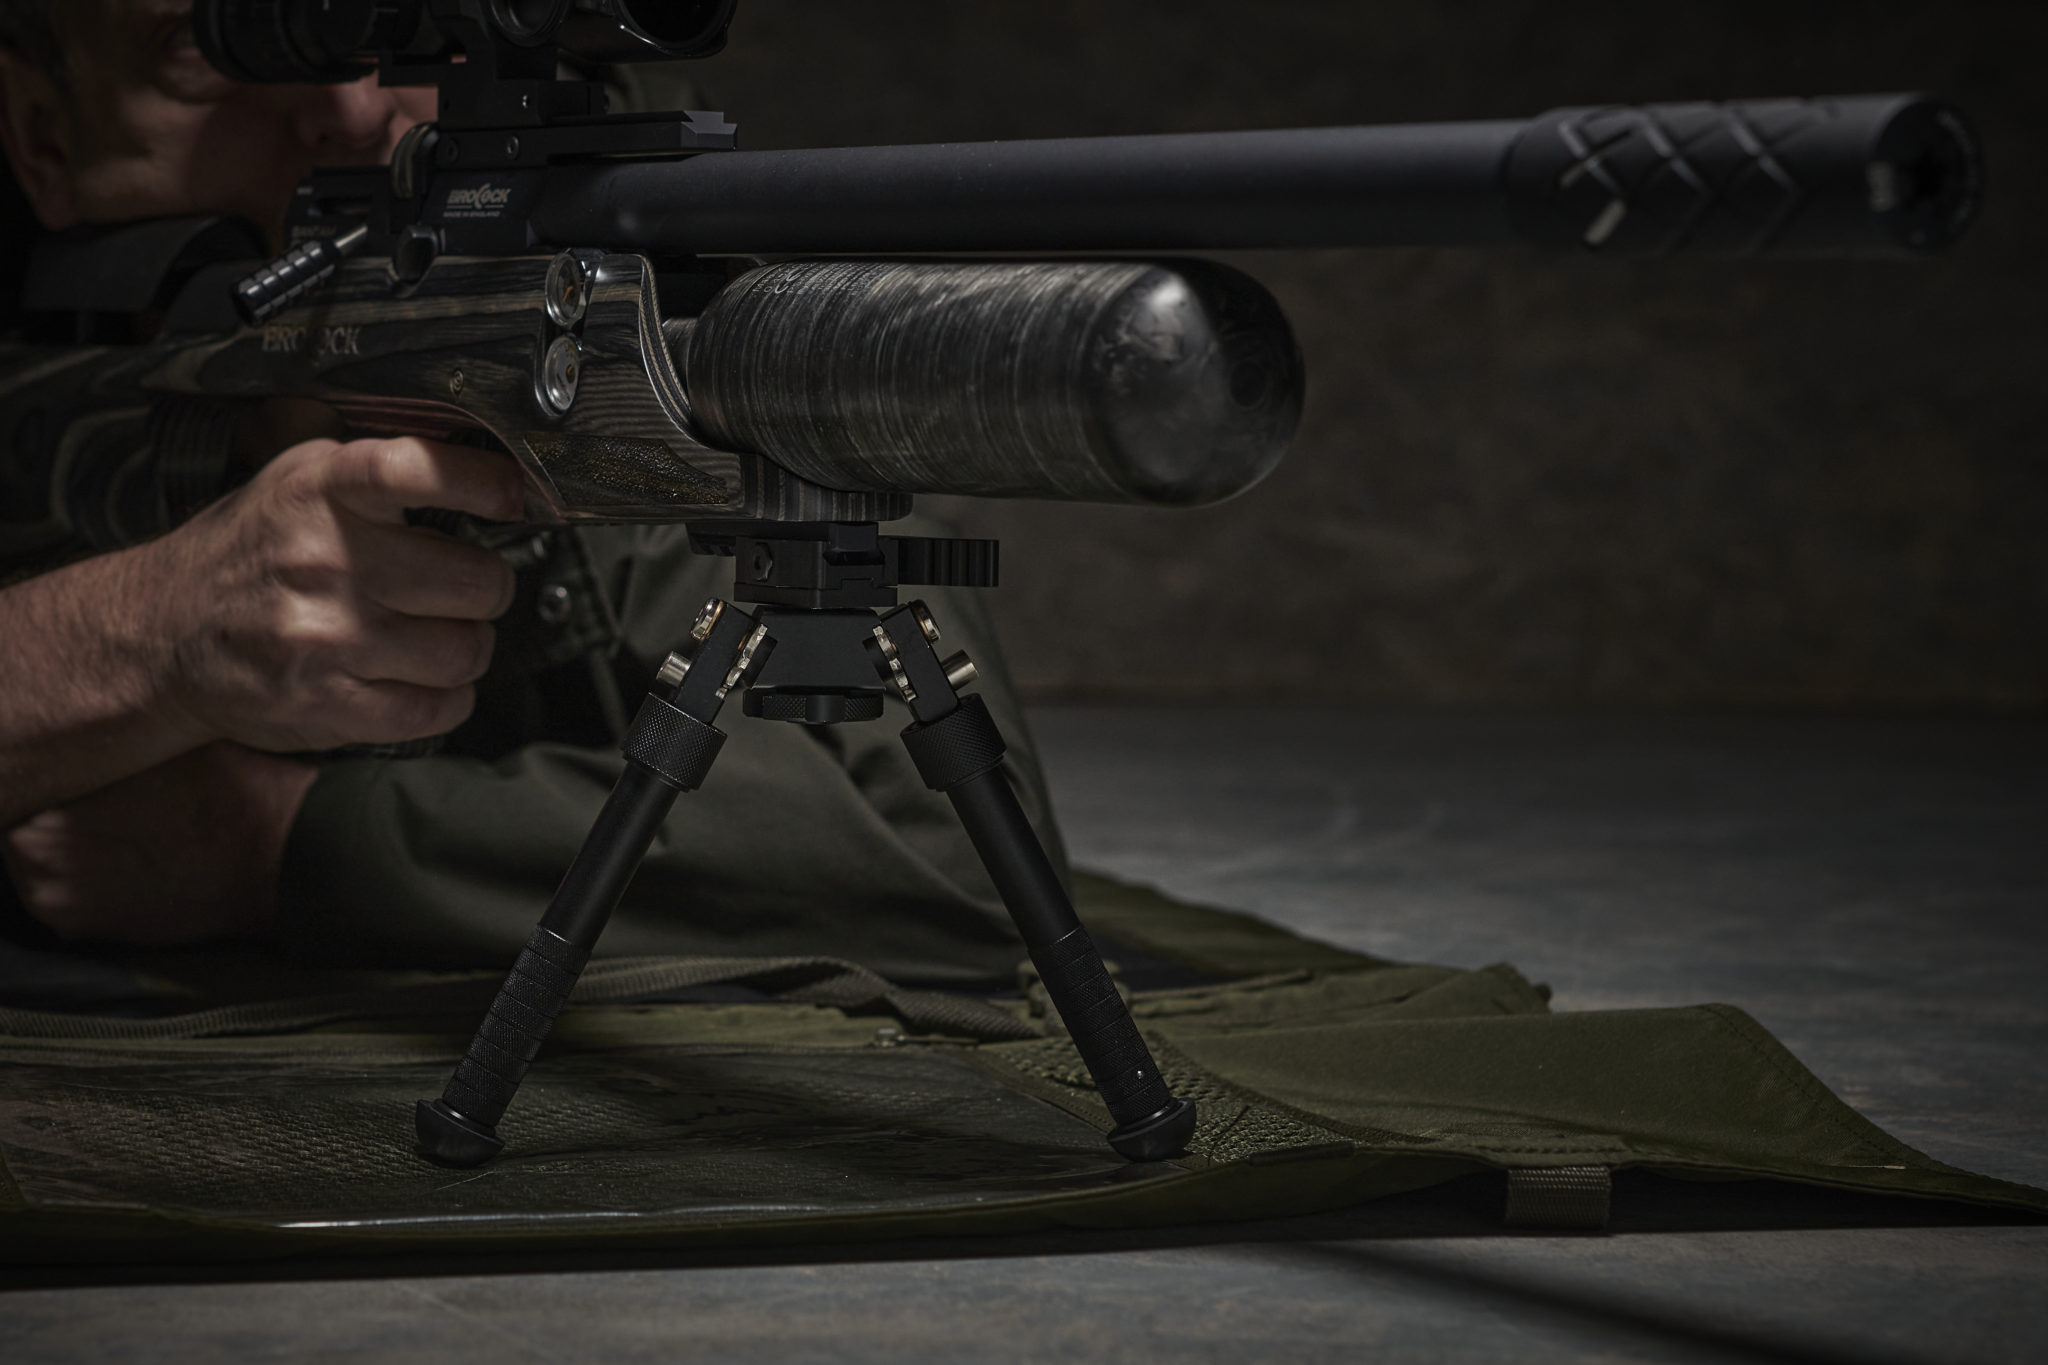
Ready for action: Mike has unlocked the Adras from its default “straight on” position so he can pan the rifle to cover a wider arc of fire
Related Articles
Gear
Optics
Benchmark redefined – the world’s best low-light digital scope just got better
Discover the HIKMICRO ALPEX PRO digital hunting scope, delivering unmatched low-light clarity, instinctive handling, and trusted performance
By Hikmicro
Gear
Gear reviews
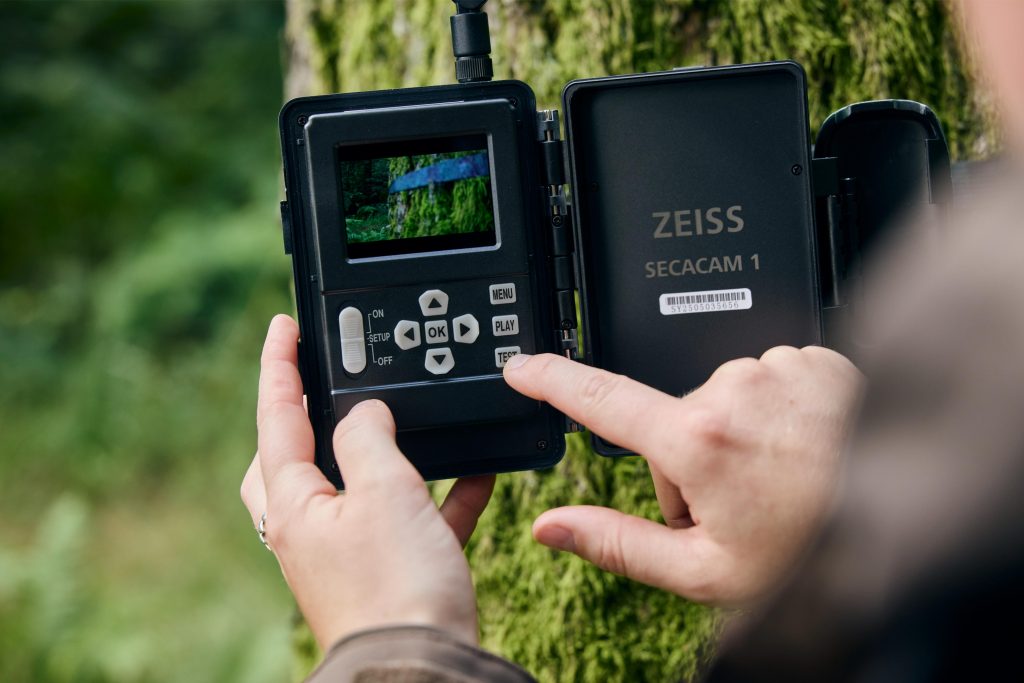
ZEISS trail cameras: revolutionising deerstalking with data
From monitoring deer movement patterns and predators to improving site security and equipment protection, ZEISS trail cameras offer a data-driven approach that enhances both efficiency and success in ...
By Shooting Times
Get the latest news delivered direct to your door
Subscribe to Shooting Times & Country
Discover the ultimate companion for fieldsports enthusiasts with Shooting Times & Country Magazine, the UK’s leading weekly publication that has been at the forefront of shooting culture since 1882. Subscribers gain access to expert tips, comprehensive gear reviews, seasonal advice and a vibrant community of like-minded shooters.
Save on shop price when you subscribe with weekly issues featuring in-depth articles on gundog training, exclusive member offers and access to the digital back issue library. A Shooting Times & Country subscription is more than a magazine, don’t just read about the countryside; immerse yourself in its most authoritative and engaging publication.

