★ Save on shop price when you subscribe. Pay just £2.80 per issue – 43% cheaper than buying in-store at £4.95! ★


How to create and use a homemade smoker
 Tim Maddams - Where There is Smoke - smoking in progress.
Usd 17 june 20 smoker
Tim Maddams - Where There is Smoke - smoking in progress.
Usd 17 june 20 smoker
Types of smoking
There are, generally speaking, two types of smoking: cold smoking and hot smoking. It is the heated variety that we will be dealing with. This has the advantage of not only being simple and easy but of cooking the food at the same time as it is being smoked.
All you need to do now is to get your hands on some meats and fish. Trout is an obvious choice for the hot smoker. Mallard breasts, rabbit saddles and even pheasant and partridge breasts and, of course, hare loin fillets all smoke very well.
Naturally, being a Shooting Times reader, you will not be happy simply purchasing delicious artisan smoked goods at your local smoke house. You will want to build your own homemade smoker. So follow the instructions here and get smokin’.
What you need to build a simple homemade smoker
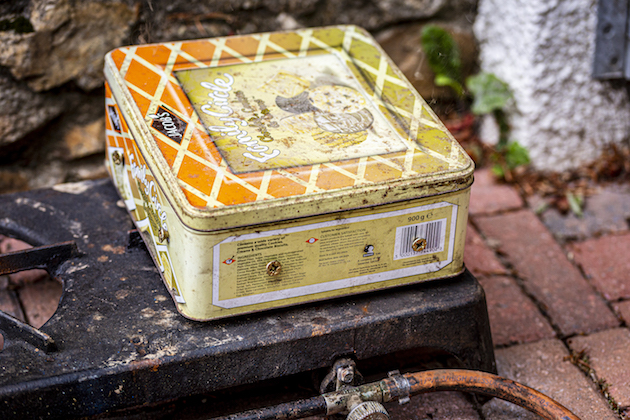
- An old biscuit tin
- A few screws
- A drill – or a nail and a hammer will do
- An old cooling rack or bit of small-gauge weld mesh or even some chicken wire
- A source of heat
- Some dust-extracted hardwood (ideally oak) sawdust
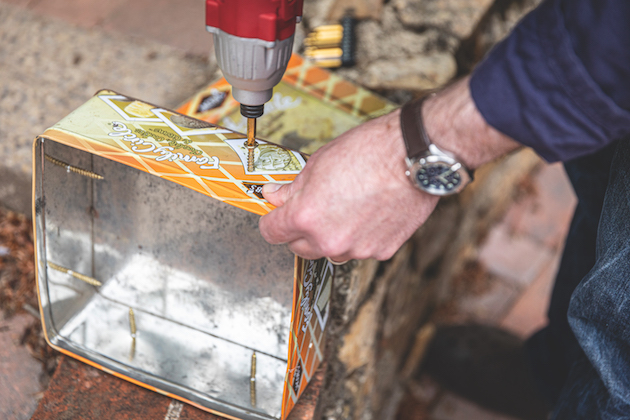
Drill two holes level with each other on each side of the tin. Insert screws into each of the holes and these will support the wire rack
The process of making the homemade smoker:
- Drill two holes on each side of the smoker. These are to put screws through to rest the wire rack on, so they need to be level with each other about two-thirds of the way down the side of the tin. If you are one of those people proficient in the art of DIY, you will have a field day making this more complicated and laborious than it needs to be. Somewhat irritatingly, however, your smoker will doubtless be far better than mine.
- Insert the screws to hold up the rack. I have learned that this works best if the holes you drill are the same size as the screws you intend to use.

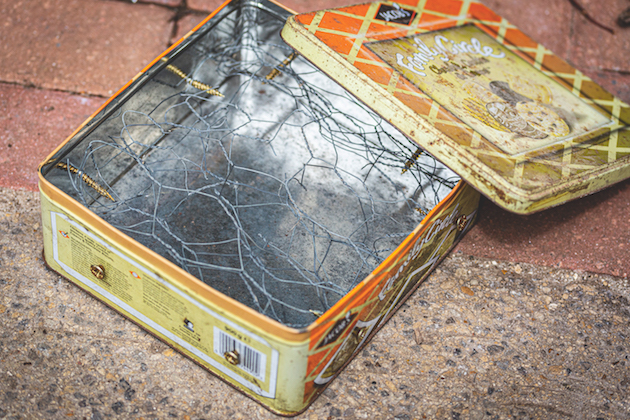
Once you have placed the wire rack in the smoker, ensure the lid can be removed reasonably easily
- If needs be, cut the rack to size, taking care to deburr any obvious snags.
- Ensure you can get the lid on and off reasonably easily. You may want to amend the fit with some pliers so it’s not too stubborn. A loosely fitting lid can happily be kept in place with a handy half-brick during the actual smoking, whereas trying to prize off a tight-fitting lid to see how your precious prize is getting on in there is tricky to do safely when it is hot.
Wood to use in your homemade smoker and what to avoid
- Oak is palatable and easy to get hold of.
- Yew is toxic, don’t use it.
- Walnut and chestnut are excellent, but hard to find.
- Pine should be used sparingly or everything will taste of pencils.
- Bay is mixed with oak for best results.
- With beech, leave meat to settle for an hour or two after smoking or you’ll get a medicinal taste and tingly tongue.
- Fruit woods such as apple are great, but can be tricky to find.
Making the cure
Before we can hot smoke anything, it needs to be cured and I like to use a dry cure. The recipe is below and will make plenty that you can keep in a jar for use as and when you decide to fire up the smoker.
- 300g fine salt (ideally pure dried vacuum salt – ask your butcher)
- 300g golden granulated sugar
- 6 fresh bay leaves
- 1 tsp fennel seeds, another of black peppercorns and another of coriander seeds.
Chop up the bay leaves, crush the pepper, fennel and coriander lightly and mix together with the salt and sugar.
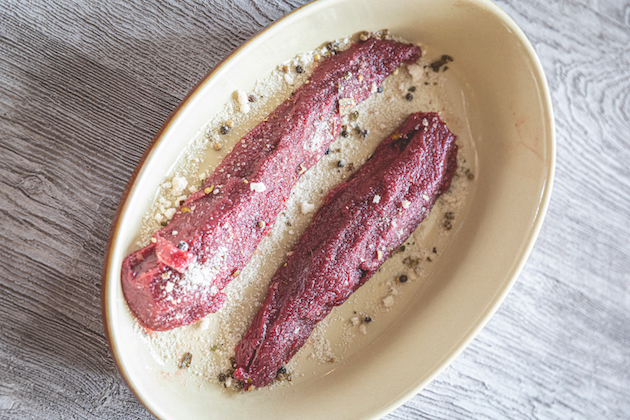
Hare fillets curing in a salt dry cure
The process of smoking
Let’s use a couple of hare loin fillets to demonstrate:
- Season the fillets with the cure. Use plenty, a good dessertspoonful per fillet. Spread it evenly over the fillets and leave them on a plate or in a non-reactive (not aluminium) tray to cure for around 20 minutes.
- Rinse the fillets and pat them dry. Leave them exposed to the air for 20 minutes to allow them to go a bit sticky – there are some fancy technical reasons for this. This is called a pellicle and is a layer of modified protein.
- Place the fillets on the smoker rack. Place a good layer of sawdust in the bottom of the smoker tin. Put the lid on and pop it on the heat source. Wait until you see smoke coming out of the smoker and set a timer, for around 10 minutes if you have a nice high heat and longer if not. Try not to overcook hare; lightly pink in the middle will be perfect.
- Remove the smoker from the heat and allow to cool for a while before removing the lid and gobbling up all the tasty flesh. Tell everyone else that it didn’t work well and then have another go. This batch you can share and everyone will think you are generous and lovely.
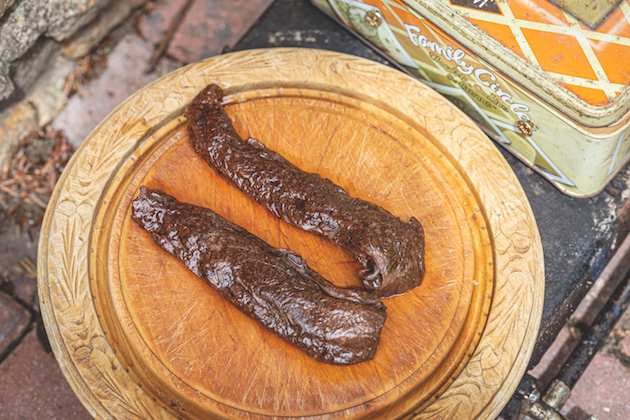
The delicious finished smoked hare fillets, ready to be enjoyed
Preserving food
The first refrigerator in a form that we’d be vaguely familiar with was built in 1834 but, frustratingly for 19th-century homemakers, it wasn’t until 1913 that a man called Fred Wolf came up with a model for domestic use.
Up until that revolutionary moment, ways of preserving food were many. We all know about fish and meat being salted and dried, and vegetables and fruit being pickled in vinegar, but there were other more obscure methods.
Root vegetables, for example, were often ‘clamped’. Typically, this involved piling them up on layers of sand on a small mound of soil with a ditch dug round it. This was then covered in sackcloth, then straw and finally earth, which protected them from frost and sunlight as well as hungry pests. Fermentation was also, of course, a type of preservation frequently used. Often, stale bread was used in beer making, ensuring precious calories weren’t lost.
Smoking and curing, however, is possibly my favourite and certainly one of the most flavoursome methods of preservation.
The origins of smoking are lost in the mists of time, but we know from written records that native Americans taught settlers from Europe how to salt and smoke venison. It is likely that ancient humans began smoking meats and fish as a natural progression to cooking with fire. It is believed that fish were first to be smoked and the idea punted about is that smoking was probably an accidental discovery made while trying to keep flies away from drying fish.
Curing or salting the food prior to smoking in your homemade smoker is the best way to go. Although the complex particulates in wood smoke will slow or stop bacterial growth all on their own, salting first will give better results and improve the flavour, as well as helping to get the smoke into the meat properly.
What the salt really does is remove a certain amount of the moisture, and bacteria needs moisture to grow. Removing excess moisture prevents bacteria developing that will spoil the food.
Smoking foods to preserve and flavour them would have been a real lifeline. Although we now have fridges and freezers, the flavour of well-smoked fish and meat has found a home in the national larder and is, thank heavens, still with us today.
Related Articles

Recipes
Pulled squirrel bonbons
Grey squirrels threaten songbirds and cause damage to woodland, but they can be a delicious treat when deep-fried
By Shooting Times
Recipes
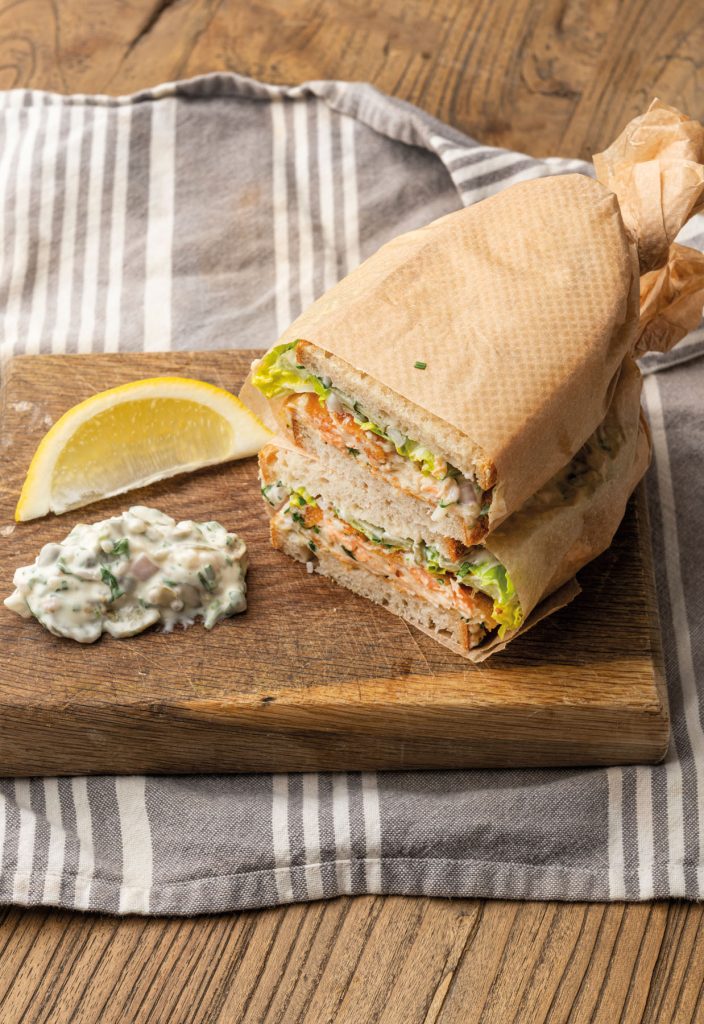
The ultimate trout fish finger sandwich recipe
Upgrade a classic fish finger sandwich with trout, homemade tartar sauce and crisp breadcrumbs in this comforting countryside recipe
By Tim Maddams
Get the latest news delivered direct to your door
Subscribe to Shooting Times & Country
Discover the ultimate companion for fieldsports enthusiasts with Shooting Times & Country Magazine, the UK’s leading weekly publication that has been at the forefront of shooting culture since 1882. Subscribers gain access to expert tips, comprehensive gear reviews, seasonal advice and a vibrant community of like-minded shooters.
Save on shop price when you subscribe with weekly issues featuring in-depth articles on gundog training, exclusive member offers and access to the digital back issue library. A Shooting Times & Country subscription is more than a magazine, don’t just read about the countryside; immerse yourself in its most authoritative and engaging publication.

