★ Win a pair of Brandecosse Capriolo boots worth £219! Click here to enter ★
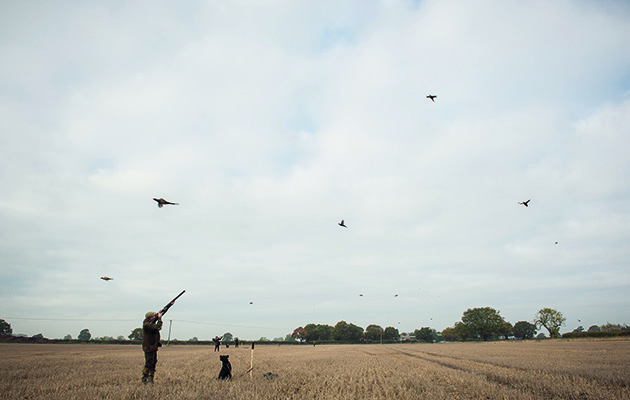
Clayshooting tips for the game season
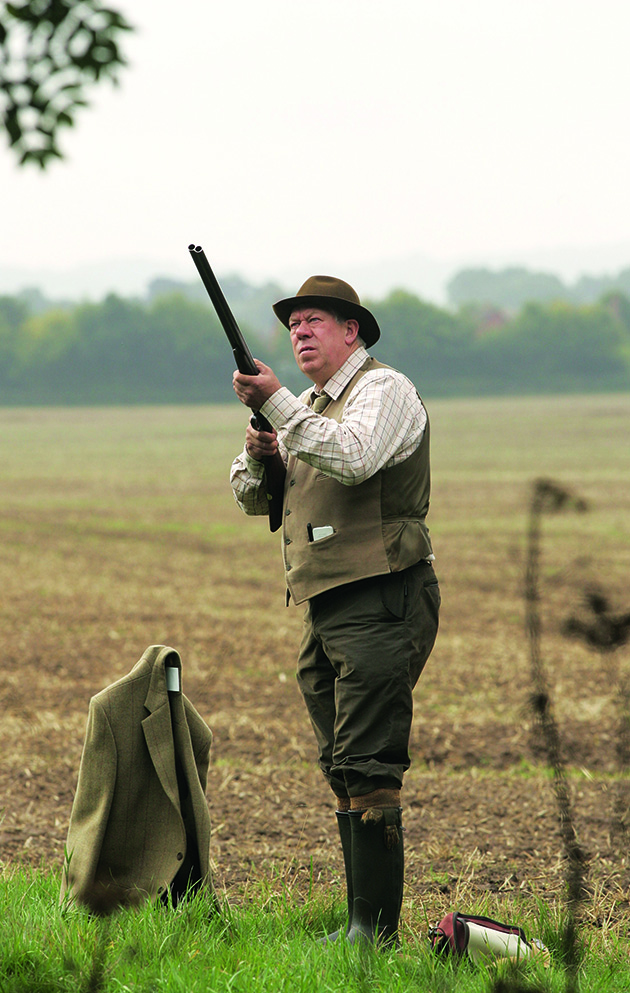
 Gary Smith and Black Lab
Clay shooting is in full swing, so why is my mind already turning to the new game season in just a few weeks time?
Good stead for game
As we are based in a rural farming area it’s natural that our members’ attention will now begin to turn towards the coming gameshooting season. The practice they’ve had on clays will stand them in good stead and I’m sure it will be instrumental in putting a few well-fed pheasants into the pot.
But as sure as night follows day, shooting coaches everywhere will soon start taking calls from game shooters who want a pre-season warm up, or a refresher lesson. Good on ’em.
Yet I am always amazed by the number of others who feel they can embark on the game season without any preparation whatsoever. Are they the same folk who also hand their gun in for an eleventh hour service or repair expecting it to be ready in time for their first day in the field?
Muscle memory
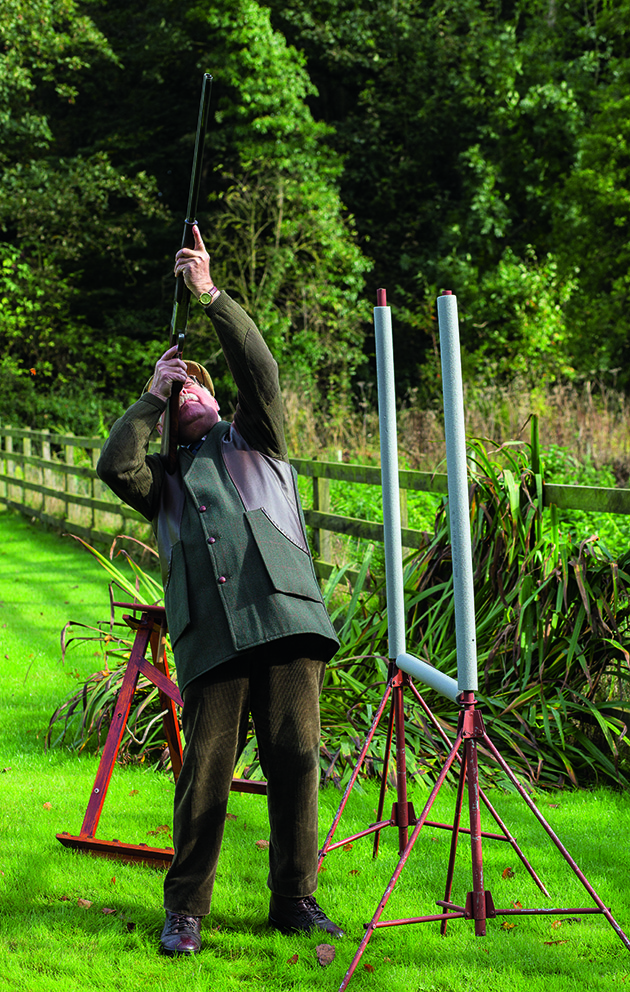
Of course we all want to shoot well from the start, but if your gun has been sitting idle in the cabinet since the end of January then the muscle memory needed to achieve a competent gun mount/sight picture will need re-embedding with an amount of practice and training. Without it you will probably struggle to establish that all-important target and gun orientation that’s the hallmark of the best Shots.
“Ah well”, I hear you say, “clays are different from game”. Clays are slowing down and game is speeding up; but not necessarily, I can show you a pheasant slowing into a wind and a midi clay speeding up, down an escarpment.
They are all just moving targets and unless you understand how you shoot these targets, you are going to struggle with consistency.
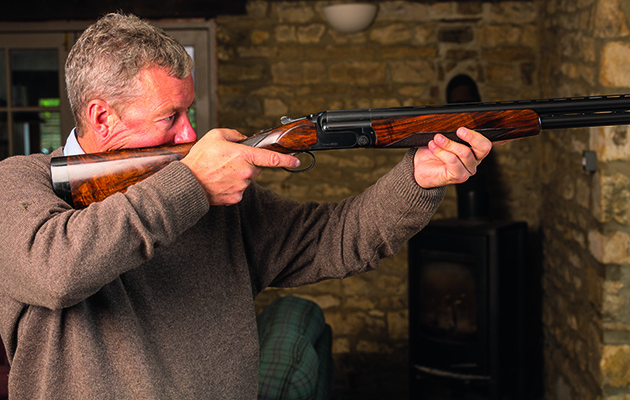
Practice your gun mount to build up muscle memory in your upper body
Gamebirds
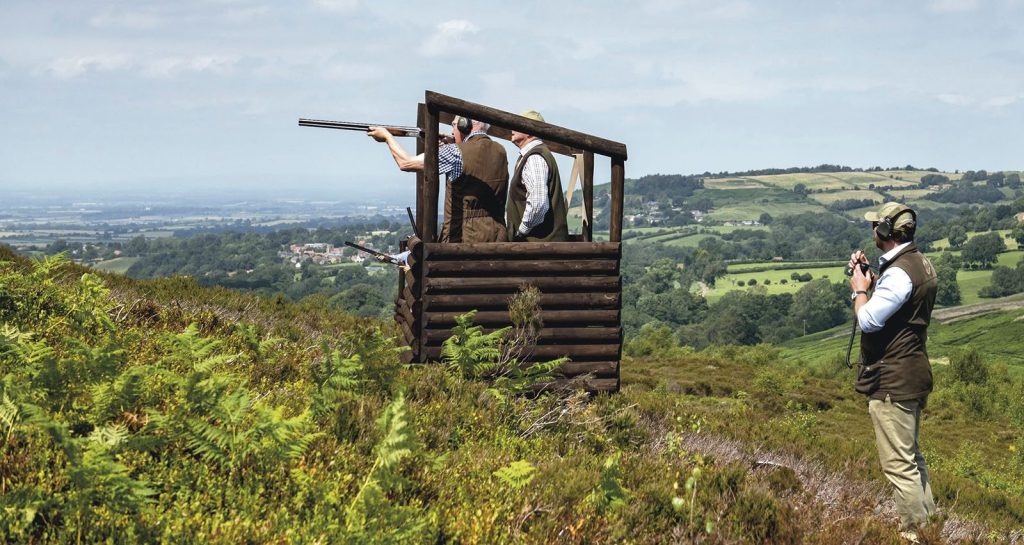
So what do most pheasant, partridge, grouse and other gamebirds have in common as “targets”? Well, in walked-up rough shooting, or in the highly regarded driven shoots around here, most of the birds will be crossing or quartering the shooting position; right to left or left to right. The true driven target from way out in front – absolutely straight over your head – is relatively rare; as is the true straight away target in walked-up grouse.
Footwork
Most gamebirds display some element of “crossing” in their flight so you have got to move your feet if you are going to address the target properly, and at the first time of asking.
Just like clays, you must set yourself up to face the area in the sky where you wish to shoot the bird. Unfortunately, with wild game, you have less time to think about it.
This is why, in gameshooting photos, you see Guns attempting to take a partridge or pheasant way behind their right or left shoulder, and almost falling over. If you want to put it in the pot – move your feet!
To get into the habit visit a Sporting clay layout and use the high tower to practice shooting targets out to your left and right, some out there as crossers and some of them high above your left shoulder, and some out over your right. In all cases, your feet need to address where you are going to shoot it – not where it has come from.
Always remember
For the right-hander, a target out to the right is somewhat more awkward than a target on your left. This is because the front, left hand is pushing the fore-end of the shotgun to address the target on your right, which is rather more awkward than pulling the fore-end to shoot a target on your left.
There is an additional challenge with the swing to the right in that the pushing motion can result in the stock being pushed away from your cheek; foot position and your cheek staying attached to the stock are critical in ensuring the gun is pointing where you are looking.
If you are trying to refresh the memory banks for lowland partridge or ground hugging moorland grouse, use the same left and right clay targets, but from a lower tower or clay-ground hillside.
With high or low targets that have an element of crossing flight in their presentation, you need to build up your library of forward allowance pictures by remembering the successful shots.
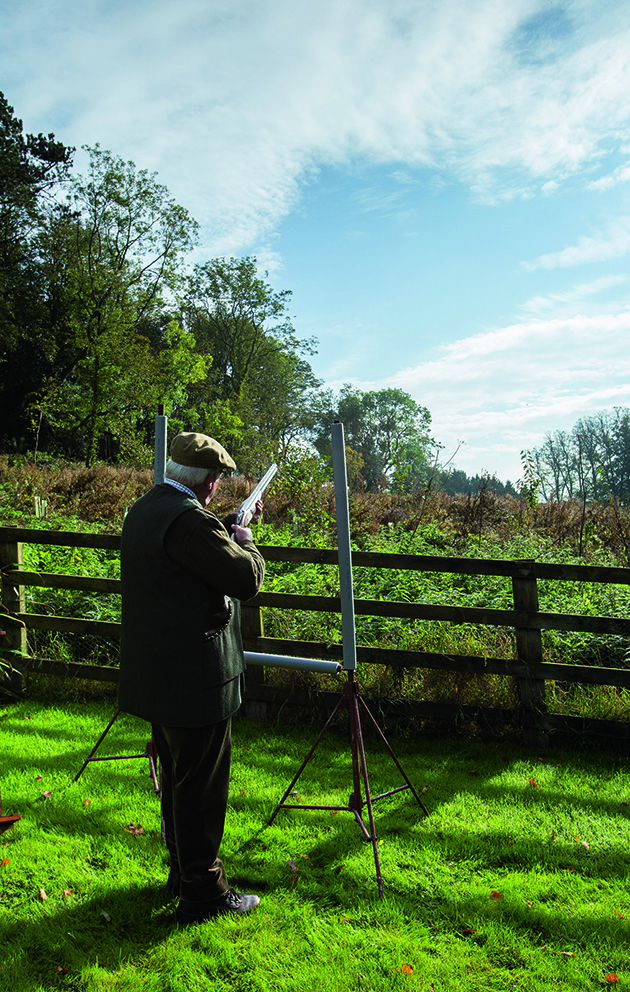
Point your feet in the direction you want to shoot
True driven targets
This gamebird’s flight-line is absolutely straight over your head from out in front, so to apply forward allowance it has to disappear underneath the barrels of the gun.
For a shooter with matching hand and eye dominance (right-handed and right eye dominant) it is a distinct advantage to shoot with both eyes open because the knack of looking under the barrels with the other (left) eye gives an “awareness” of the gun/target relative positioning.
With practice it is possible to learn the instinctive timing of the shot to bring about a successful hit on low-to-medium height targets.
However, high, true driven targets are much more of a challenge, particularly for any shooter who has to close a mismatching dominant eye.
I have written about techniques for shooting high driven clays before. But for game targets, one method stands out and is used by many proficient high bird experts – turn sideways and take the bird as a high crosser.
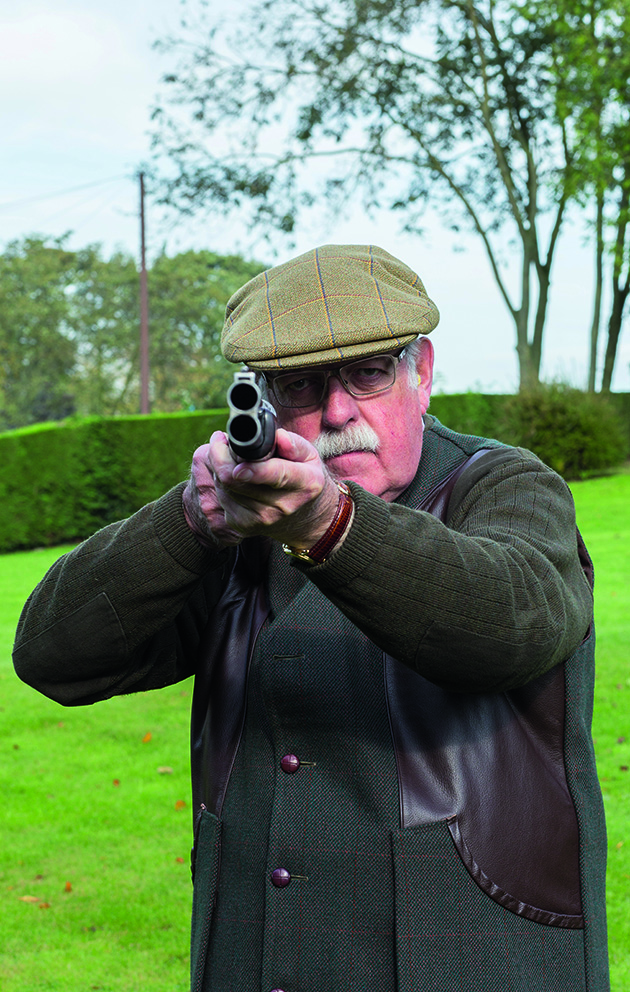
For a shooter with matching hand and eye dominance, it is a distinct advantage to shoot with both eyes open
Drifters
If a bird should be drifting slightly to your left, turn your stance left to address the shooting point high above your left side. Conversely, if it’s drifting right, turn to the right – in that process you will now pick up this high crosser’s line of flight and see the forward allowance that is required.
The great benefit is that if the bird curls slightly you can adjust your gun placement accordingly. There is no danger of losing sight of the bird under the gun.
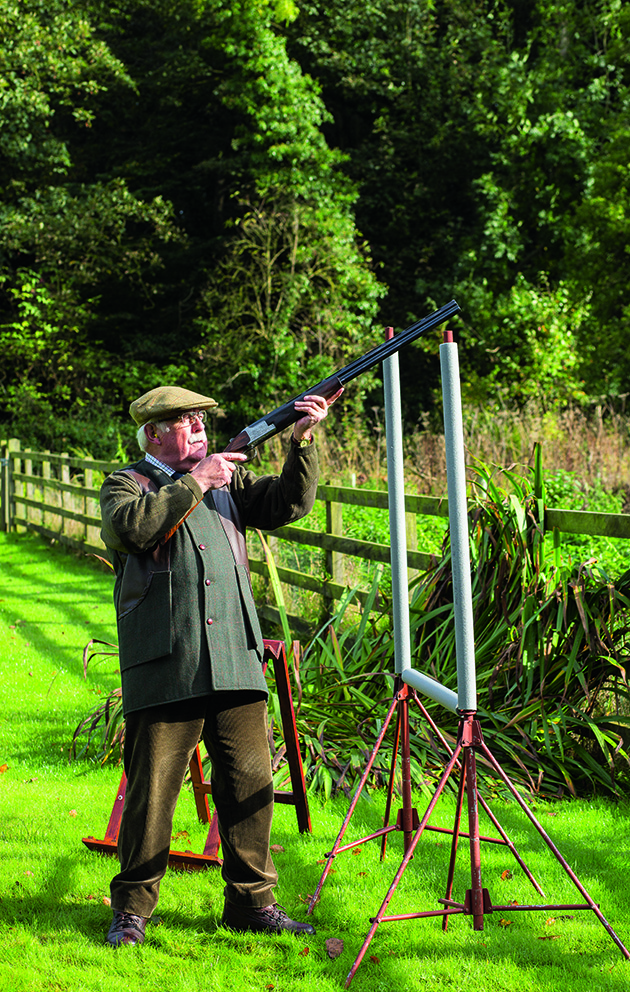
Turn sideways by stepping one of your feet backwards for overhead birds
If the bird is absolutely vertical overhead you can turn either way, as you prefer, but often the under-foot ground topography determines the best position.
For this shot the time available may be rather short, but the sideways turn can be accomplished by just moving one of your feet backward, to rotate your thorax. For example, to rotate left the left foot is placed backwards half a pace. This manoeuvre can often be helped by slightly dropping the right shoulder to get the mounted gun on the flightline of the bird (for a right hander).
This manoeuvre is helped by slightly dropping your right shoulder
What next?
I have a client (right-handed) who comes for a warm up in August and often again in mid-season.
Having had a few shots, the conversation follows the same route during each lesson. “Feet are in the wrong position; gun mount: does not get the stock consistently to your cheek and often your head is lifting before the shot, particularly on left-to-right crossers, as you push the gun away from your cheek; applying the lead is rather haphazard.”
After a whole-hearted agreement and a series of successful shots on a variety of targets, my client leaves full of confidence. Mid-season, he’s back again – having drifted once more into the self-same errors again.
To avoid doing the same, practice your gun mount to build up muscle memory in your upper body and the touch memory on your cheek; the gun must be pointing where you are looking.
When you miss, ask yourself: “Did I lift my head or fail to get the stock to my cheek?”
Happy with your head position? Then next question to tick off is: “Were my feet in the right position so my upper body was not wound up and I was balanced when I shot?”
If swing and balance were okay, next on the personal checklist is: “Was my gun position reflecting the bird’s real line of flight?”
And if the answer to that is “yes” then the only remaining variable is lead or forward allowance.
Congratulations. You are now aware of – and diagnosing – your own shooting!
Follow the Method
When it comes to the best technique for shooting game there is no hesitation in my recommendation – point at the target and pull ahead. What we in the clay-shooting world refer to as ‘The CPSA Method’. It’s simple.
Imagine a laser coming out of the end of your gun
Imagine a laser coming out of the end of your gun. When you see the pheasant, which you wish to shoot (even when your gun is in the unmounted position), point the laser at the bird and keep it pointed as you mount the gun. Both hands working in unison will keep that laser locked on and ensure the gun is now moving at the same angular speed as the target.
Your brain, eyes, arms and hands are all working together to focus on that target. And if it should curl, the “laser” and gun will follow it.
All that remains is to bring the gun to your cheek, put on the lead or forward allowance and then pull the trigger. It’s as easy as that!
Related Articles
Stalking diary: the boundary-crossing buck that made the morning hard work
Waking at 3am is only half the battle when a boundary-crossing young buck decides to make Charlie Blance's morning roe stalk as difficult as possible
By Charlie Blance
Simulated game shooting: like game shooting minus the feathers
Once dismissed as mere off-season practice in tweed, the simulated game day has become a sport in its own right; Selena Barr asks four leading operators what separates a standout day from a chaotic on...
By Selena Barr
Get the latest news delivered direct to your door
Subscribe to Shooting Times & Country
Discover the ultimate companion for fieldsports enthusiasts with Shooting Times & Country Magazine, the UK’s leading weekly publication that has been at the forefront of shooting culture since 1882. Subscribers gain access to expert tips, comprehensive gear reviews, seasonal advice and a vibrant community of like-minded shooters.
Save on shop price when you subscribe with weekly issues featuring in-depth articles on gundog training, exclusive member offers and access to the digital back issue library. A Shooting Times & Country subscription is more than a magazine, don’t just read about the countryside; immerse yourself in its most authoritative and engaging publication.

