
How to make an antler handle knife
Every stalker I know has an “antler box” — a collection of cervine debris that has gathered dust for some…
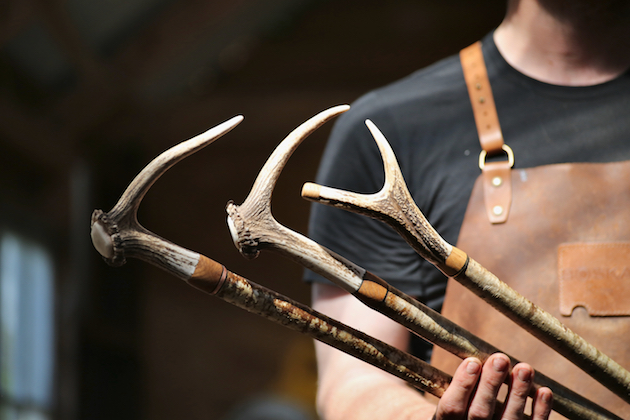 A trio of antler sticks. Two are crowns from a young red stag, whilst the thumbstick is a fork from a sika. Well-protected and used sensibly, they should last a lifetime
Usd 22 july 20 stick making
A trio of antler sticks. Two are crowns from a young red stag, whilst the thumbstick is a fork from a sika. Well-protected and used sensibly, they should last a lifetime
Usd 22 july 20 stick making
The stick. The fact that you’re reading this suggests you probably have one — quite possibly several — and for hundreds of years a stout wooden pole has been the quintessential companion of those who venture into rural parts.
Delving yet further into our species’ history, the simple stick has proved vitally important from the first moment some enterprising Neanderthal sharpened one and flung it at his supper. Flint-knapping and the carving of bone tools is impressive but most of these inventions would be mere ornaments without a strong, straight piece of wood to strap them to.
Thankfully, such an implement is no longer required to fend off savage beasts or dispatch your dinner, but a good stick is no less valued today than it was by our ancestors. And, although you won’t have to look far to find someone selling finished sticks, it’s one of the simplest and most satisfying things to have a go at making yourself. So here’s how to make an antler walking stick.
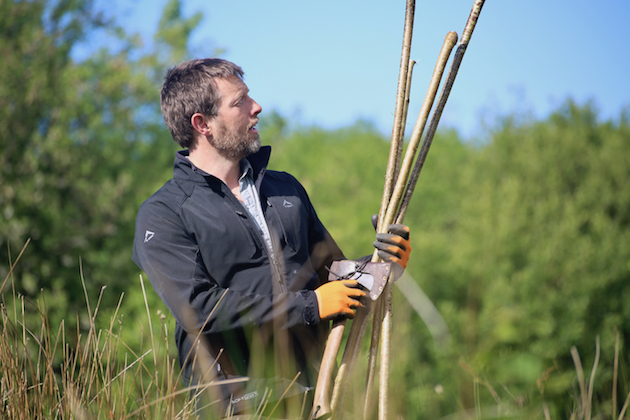
Chestnut, holly, ash and blackthorn can all produce a fine stick, but the most popular wood by far is hazel. I asked Keith Pickering, a professional stick maker of 30 years’ experience who counts royalty among his illustrious clients, about the enduring appeal of hazel: “It’s lightweight, strong and grows pretty straight to begin with. And it has a wonderful array of colours, from dark brown to almost silver.” Widespread throughout the country, in good soil, coppice growth of hazel is quite capable of growing 3ft a year, making it a sustainable choice.
Relatively open woodland with a high canopy is a good place to go stick hunting, where the new growth must reach skyward rapidly in its quest for daylight. Riverbanks can be quite productive, too, as can recently neglected or previously laid hedges, where vigorous growth from an earlier trimming may have produced nice straight stems.
The ideal stick will have a ‘butt’ of around an inch in diameter and taper to no less than three-quarters of an inch. It should be as straight as possible without excessive side branching, kinks or scarring from the ministrations of deer.
There is an old country saying that the best time of year to cut a stick is when you see one you like. My own stock is added to throughout the year (most recently when out looking for something to hold up the runner beans), but according to Keith the prime time to gather them is over the winter months before the sap has risen.
Once you’ve found the perfect specimen, you’ll need to put it away to season for a bit. Conventional wisdom says that you should leave it for 12 months per inch of thickness. In practice, this is more relevant to planked construction timber than sticks and six months is usually sufficient, provided these aren’t the dampest and coldest months in the calendar. As well as leaving the stick stiffer, stronger and more stable, the seasoning process allows the bark, one of the most important aesthetic features of the stick, to shrink and harden gradually.
Cut the sticks as long as possible, ideally at least as long as you are tall, to give you options later
As anyone who’s gone hedge-delving will tell you, nature is a fickle mistress and perfectly straight sticks are surprisingly rare. Every stand of hazel in the country contains at least half a dozen that, from a distance, seem ruler-straight but, on closer inspection, have more bends than an alpine B-road.
Fortunately, it’s easy to straighten a stick. Professional stick makers commonly put large batches in steam boxes to soften them before straightening with a jig, which can be as simple as two pegs in a workbench.
Working on a small batch or an individual stick, I most commonly use a paint-stripper, heating around 4in at a time centred around the wonky bit until the wood becomes hot and pliant. Then I reverse the bend firmly over my knee or with a wooden guide.
As well as being incredibly useful, straightening sticks is also strangely cathartic — something about improving nature’s design, perhaps, or bringing order out of chaos. Either way, if you’ve never had a go, I’d highly recommend it.
If you haven’t the time or inclination to go rustling around in a wood or playing about with paint-strippers, it’s easy and inexpensive to buy a ‘blank’ stick that is seasoned, straightened and ready to work on. There are a few excellent online suppliers. Keith himself sells large numbers of these each year, alongside all the materials required to assemble your own when you decide to make an antler walking stick.
Any good wood oil designed to work outside will protect your stick and can be reapplied as necessary. Outdoor furniture oil is especially good.
The real personality of a stick is in the head. Most of the ones I make feature antler in one form or another (since I’m fortunate to have access to plenty of it) and incorporating antler into your stick is a fantastic way to honour your quarry and make good, practical use of another part of the beast.
The most commonly used parts are the crown and brow tine to create a walking-stick head, or else a well-formed fork used as a thumbstick. Choosing the right piece of antler is purely personal. Get a good grip on whatever pieces you have and see what feels best in your hand.
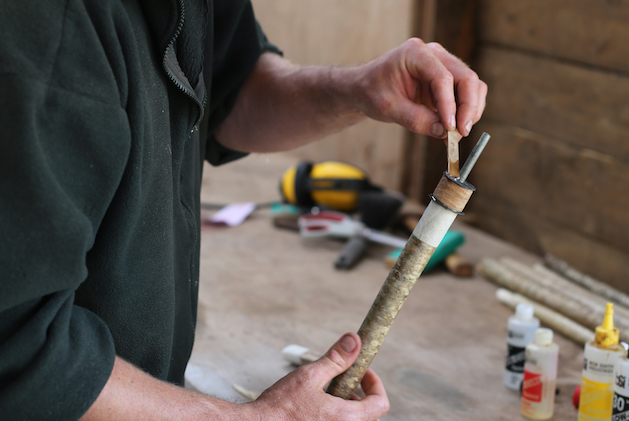
Attaching the antler to the stick can be approached in one of two ways. Where the antler is from a larger species, such as red deer, and is wider than the head of the stick, the traditional approach is to whittle a dowel on the first inch or two of the stick and drill a hole to match in the pith of the antler, creating a simple and surprisingly strong joint.
Barry applies glue to the stick components
Where the antler is smaller or particularly irregular, it is usually best attached using a short length of threaded steel. A puck of hardwood or horn can be helpful between the stick and the antler to help to marry the profile, and this also gives you the opportunity to insert a little detailing, such as a plate of brass or copper.
All parts should be glued carefully together with a two-part epoxy, ensuring a strong join that will stand up to the rigours of the countryside. A quick-setting epoxy is usually easiest here. Sticks are notoriously difficult to clamp and it’s simpler to hold the head in place for a few minutes until the glue dries. Once everything is set firmly, get to work with a file and sandpaper to make the join as smooth as you want.
Every stalker I know has an “antler box” — a collection of cervine debris that has gathered dust for some…
Cutting the stick to length will depend on what — and who — it is intended for. For a walking stick, the inside leg measurement is often cited as a useful guide (if it is intended as a surprise gift, I recommend checking the label in a pair of the recipient’s freshly laundered trousers, rather than any attempt at surreptitious measurement).
Thumb sticks should be 6in to 8in longer than the distance from the ground to your elbow. Where it is going to be used in particularly rough terrain, it may be helpful to leave it slightly longer than this. For a stick designed to be used as a stalking aid, it’s best to take an over-long blank stick and rest your rifle on it at different heights using your clenched fist to see what length will be most useful to you.
Once cut to length, the stick should be tipped with a ferrule. These are usually of brass or steel tube around ¾in in diameter, either glued or fitted tightly and held in place with a horizontal pin. If you plan on using the stick over hard surfaces, a removable rubber cap is a good addition.
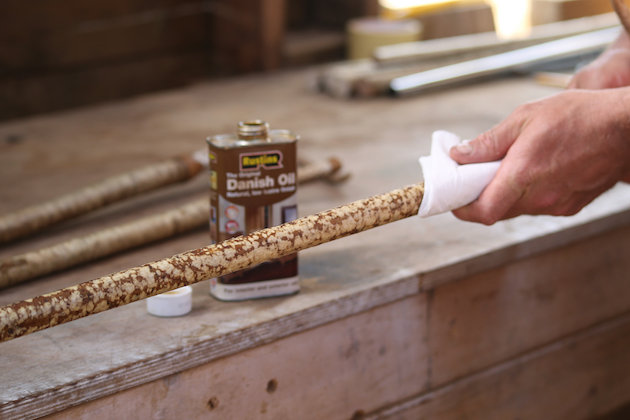
The final act when you make an antler walking stick is the application of a protective coating. A tough outdoor varnish is a popular choice. In my experience, this looks fine but over years the varnish can become cracked or chipped and lift, possibly bringing some bark with it. I prefer to finish with a good rub of teak oil or Danish oil, which can easily be topped up each season to keep your stick in excellent condition.
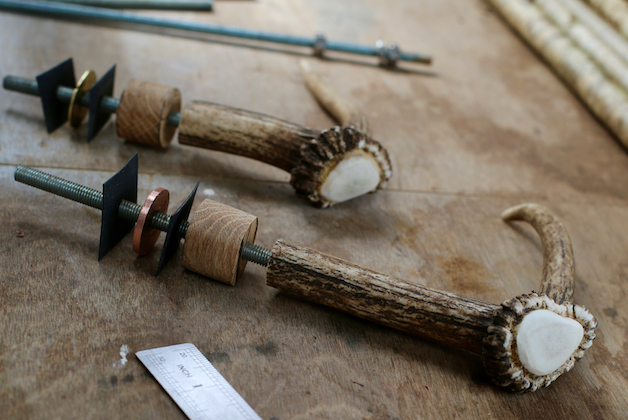
Two antler crowns, ready for mounting.
A well-made stick will last a lifetime and makes a perfect present (to yourself or others). Although summer cutting is not the professional’s choice, if you cut one this week it’ll be just about ready in time to fashion into a festive gift. So why not get down to the woods and begin your Christmas shopping early?
A whole range of stick-making supplies, from blank stems to ferrules, can be purchased from Keith Pickering here.
A good place to start when you decide to make an antler walking stick.
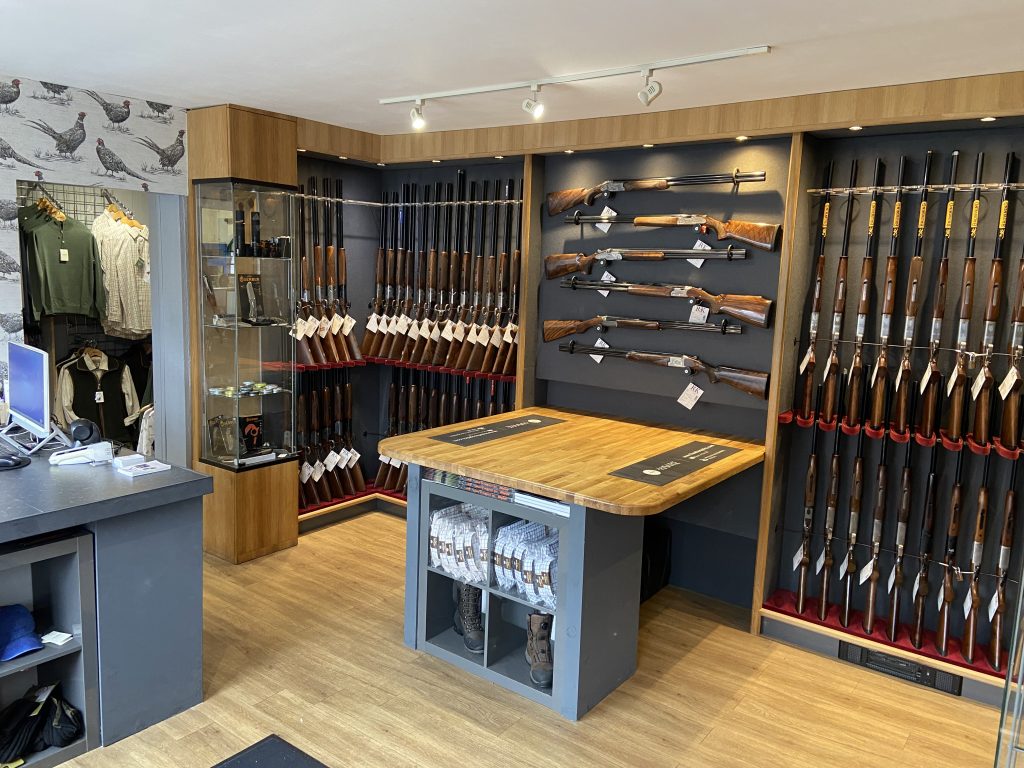
A pick of some of the best gun shops for fieldsports enthusiasts
Get the latest news delivered direct to your door
Discover the ultimate companion for fieldsports enthusiasts with Shooting Times & Country Magazine, the UK’s leading weekly publication that has been at the forefront of shooting culture since 1882. Subscribers gain access to expert tips, comprehensive gear reviews, seasonal advice and a vibrant community of like-minded shooters.
Save on shop price when you subscribe with weekly issues featuring in-depth articles on gundog training, exclusive member offers and access to the digital back issue library. A Shooting Times & Country subscription is more than a magazine, don’t just read about the countryside; immerse yourself in its most authoritative and engaging publication.

