★ Beat print – get early access to the news by signing up to the Shooting Times newsletter here ★


Top tips for a Glorious season
 Roland Mechtler, Matthew Finch
Usd 29 july 20 tips for grouse
Roland Mechtler, Matthew Finch
Usd 29 july 20 tips for grouse
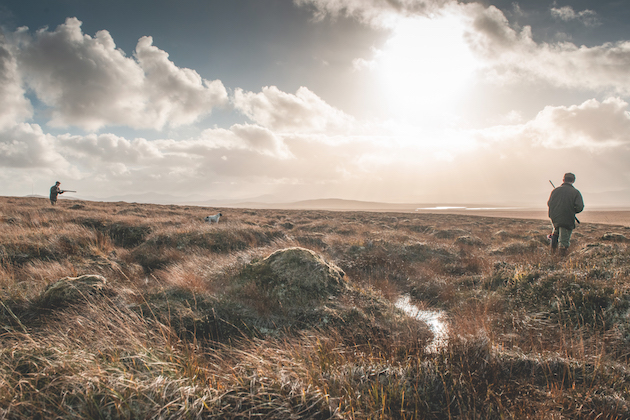
As a game shooter living in deepest partridge country, I consider any time spent on a grouse moor as a treasured experience.
The chance to shoot grouse in that landscape is a privilege, though one available to us all. But how do we make the most of our chances when the opportunity arises? For insights into driven, walked-up and grouse over pointers and some grouse shooting tips, I spoke to Matt Smith of the Calvert Sporting team, who are world renowned for their specialist grouse tuition.
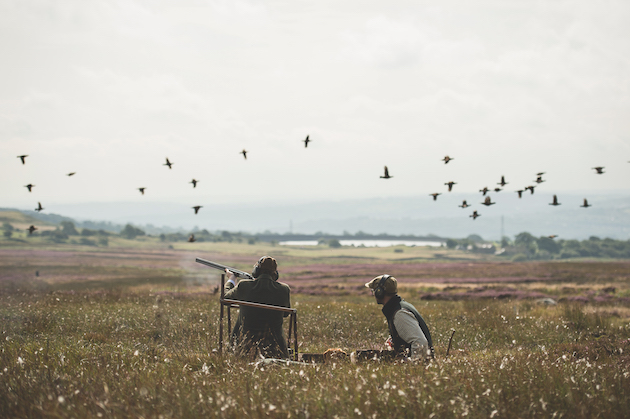
A growing number of shooting grounds have ‘grouse butts’
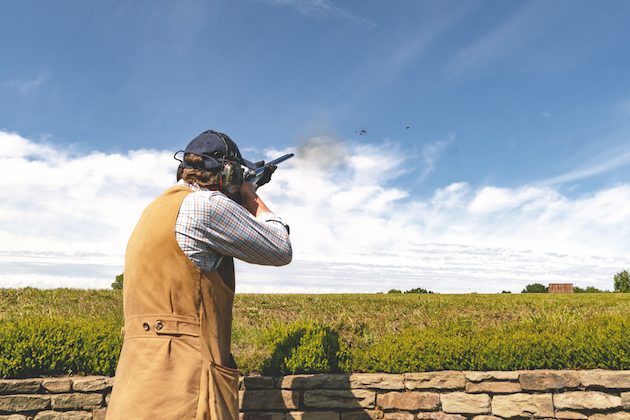
Grouse shooting tips
Matt emphasises: “Shooting grouse-like targets before you go will give you the mechanics. For driven you need to practise on a flat, fast incoming target and you also need to be able to practise shooting in front and behind at the same target.”
This is not easy to do on any clay ground; a specialist grouse layout comes into its own and Calvert Sporting runs the best I’ve shot.
“You need to be able to deal with multiple birds, not just coming at you, but also crossing behind each other, taking your eyes away from you. Like all practice, it needs to be meaningful practice,” says Matt.
“We will prepare you for the intensity you could face in a grouse drive when it really does switch on — train hard, fight easy.
“At your clay ground, if rules allow, make the target simulate a grouse. Take the going-away bird on a sporting stand by turning round to shoot it. This you must do safely with your gun up as you would turn safely in a butt. As many as 40% of driven grouse shot are taken as back birds, so it’s important to practice this.
“If the grouse is within 60 yards you kill it. If it is within your range, it’s your bird. There is no ‘his bird or her bird’ as you would find with pheasants and partridges. So it can be considered a more aggressive style of game shooting,” admits Matt.
“Also be prepared for the fact that grouse will not always come as a pack. Early season, before they know what the butts are, they might come in twos and threes. Later, they pack up but if you are on a ridgeline or a natural flightpath for the grouse, they may well come in a constant stream.”
Some of the best practice for the type of intensity you will face in a grouse butt can be found in a pigeon hide on a busy day, according to Matt. Fast, wild birds in a wind will test you and they require instinctive shooting as well as a business-like attitude.
“We teach our clients to ignore the ‘big bird’; that is the one that is too close to shoot. The speed and angle make it far more difficult and if you connect you ruin it for the table. Forty yards is the sweet spot.
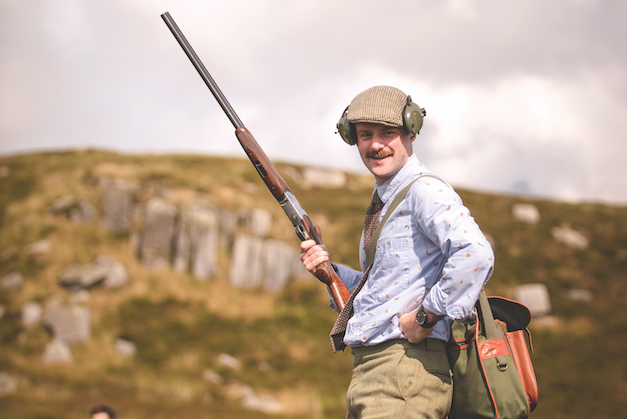
It’s best to avoid light-coloured shirts as they will send the grouse over your neighbours
You should identify where the grouse will appear from and have a ‘hold point’, as in clay shooting — you address the grouse, kill it, then go back to the hold point. It takes discipline to ignore another bird that may be closer and go back to the hold point to collect another bird that you are more likely to kill cleanly and not ruin.
Matt recommends you “wear a dark-coloured shirt because if it gets hot in August and you have to take off your jacket, light shirts will drive all the grouse over your neighbours. Avoid the heavy jackets found on a wet day on Exmoor. Lightweight technical jackets to cope with quick showers are what you need — you can put a shooting waistcoat over the top for bigger pockets.”

Safety sticks are stuck into grouse butts to remind Guns where the safe angles are
Frustration
“Safety is paramount,” says Matt. “The more confident you are in your safety the better you will shoot. You won’t hesitate and shy off birds. This can lead to frustration and frustration can lead to a dangerous shot.”
Safety sticks are stuck into the top of a grouse butt to remind Guns where the safe angles are in the middle of a drive. “Set your own sticks. Make sure they are right for you: dry mount with an empty gun or a walking stick and test your angles from the middle of the butt. Once they are set, remember to shoot from within that position.
“Try not to be too upright in the butt and remember not to step forwards or backwards as you turn to take a bird out the back. If you imagine a hula hoop as your turn, you should turn within that circle or you will change the safe angles of your sticks,” he continues.
“Butts 1, 2 and 3, and 7, 8 and 9 need to take account of flankers. Butts 2 and 3 and 7 and 8 need to think both about their neighbouring Guns and the flankers. Your sticks in these butts need to be placed with a flanker in mind as he may be in range. Take another set of sticks in these butts — they should be provided but walking sticks and grip magnet sticks can also be used. Flankers also move during the drive so you may need to adjust your stick position.
“Your first flanker is your major concern as he may be well in range. Some estates now have flankers in an orange baseball cap.
“Butts 1 and 9 can be a delight because, as the flankers come in during a drive, all that free space to the left and right opens up for you to shoot safely into,” says Matt.
“Make sure you get yourself familiar with how the horn system works during the drives and the signal for the end of the drive. This should be outlined in the safety briefing. Safety glasses are essential and are compulsory on most moors and a hat should be worn for camouflage as well as protection.”
As I steered our conversation to the more accessible form of grouse shooting — walked-up grouse — it had become clear that these grouse shooting tips had been distilled from a life lived with grouse and moorland.
Much of the advice about walked-up grouse can be applied to shooting the birds over pointers
Walked-up grouse
If you’ve done some rough shooting for wild game then you will have a reasonable idea of what to expect, says Matt. Many moors offer walked-up shooting because the ground doesn’t lend itself to driven grouse shooting. On rocky, harder terrain, grouse exist in pockets — expect the walking to be reasonably challenging.
“Ask your host what type of ground it is but remember they will probably have been walking over it since they were young so add half as much again. If you have back or knee problems you should make enquiries,” warns Matt.
“Travel as light as you can but remember that you will need warm and wet weather clothing accessible. Some moors you will leave the vehicle and not return all day. Some moors have ATVs that will follow you at a distance all day. Find out what the arrangements are beforehand. Take a game bag with some water in it and use a cartridge belt,” is his advice.
“The vast majority of shots will be going away from you but not all. Some grouse will turn if walked into a wind and come back over you; sometimes you will walk over a covey and they will get up behind you, so be prepared for that.
“You can’t concentrate all day so try to increase your concentration when the ground looks ‘grousy’. It’s a good idea to learn what a dog looks like when it gets ‘birdy’. Remember that a dog retrieving can flush a covey on the way back so stay alert but do avoid shooting over a dog that is on a retrieve.”

Watching dogs like vizslas work is almost as exciting as the shooting
Long shot
“By the time you get the gun up the bird will be a sporting distance away. A 40-yard going-away grouse is a long shot so it’s probably the limit of range. Remember the grouse has got to be picked so think hard before taking on a long one.
“Use a game gun of some description and don’t get hung up on chokes and cartridges. Remember that if you choose to use one, you will have to carry a 32in over-and-under all day,” Matt cautions.
“There may be other species on the menu but, on rocky ground, rabbits and hares are better off left. If you shoot a hare keep in mind that you may have to carry it.”
Much of the walked-up advice can be applied to pointers, says Matt. “The difference is the dog will be cast off a distance away and, until it comes on point, you can be fairly relaxed. Once it does come on point you need to get up into position relatively quickly.
“Normally two of you will be called forward to shoot. Try to have a plan with your neighbour — left-hand Gun taking the birds to the left and right-hand Gun the right, with the dog as the middle line,” he adds.
“Unless it’s a false point you will be getting a shot, so you need to have the gun up just out of the shoulder. Pick a bird out of a covey — some people pick the bird their eyes first fall to. Some like to pick the bird off the top of the covey, using the gun to obscure the rest from vision. Always keep in mind the position of the rest of your party and don’t shoot directly over the dog.”
The chance to shoot grouse is a rare privilege for me. The opportunity to glean some secrets from someone whose mastery of the art comes from growing up surrounded by his quarry felt like privileged access too.
Related Articles
Shooting
Drey poking kit guide: essential equipment for grey squirrel control
Invasive grey squirrels do a great deal of damage to our trees and their numbers need controlling, so you must have the right kit
By Shooting Times
Get the latest news delivered direct to your door
Subscribe to Shooting Times & Country
Discover the ultimate companion for fieldsports enthusiasts with Shooting Times & Country Magazine, the UK’s leading weekly publication that has been at the forefront of shooting culture since 1882. Subscribers gain access to expert tips, comprehensive gear reviews, seasonal advice and a vibrant community of like-minded shooters.
Save on shop price when you subscribe with weekly issues featuring in-depth articles on gundog training, exclusive member offers and access to the digital back issue library. A Shooting Times & Country subscription is more than a magazine, don’t just read about the countryside; immerse yourself in its most authoritative and engaging publication.

