★ Win a pair of Brandecosse Capriolo boots worth £219! Click here to enter ★

How to set up your airgun scope
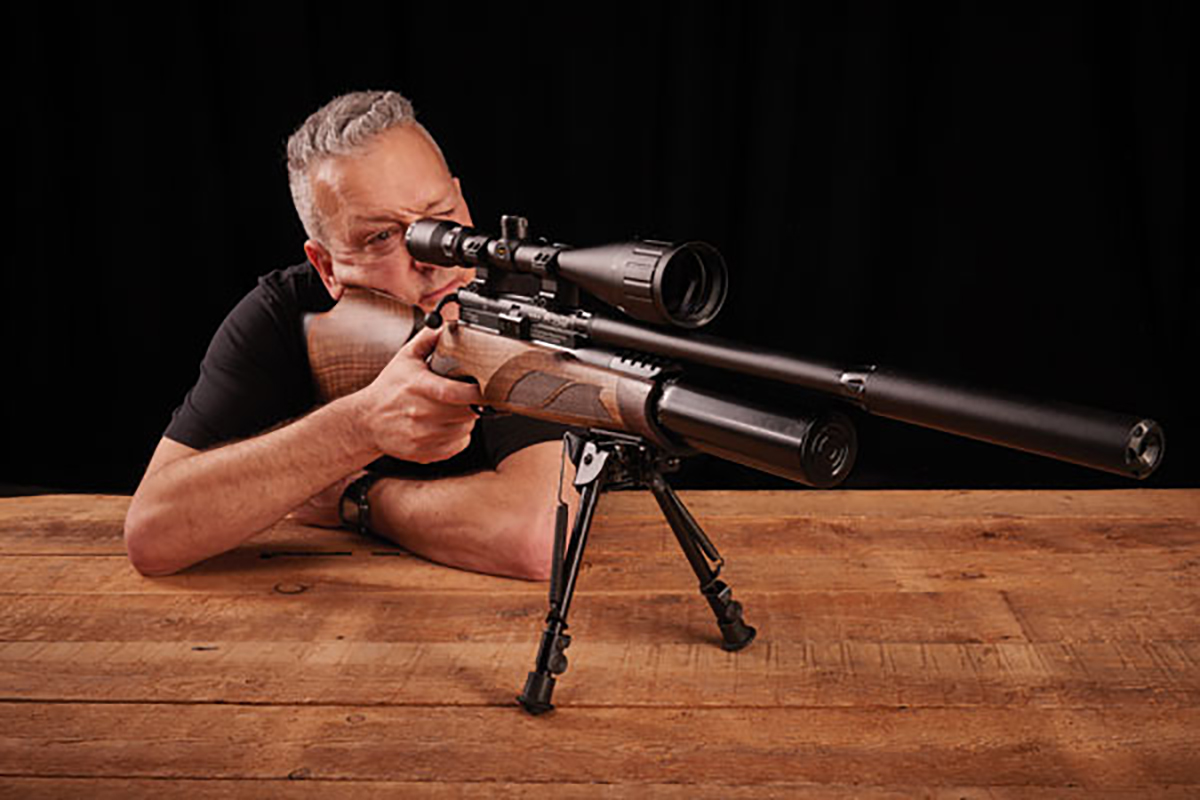
Some people, early on in their shooting careers, will either use a rifle with a telescopic sight already attached or ask someone to fit one for them. In both cases the scope and mounts may have been fitted properly to the rifle, but there’s no guarantee the shooter will do well with that set-up if it hasn’t been specifically tailored to them, which is why knowing how to set up your airgun scope is essential. (Looking for the best scopes? Read our list here).
One of the best ways to illustrate this is to compare a premounted scope with buying a new car. Would you jump in and drive it away without adjusting the seat or mirrors?
You could drive the car that way, certainly, but you definitely wouldn’t be driving it as well as you could. Whether your rifle’s destined for the garden, the range or the hunting field, you will always shoot it better if it’s been set up just for you.
How to set up your airgun scope: where to work
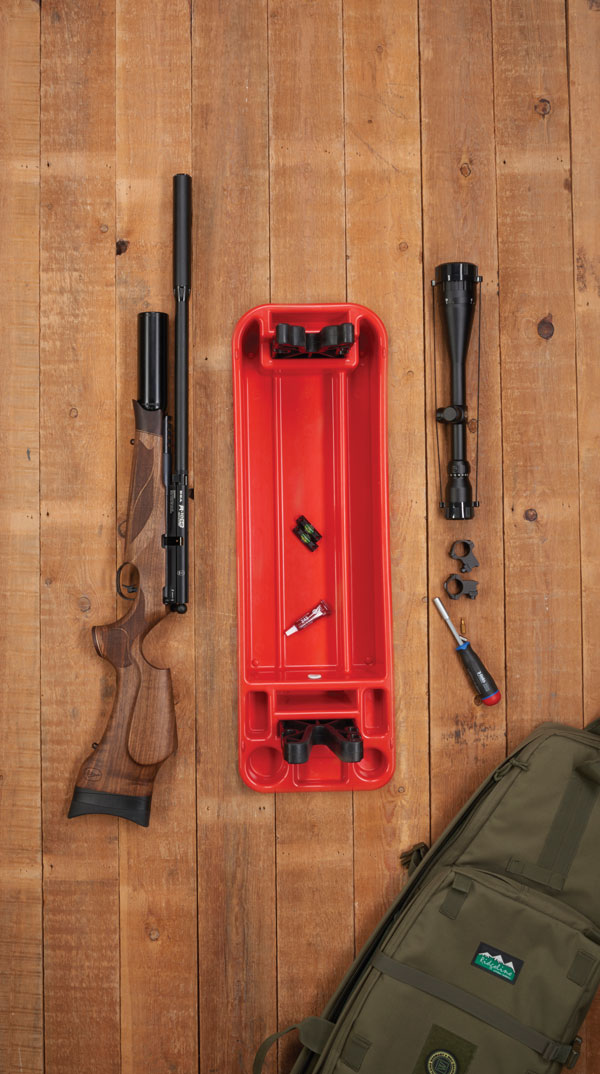
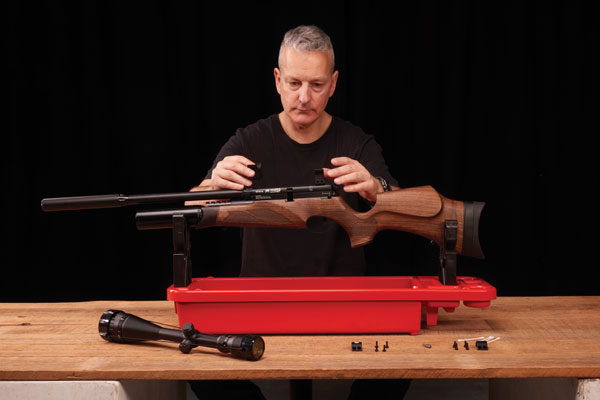
From left to right: rifle, cradle, scope, mounts
Clear a work space where you won’t be disturbed and get everything ready. Safety first! Make sure your rifle is unloaded and uncocked before you start. You’ll need something to keep the rifle level. A gun cradle is ideal, but gun bags or a bipod can also be used to good effect.
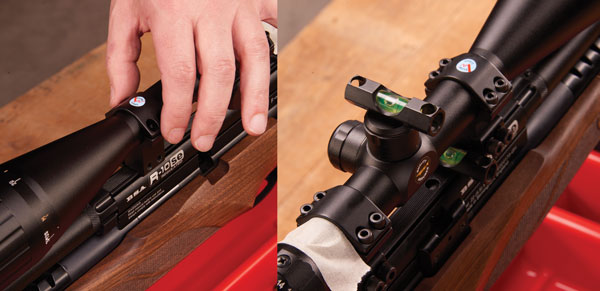
If you want to use scope lens covers on your completed rig then you’ll need to make sure the mounts you’ve chosen give you enough room between the cover over the objective lens and the barrel. Prep your mounts by removing the upper rings. Keep track of the orientation of the uppers and their screws.
How to set up your airgun scope: getting started
There are a few things to consider on how to set up your airgun scope. First of all, ensure the rifle is safe. That means the magazine, if it uses one, has been removed, no pellet is in the breech and the rifle is not cocked. Secondly, you need somewhere to rest the rifle while you’re working on it.
If you have a bipod fitted this can often be used as long as it’s a swivel type that can be adjusted so the rifle sits perfectly level. I prefer to use a gun rest or cradle, and the type I use more than any other is the Gunsmith Maintenance Center from US firm MTM.
This features rubber butt and forend rests that can be positioned in a variety of ways to ensure your airgun sits level. If you happen to shoot rimfire or centrefire rifles as well as your airguns, the rest can be used to position your rifle with the muzzle pointing slightly down, which aids cleaning. The next thing to consider is the mounting system present on your rifle.
Give yourself room: Line up your horizontal crosshairs with the level, then check the rifle itself is level using one of the small bubble levels. Cant is a true enemy of accurate shooting.
The vast majority of airguns have a dovetail rail, so called because when looked at end-on they resemble the shape of a bird’s tail. Dovetail rails, while looking similar to one another, are not always the same size, however; the majority of dovetails are between 9.5mm and 11.5mm long, while some manufacturers use wider 11-13mm rails.
It’s important to use the right size otherwise the mounts will not sit true to the action. Sportsmatch makes dedicated mounts for these wider rails along with the more usual narrower variety as well as brand-specific mounts. Dovetails are not the only mounting system that can be used.
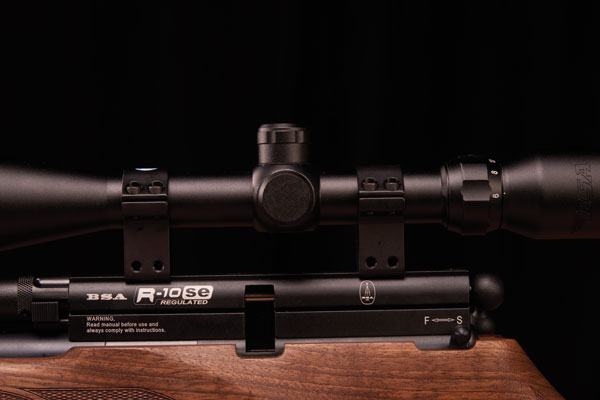
Mounts need to be low enough to achieve a good sightline, but high enough so the scope clears both the barrel and magazine
Weaver and Picatinny rails are slowly becoming more common in airgun use, especially on bullpup rifles. These two systems are similar, but not identical, and utilise a pair of parallel rails and several slots perpendicular to them.
The main difference is the spacing between these transverse slots. This is only a problem, however, if you try to use a one-piece Weaver mount on a Picatinny rail or vice versa – they won’t fit. But if you use two-piece mounts then you can mix and match between the two.
Which system is best? Dovetails are more commonplace, meaning there’s a greater choice of mounting options. They are lighter and less bulky than the Weaver/Picatinny systems, and arguably more aesthetically pleasing. Weaver/Picatinny rails offer a more solid mounting system that copes better with recoil – which is important for springers.
They also let the shooter swap scopes and mounts more easily, with an almost perfect return to zero. If you have a rifle with one system and want to use the other then you can use an adapter. This, of course, will add weight and height to your rail system as well as adding to the cost. The choice is yours.
How to: Install lower rings
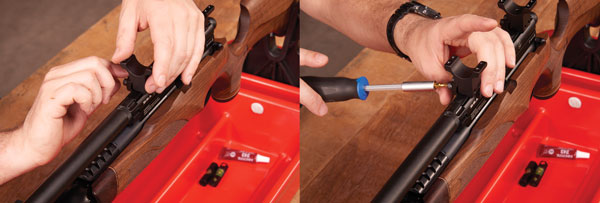
- The dovetail rail on this BSA R-10 SE runs the whole length of the receiver and is not fouled by the magazine. This means you can optimise the location of the mounts.
- Don’t tighten the lower rings too much at this stage as you may have to relocate them slightly when trying to achieve correct eye relief later on in the mounting process.
Single or double?
The next thing to consider is whether or not you want to fit one- or two-piece mounts. One-piece options offer a greater clamping area on a rail and are more resistant to recoil. For this reason, these mounts are often the preferred choice on springers and gas-rams.
The downside is the fact that they are usually bulkier, heavier and more expensive, and not necessarily the best choice on a springer if it’s been tuned or is otherwise mild-mannered with respect to recoil.
Some rifles simply cannot take one-piece mounts, notably those with a magazine system that sits higher than the rail. Two-piece types offer more flexibility when mounting a scope as they can be better positioned to clear the scope objective bell or central saddle. Two-piece mounts may be termed double- or single-strap.
This means each mount, fore and aft, may feature either one or two securing screws each side, with doubles being wider and therefore providing a greater contact area with the scope tube.
With a springer you may be better off with double-strap mounts, but for PCPs shooting at non-FAC levels singles are absolutely fine. Again, it’s down to availability, cost and personal choice.
How to set up your airgun scope: right size, right body
Yet another point to consider is the diameter of the body tube of the scope that you’re intending to mount. Almost all scopes slated for airgun use will measure either one-inch (sometimes referred to as 25mm) or 30mm, and you must use the correct set of mounts to match.
The final consideration is the height of the mounts. A general rule is to use the lowest set of mounts you can get away with. This means making sure the objective lens of the scope doesn’t touch the barrel, and that includes the front scope cap if you intend to fit covers.
Mounts need to be low enough to achieve a god sightline, but high enough so the scope clears both the barrel and the magazine
You must also be able to insert and operate a magazine, if your rifle uses one, without it being fouled by the scope. You may well come across the terms ‘low’, ‘medium’ and ‘high’ when researching mounts. Be careful here, because there is no industry standard and ‘low’ for one manufacturer may well be ‘medium’ for another (BKL is a good example of this).
If you are ever uncertain when choosing scope rings contact the retailer or manufacturer and tell them your rifle type and the kind of scope you want to mount to it. The size of the scope’s objective lens – typically 40mm, 50mm or 56mm – will usually be the deciding factor.
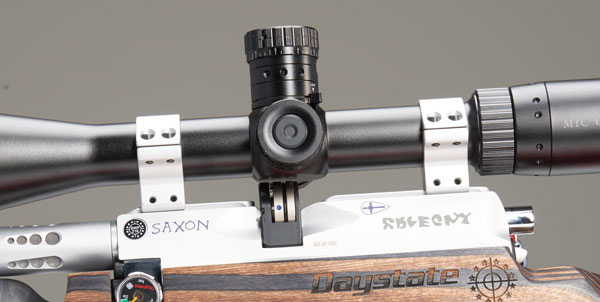
Fine-tune for eye relief
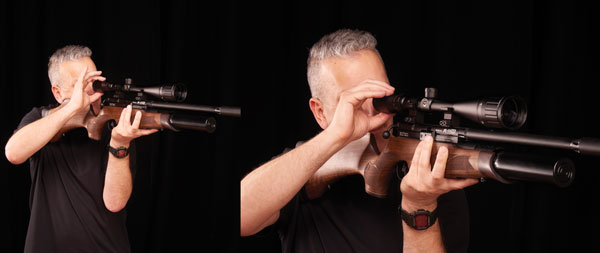
Ensure you are achieving a full viewing angle by fine-tuning your eye relief
Eye relief is the distance from the rear lens within which the shooter can achieve a full viewing angle. In practice, this means sliding the scope backwards and forwards until a perfectly clear image can be seen.
If you see a half-moon effect, this means you are partially looking at the inside of the scope tube and have not got correct eye relief. Ensure the scope is on its lowest magnification and keep adjusting until eye relief is right for you.
How to set up your airgun scope: ready, steady, go!
You’ve now gathered your chosen scope, rings and rifle, and are ready to assemble them into an accurate shooting rig. Most mounts will come with a set of hex or Torx keys, or just a single key if the base screws are similar to the ring screws.
I like to remove the upper rings first, keeping track of each screw and the hole it came from. I use a cotton bud dipped in rubbing alcohol to swab out the screw holes and clean the screws themselves of any manufacturing oil or debris. The inside of the rings should also be swabbed clean.
The twin spirit level method is the editor’s preferred way to align the scope, as the elevation turret cap is perpendicular to the crosshairs.
Many springers will have a hole in the top of the action block to take a recoil pin in the rearmost mount. Some mounts, such as those from Sportsmatch, come with a separate post while others, like those from Hawke and Optisan, may feature a cone-shaped device that fits into the hole. The next stage is something of a balancing act, especially with two-piece mounts.
The optimal fitting method is to have them as far away from each other as possible, offering maximum support to the scope tube. However, you may need to adjust the position of both mounts to get good eye relief. Locate the mounts in roughly the right place on the rail, then snug the screws down just enough to hold the mounts in place.
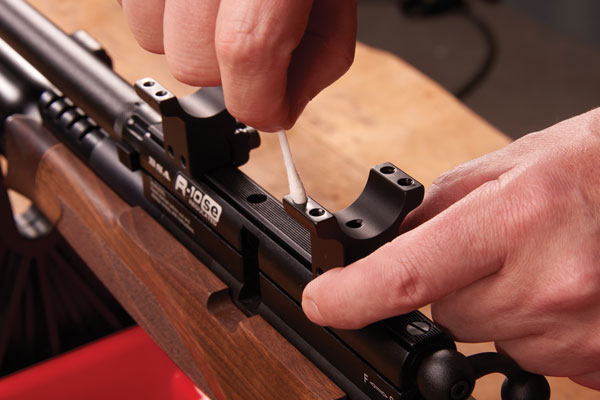
No grease guns here: A cotton bud dipped in a solvent such as rubbing alcohol can be used to ensure all contact points are clean and free of any chemical contaminants or other debris.
Next on how to set up your airgun scope, lay the scope in the lower rings and shoulder the rifle, pointing it in a safe direction. If you’re worried about the scope tumbling to the ground then fit the upper rings, but do so very loosely – you’ll need to move the scope backwards and forwards until you have good eye relief.
If you run out of room you’ll have to loosen and reposition one or both of the mounts. It’s best to turn the magnification on the scope right down when you do this.
Once you’ve got the mounts in the right place, turn the magnification as high as it will go and fine-tune the position of the mounts. With higher magnification scopes it’s not always possible to get absolutely perfect eye relief in all shooting stances; in this case pick the position – prone, standing, sitting, kneeling or bench-rested – from which you intend to shoot the most and fine-tune your eye relief based on that.
How to set up your airgun scope: get masking

Masking tape ensures you won’t out unnecessary stress and strain on the scope tube
Once the final position of the rings on the rails has been worked out you can then tighten them down properly. Masking tape can be used to mark the fore and aft orientation of the scope, which now needs to be removed before the lower rings are torqued down onto the rail.
It’s not a good idea to do this job with the scope in place because it will put unnecessary stress and strain on the scope tube. With the mounts tightened, the scope can be fitted back into the lower rings, using the tape to align it.
Shoulder Arms
Now close your eyes, shoulder the rifle and open them: eye relief should now be perfect. If you have to move your head backwards or forwards then you haven’t got correct eye relief. Slide the scope tube backwards or forwards until it’s correct; if you run out of room you’ll have to move the mounts themselves.
Once you’re happy with everything you can secure the bases to the rail, preferably using a torque screwdriver and sticking to the manufacturer’s recommended settings. You also need to decide whether or not you want to use threadlock; if you do, make sure you use the non-permanent blue type.
I prefer to shoot the rifle for a while before adding threadlock, making sure the mounts are exactly where I want them before locking those screws in place.
How to: Get on the level
Confirm you’ve properly set up the scope!
You can use a plumb line or larger spirit level to confirm you’ve properly set up the scope to avoid cant (having a tilted rifle or tilted scope without realising).
Line up your horizontal crosshairs with the level, then check the rifle itself is level using one of the small bubble levels. Cant is a true enemy of accurate shooting.
Bubbles, not troubles
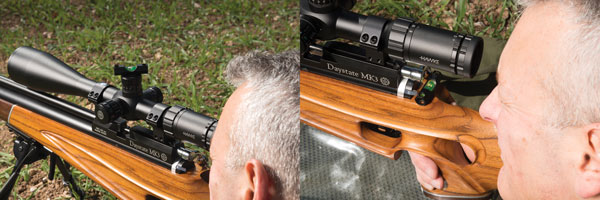
With the mounts fitted and the scope adjusted for eye relief it’s time to level the crosshairs. This is a job I like to do using two small spirit levels. Firstly, use one to make sure the rifle itself is perfectly level. Next, gently rotate the scope, taking care not to move it backwards or forwards, with the second spirit level resting on the turret cap.
Rotate the scope until the bubbles are centred on both levels. The turret cap method is an almost foolproof way of accurately levelling the crosshairs. You can always double-check afterwards using a plumb line, but I’ve never needed to go back and readjust.
Nearly there: When the bubbles in both spirit levels are aligned the scope has been properly levelled and the rings can be tightened. Tighten the screws a little at a time
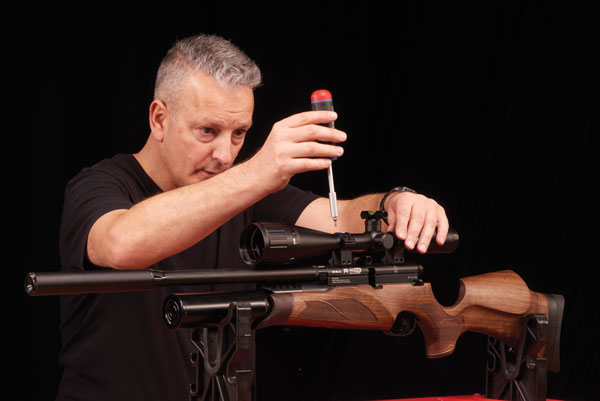
It’s now time to snug up the screws on the upper rings. To do so, use an X-pattern to tighten them slowly and evenly. Refer to the manufacturer’s recommendations if using a torque screwdriver, but if you don’t have one then hold the hex or Torx key by the short end – this should ensure you don’t overtighten the rings, potentially crushing the scope tube. There will be a gap between the upper and lower rings – this is normal; do not try to close the gap!
If you have been tightening evenly, the gaps will also be even both sides; if they’re not, adjust the gaps by loosening the screws on one side and gently tightening them on the other, all the while keeping those spirit levels level. Your final task is to check everything over. Shoulder the rifle and check eye relief once again. Are the horizontal crosshairs still level with the action? Have you correctly tightened every screw?
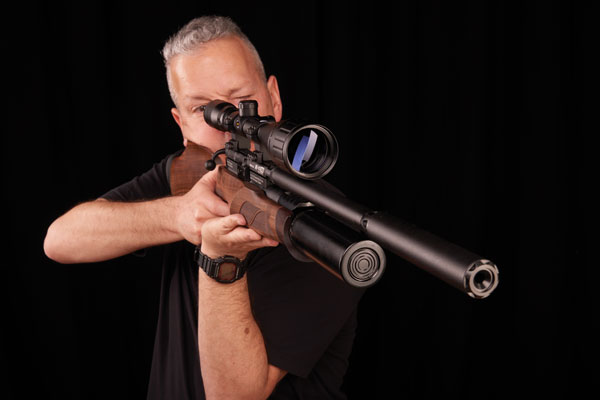
Strike those stances: Check the full range of magnification your scope has to offer. Eye relief is far more critical on high mag. Also check for good eye relief in various shooting stances.
If you encounter a problem at this late stage, and after all that hard work, it’s tempting to shrug it off and just settle for what you’ve got. Maybe the scope’s not truly level after all. Maybe eye relief isn’t as good as you thought it was. It’s much better to tackle problems like these now and get that scope set up perfectly.
You’ll thank yourself later! When you’re perfectly happy the scope has been correctly mounted you can afford to relax. Your rifle and scope combo is now ready to be zeroed, which you can read about here.
Related Articles

ZEISS Secacam Trail Cameras: the essential tool for modern deer management
Professional deer stalker Jim Riley explains how ZEISS Secacam trail cameras have transformed deer management, wildlife monitoring and estate security at Chippenham Park Estate, helping deliver more e...
By Shooting Times

HIKMICRO Alpex Pro A50PL review
Designed for the hunter who demands both performance and agility, the Alpex Pro A50PL sheds nearly 300g compared to the original 4K. But can a fixed f/1.8 aperture and a new 12MP sensor truly match th...
By Ed Jackson
Get the latest news delivered direct to your door
Subscribe to Shooting Times & Country
Discover the ultimate companion for fieldsports enthusiasts with Shooting Times & Country Magazine, the UK’s leading weekly publication that has been at the forefront of shooting culture since 1882. Subscribers gain access to expert tips, comprehensive gear reviews, seasonal advice and a vibrant community of like-minded shooters.
Save on shop price when you subscribe with weekly issues featuring in-depth articles on gundog training, exclusive member offers and access to the digital back issue library. A Shooting Times & Country subscription is more than a magazine, don’t just read about the countryside; immerse yourself in its most authoritative and engaging publication.

