
How to make an antler stick
The stick. The fact that you’re reading this suggests you probably have one — quite possibly several — and for…
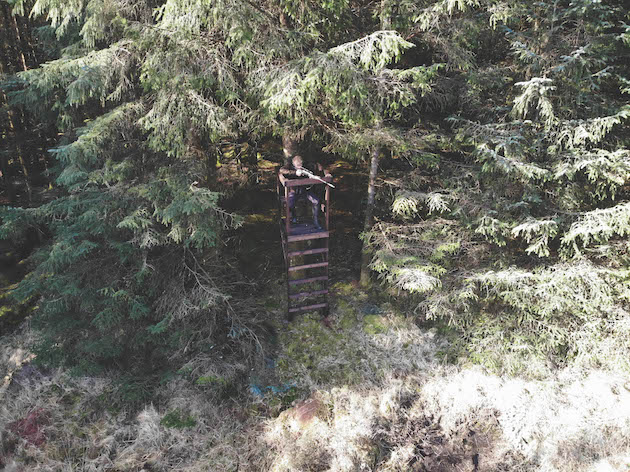
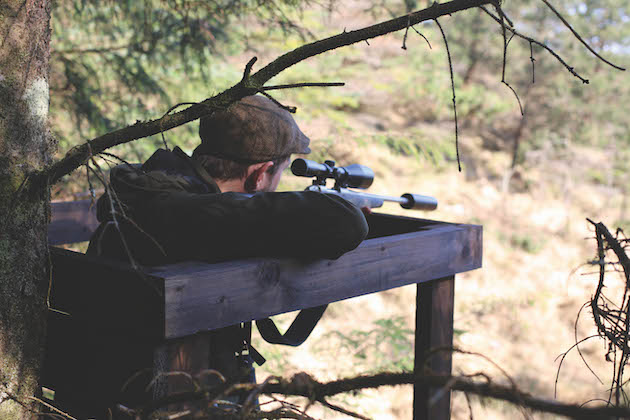 It's important to check the field of view from the seat before you need to use it, and ensure you have a good, uninterrupted field of view It's important to check the field of view from the seat before you need to use it, and ensure you have a good, uninterrupted field of view
High seats feature in some of my most enduring stalking memories. With the safety of a permanent earthen backstop and the comfort and concealment that a high seat for shooting offers, it’s easy to see why elevated hunting blinds are enormously popular both in the UK and throughout much of continental Europe. But, for some reason, we don’t see as many here in Ireland as you might expect.
I use a number of high seats in the forests I manage. Initially, these were mostly of the portable, metal type and, though they did the job, I learned the hard way that you get what you pay for.
In the damp environs of south Kerry, models from the lower end of the price spectrum had a depressingly short lifespan and, some years back, I started replacing many of them with home-made timber versions. While more time-consuming to construct and requiring a little more maintenance, they last far longer if properly installed.
Earlier this year, I was handed the deer management of a mixed conifer plantation sprawled across the hillside above my house, where a healthy population of sika were beginning to make a real nuisance of themselves.
Untamed for some years and spilling across steeply undulating hillside, the tree cover contained few easily navigable tracks and the clearings and rides were bumpy and overgrown. It was clear from the outset that stalking through this forest would be impractical and I quickly came to the conclusion that the only way to get on top of the problem would be from a few carefully sited high seats.
Keen to make the best job of it I could, I called local experts Niels Nielsen and Dermott Long, of Irish Deer Hunting Ltd. Managing huge tracts of forestry to the east of the county, they maintain a large selection of seats for their annual stalking clients and I had been very impressed with what I’d seen of their handiwork.
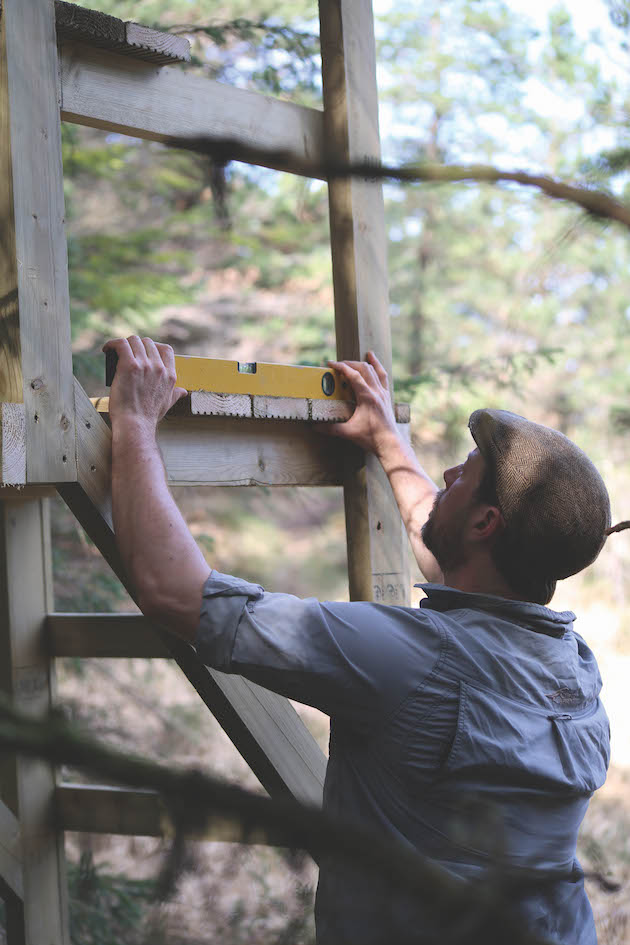
The tree stand doesn’t have to be perfectly level, but sitting on a listing seat can be uncomfortable, as well as unstable
“Make sure you put it in the right place,” was Niels’s first pearl of wisdom, delivered with a laugh. “It sounds obvious, but there’s a lot to think about. First, make sure that you actually need a high seat. Ground blinds are simpler to build and, in some cases, they’re just as good and easier to use.”
I started making my mental checklist as Dermott added: “Don’t point it east or west if you can help it — you’ll be stalking with low sun in the early morning or evening. And try to set it downwind of the deer.”
They continued with more helpful advice and a few cautionary tales — public access to some of their forests means they have to remove certain seats each February to prevent them being misused by non-hunters and they recently had one vandalised during the season. I felt slightly relieved that my latest forest was private and hard enough to access for a dedicated stalker, let alone a potential vandal.
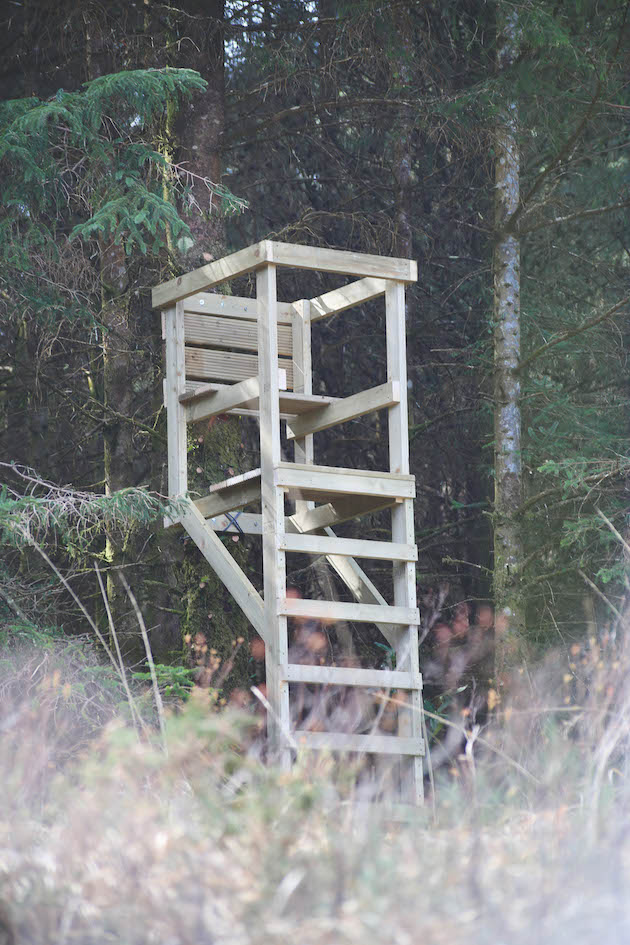
The finished tree stand before the coat of weatherproofing gave in some protection and camouflage The finished tree stand before the coat of weatherproofing gave in some protection and camouflage
Time spent in reconnaissance is never wasted and, over the next month, I decided on two locations where deer were moving regularly through clearings in the plantation. The height of cover and rough topography didn’t leave me the opportunity for a ground blind, but there were some good sites for high seats.
One clearing offered a north-east corner of mature spruce, overlooking what appeared to be a well-used deer track downwind to the south-west. A second promising spot was at the back of a boggy ride amid younger timber facing another deer track. The trees would not be stout enough to bear a seat, but a free-standing one could be set back on the northern margin.
Both locations were, of course, a long way from the main track and would require a good bit of manual labour, but I was confident that the effort would be worth it. A seat put in the easy place rather than the right place invariably ends up being moved or abandoned rather quickly.
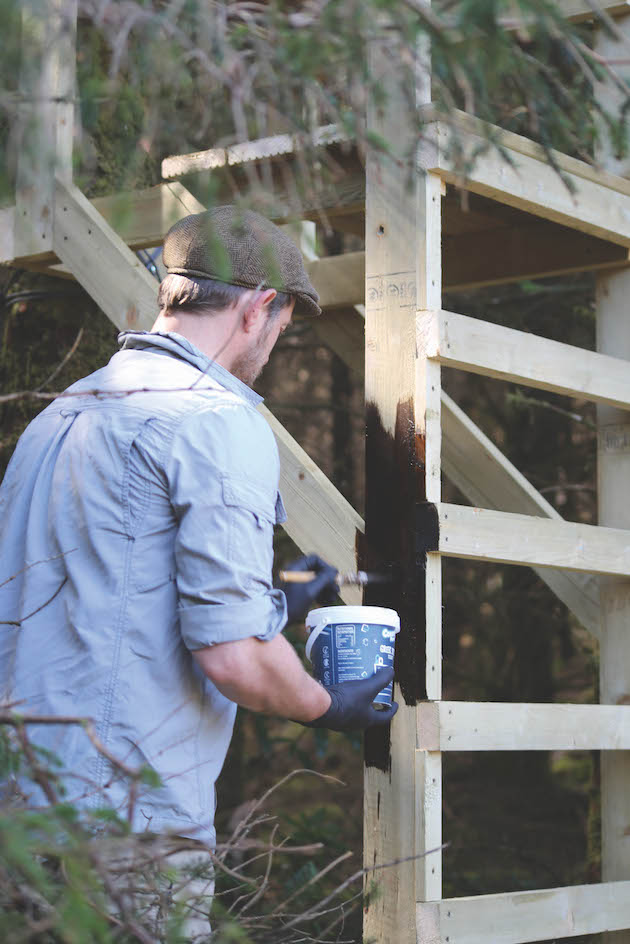
Weatherproofing will camouflage the timber and give the seat extra years of life
Cutting the tracks into the sites I’d chosen, I was careful not to come too close to where I thought the animals would be, taking a slightly circuitous route to approach the seats from an upwind direction and hopefully leaving less chance of bumping the deer when getting into position.
Some years ago, my earliest forays into high seat construction resulted in the much-loved ‘plank on a branch’ model and the deluxe ‘two planks on a branch’ variant. A few of them are still in service today and, in the right places, are still getting fine results.
This time round, assisted by a design generously shared by Niels, both seats were made entirely from treated 2×4 and a couple of planks of decking. This proved an economical approach, with the materials for the pair costing less than £150, making them significantly cheaper than their metal counterparts.
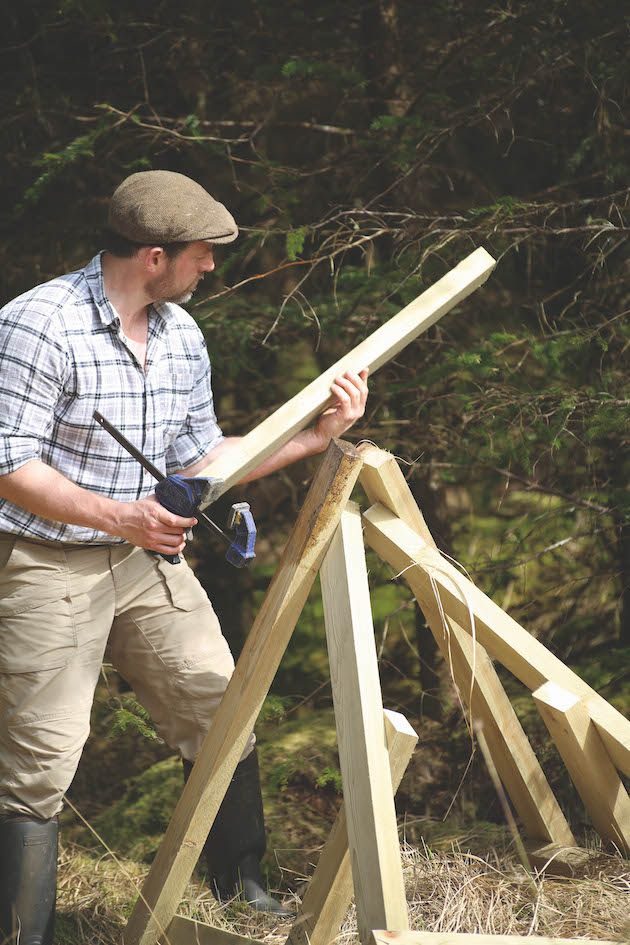
The seat can be made at home t check dimensions then be reassembled in the forest
Construction took place over a couple of sunny afternoons in the back garden, allowing me to fully assemble both seats to check the dimensions were right.
The height of the seat and the shooting rail are the critical ones to check. I set these at 55cm and 110cm respectively, but both will depend on the size of the stalker. If the seat will be used by different people, it’s usually best to err on the low side for the rail. The long uprights were all 3m in length, which I find is plenty for most terrain without giving anyone a case of vertigo.
Once I was satisfied, I dismantled the seats into portable sections, labelling each part as I went, ready for the big haul up the hill.
By lunchtime the following day, both seats were in pieces at their sites. I assembled the free-standing seat first, fiddling with the position a little to get the best field of view, having cut myself a 3ft hazel stick on the way up to serve as a proxy for the rifle.
The tree stand seat took a little longer because I trimmed back the lower branches before putting the seat together and setting it solidly against the trunk. Fortunately, the tree in question was more or less vertical where it mattered and provided a decent canopy above the seat, which I was certain I would be grateful for come October.
The stick. The fact that you’re reading this suggests you probably have one — quite possibly several — and for…
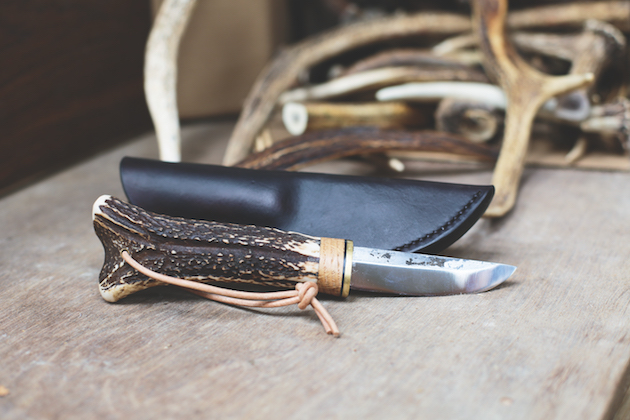
Every stalker I know has an “antler box” — a collection of cervine debris that has gathered dust for some…
After fixing the frame in place with some large galvanised timber-framing screws and a ratchet-strap, I ascended for the first time and did a little light pruning, being careful only to remove enough foliage for a clear sight.
I gave both seats a quick splash of wood preserver before pausing to survey my handiwork. Both were front-entry, meaning there was little camouflage in front of the stalker. I generally find this to be fine, as long as the stalker doesn’t fidget too much — or wear particularly brightly coloured trousers.
That said, in locations where circumstances force the seat to be within 50 yards of the anticipated deer, I would always try to enclose the lower part of the seat to conceal my movement. This is usually some olive drab netting from army surplus, draped in front after you’re installed.
Foliage above the seat level will provide some additional protection from the elements
I surveyed my handiwork critically. The tree stand blended in nicely with the large spruce, vertical lines merging with the trunks of the mature trees. To my eye, the free-standing seat seemed a bit more obvious against the greenery of the younger forest and I made a note to return and try to nestle it in a bit more at a later date.
As the sun dipped and the shadows inched across the clearing, I sat in the tree stand and tipped the last of the coffee from my thermos flask, taking the weight off my tired feet before contemplating the trek back down the hill. The warmth of the April sun still lingered and the gentlest of breezes tickled the top of the pines.
As I sat wondering for the umpteenth time if I’d chosen the right spot, a small movement drew my gaze to the far corner of the clearing. A sika pricket had stepped out from beneath the tress and was grazing lazily on young heather tips a little more than 100 yards away.
Roll on September, I thought.
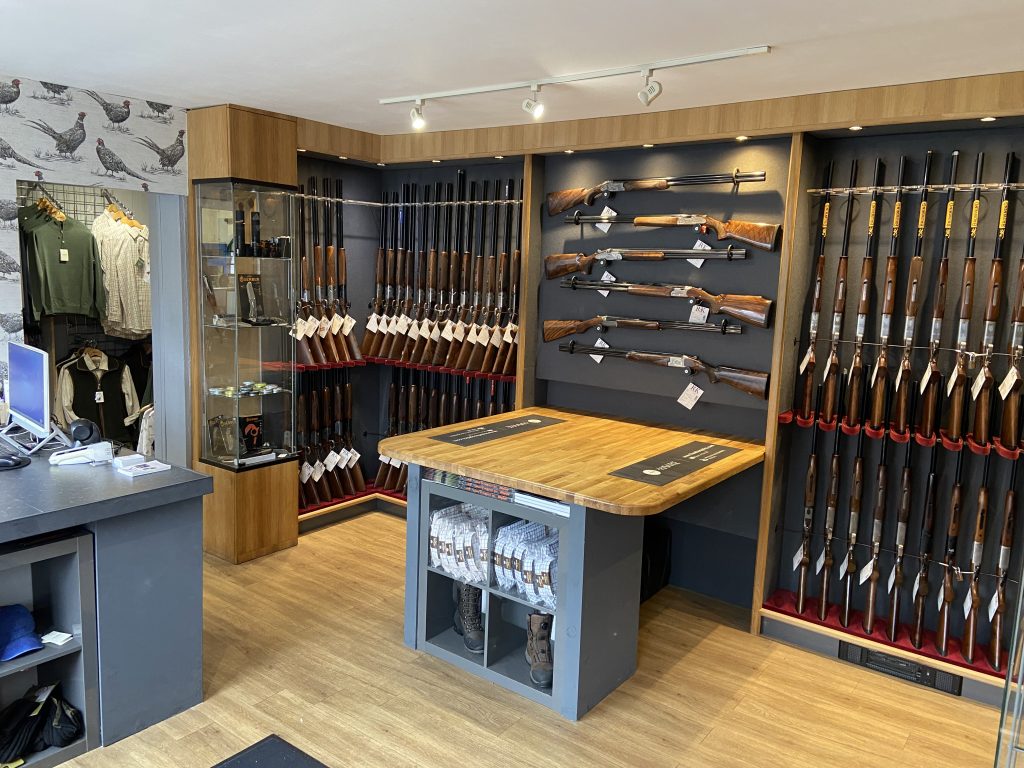
A pick of some of the best gun shops for fieldsports enthusiasts
Get the latest news delivered direct to your door
Discover the ultimate companion for fieldsports enthusiasts with Shooting Times & Country Magazine, the UK’s leading weekly publication that has been at the forefront of shooting culture since 1882. Subscribers gain access to expert tips, comprehensive gear reviews, seasonal advice and a vibrant community of like-minded shooters.
Save on shop price when you subscribe with weekly issues featuring in-depth articles on gundog training, exclusive member offers and access to the digital back issue library. A Shooting Times & Country subscription is more than a magazine, don’t just read about the countryside; immerse yourself in its most authoritative and engaging publication.

