★ Win a pair of Brandecosse Capriolo boots worth £219! Click here to enter ★
English Sporting clays. Here’s what you need to know.
Top coach Russell Mark looks at a few typical English Sporting targets that will help on game shoots
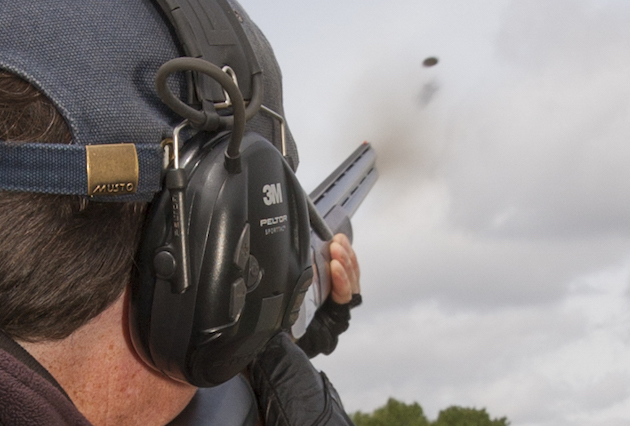 On station 8 clays are close and here the shot can be seen split seconds before smashing the clay
The benefit of practising your shooting on English Sporting clays is because the way the birds are presented emulates typical quarry species. Very useful of course when you are out in the field because these are the types of shots you’re likely to encounter.
The targets with English Sporting clays can vary immensely from ground to ground, but some aspects do remain fairly constant. You obviously have a rough idea what the target is going to be like if the stand is labelled ‘teal’ or ‘crow’ for instance. (Read more here on dealing with different clay targets.)
Targets in English Sporting clays
Before we look at the mechanics of hitting specific targets, here are the different ways in which the birds might be presented.
Single: As the name suggests, just one clay will be presented when the shooter calls pull. This type of bird might represent a single partridge, for example.
On report: A second clay is presented immediately after the gun is fired at the first. This could represent a pair of woodcock zipping one after another through the woods.
Simultaneous (SIM) pairs: When the shooter calls for the target, two clays are released and they’ll both be in the air at the same time. Grouse springs to mind here. (Read more on SIM days here.)
Single, fast crosser:
In this instance we’re looking at a crossing bird that’s coming low and fast. Here, by nature of the trees and hedges in front of the shooter I’ve been able to incorporate what amounts to a false ground line – this can give rise to the impression that the bird is dipping in flight, often causing unwary shooters to shoot below the target.
- Your initial stance should accommodate your chosen kill point, then bring the muzzles halfway back to the trap – this should usually be somewhere just after the visual pick-up point.
- Because it’s a really quick bird the window of opportunity to kill it is limited, so gun up is needed here.
- Shooting ‘maintained lead‘ style is probably the best option. Try to swing through or pull away on this type of bird and the target will probably be out of shooting distance before you’re ready to pull the trigger.
- As soon as you pick up the bird visually start your swing, remembering to always keep the muzzles ahead of the bird. There’s an element of ‘snap shooting’ involved here, so let instinct take over – when you feel the lead is correct pull the trigger and let the shot string do the rest. Don’t stop your swing when you pull the trigger.
Away, and over on report
This stand could easily be replicating a spot of decoying from a hide.
The first bird is a fast, going away ‘teal’ type bird that zips up and away from you – a bird that in real life might have spotted some movement in the hide and cleared off in super quick time! This is followed, on report, by high overhead target that comes over you from behind.
- Don’t be phased by the slightly bizarre combination, just treat both birds as singles.
- For the first bird, start with the gun up, your weight forward, with your muzzles just above the trap (or where you first see the bird.) Make sure you keep your face planted firmly on the stock.
- Try to stay cool, calm and collected, and transfer your weight onto the back foot.
- Swing the muzzles onto the bird, smoothly but as quickly as you can. Then track the target before pulling the muzzles ahead of the clay. Pull the trigger and remember to keep the gun moving after you’ve fired.
Up or down?
Gun up: You’ll often hear your instructor or fellow shooters use this phrase. Shooting ‘gun up’ means you have the stock of the gun already in the pocket of the shoulder as you call for the bird, ie pre-mounted. This doesn’t always mean your face has to be on the stock. For some birds you need to be able to look around to visually pick up the bird in flight before dropping your face onto the stock.
Gun down: The gun is out of the shoulder as you call for the bird. Shooting under FITASC rules, for instance, the heel (top) of the stock has to be not less than 25cm from the top of the shoulders when you call for the target. Shooting ‘gun down’ accentuates the natural swing and diminishes the tendency to ‘aim’ at a target.
Driven singles, on report
Presented on report from two separate traps, both birds quarter in towards the stand, the first is higher and from 10 o’clock, the second, coming in lower is from the 2 o’clock position.
- This set-up is always going to demand a compromise as far as stance goes, so try and adopt a neutral stance. In an ideal world you’ll hardly have to shift for the second shot. Keep your weight slightly on the front foot, which is pointing towards the flightline of the first bird. Be ready to transfer your weight onto the back foot if you’re going to take the bird later when it’s closer and nearly above you.
- There’s no need to rush so shoot ‘gun down.’ If you shoot this type of bird gun up, you’ll often find you aim at the target, resulting in a miss behind.
- A smooth, unhurried gun mount is necessary. Get on the bird then pull away in front. When the
muzzles obscure the clay pull the trigger. - Take the gun a little out of the shoulder. If you find you have to, move your feet just a little and adjust for the second bird. Then re-mount the gun.
- Although the second bird might look faster because it’s nearer the ground, it’s actually travelling at exactly the same speed. As such, don’t rush your shot, simply repeat what you did on the first bird… pull away slightly ahead of the target and fire.
Pair of SIM crow-type targets
This is a stand where the birds appear above the tree line slightly to the right, they apex in front of the stand and then drop to the left. They’re probably only 20 yards or so away from the shooting position and one bird will be about ten feet above the other when they’re both at their peak.
- The golden rule here is to kill them when they’re both still under power, not as they’re dropping.
- Time is going to be limited so opt to shoot gun up. Keep the weight on your front foot that should be pointing towards the chosen kill point at the apex of the birds’ flight.
- Have your muzzles ready on the flightline, and take the lower bird as quick as you can – albeit without rushing your shot. Keep the gun moving, pull away and fire. Like every pair, treat each bird as a single. If you miss the first, simply ignore it and concentrate on the second.
- Come back onto the second bird and repeat the process. If for some reason you’re slow on the first and have to take the second bird on its way down, give it a lot more lead than you think.
- Watch the target closely and be aware of any deviation in the flightpath because of any side wind.
SIM pair
On the next stand we’re showing a simultaneous pair that are quartering away to the front of the stand from the side. One bird, slightly slower out of the trap, is a little bit higher than the other. This could be any typical pheasant or partridge type shot.
- Unlike in real life you’ve got time on your side – and you can watch how the birds are going to be presented. So, ascertain the pick-up and kill points then adjust your stance accordingly.
side, wait until they’re both in view before mounting the gun. Make sure you’ve got a clear view of both targets. - As the birds are going to cross in front, speedy reactions are not necessarily required, so shooting gun down is probably best (if you pre-mount the gun you’ll probably ‘aim,’ and we all know if you do this you’ll miss behind.)
- It’s worth noting at this point that the general tendency is to initially try and hit the first bird you
see, rather than think about the process logically. - So then, as the birds are both travelling from one side, wait until they’re both in view before mounting the gun. Make sure you’ve got a clear view of both targets.
- Don’t be tempted to rush your shots. Generally speaking, and certainly in this instance, take the “bird that’s behind” first. (If you take the bird that’s in the front of the pair, you’ll have to stop your swing and then get back onto the trailing bird.) Continue and adjust the swing – vertically – to get on, then pull away in front of the second bird. Pull the trigger and that’s another two hits on your scorecard.
This piece was originally published in 2013 and has been updated.
Related Articles
Shooting
Drey poking kit guide: essential equipment for grey squirrel control
Invasive grey squirrels do a great deal of damage to our trees and their numbers need controlling, so you must have the right kit
By Shooting Times
Get the latest news delivered direct to your door
Subscribe to Shooting Times & Country
Discover the ultimate companion for fieldsports enthusiasts with Shooting Times & Country Magazine, the UK’s leading weekly publication that has been at the forefront of shooting culture since 1882. Subscribers gain access to expert tips, comprehensive gear reviews, seasonal advice and a vibrant community of like-minded shooters.
Save on shop price when you subscribe with weekly issues featuring in-depth articles on gundog training, exclusive member offers and access to the digital back issue library. A Shooting Times & Country subscription is more than a magazine, don’t just read about the countryside; immerse yourself in its most authoritative and engaging publication.

