Understand the jargon heard on the clay shooting ground with Mark Russell’s tips for shooting beginners
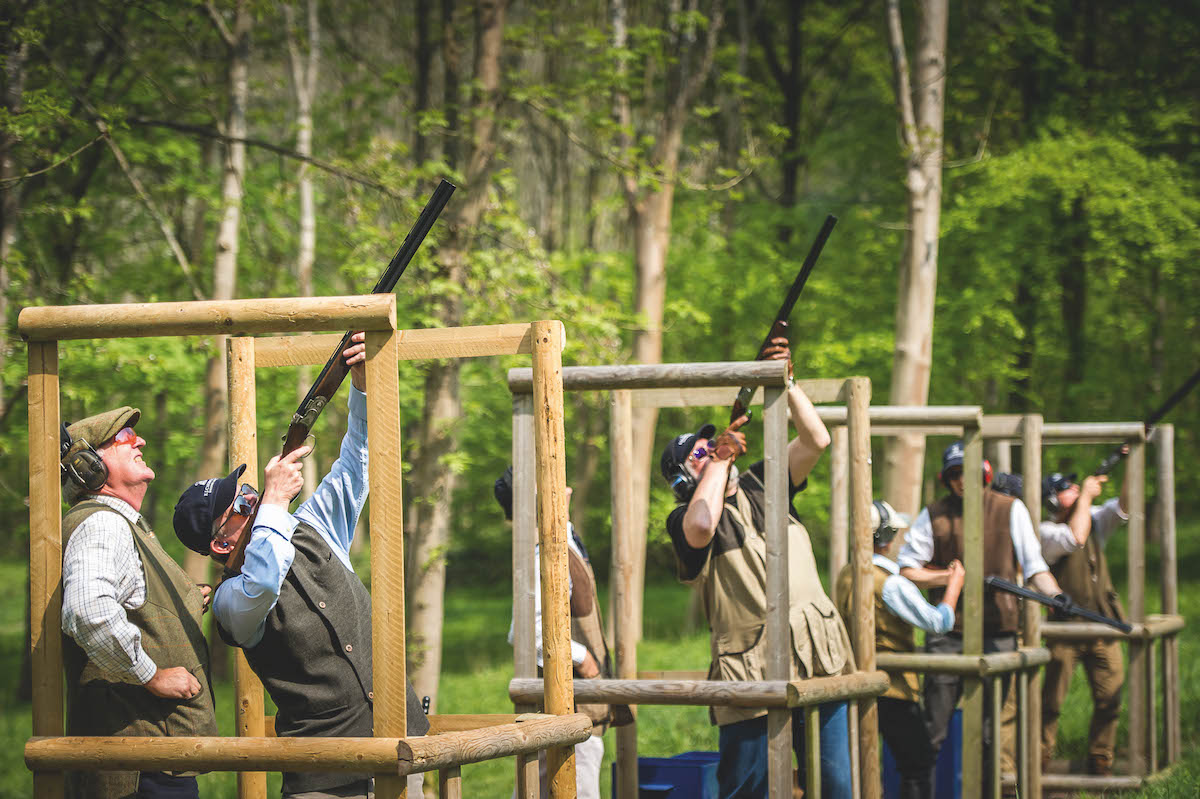
Here the shooting coach explains how to tackle those clay ground favourites: sneaky little midis, minis and battues.
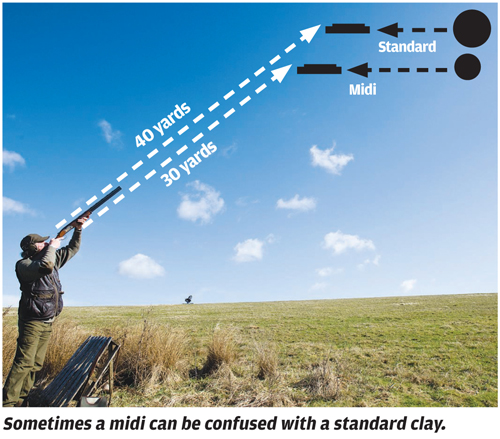
The standard clayshooting target is just over 4″ diameter and usually flies true, unless there is a particularly strong wind. So with a standard clay you know what to expect.
So what makes midis, minis and battues so tricky to hit?
This is smaller than a standard clay at around 3.5″ diameter and it can seem to fly differently from the trap. A midi will fly relatively ‘true’ as it is released, but can perform unexpected ducks and dives when it is no longer ‘under power’ – that is when initial velocity has been expended.
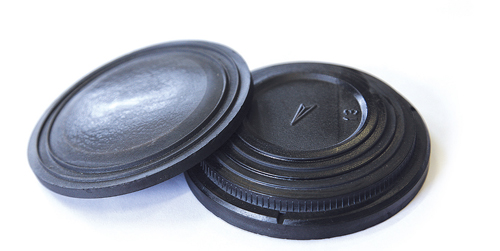
Some clayshooters consider this to be a really tricky one, probably because it’s small at just under 2.5″ in diameter. It leaves the trap like a bullet and then travels consistently until its velocity drops – at which point wind can catch it.
Battues
These targets are different again. They’re the same diameter as a standard clay but are thin and concave, which makes them fast. Sometimes they present edge on or as a ‘scything looper’ if put upside down on the trap arm.
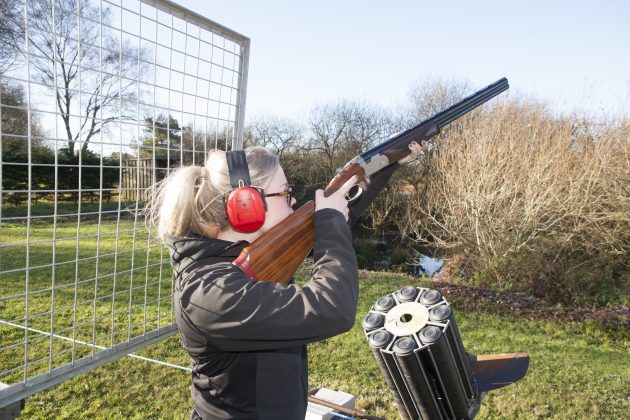
We’ll start by making the assumption that the shooter has a good stance, ready position and gun mount technique. In his mind, having seen the target presented, the pick-up and approximate kill points are clear.
I reckon the midi is one of the best sporting targets you can get. The clay itself is heavy enough to maintain a good speed over quite a long distance but, because it’s lighter than the standard target, it tends to come out of the trap slightly quicker than its bigger brother. That said, there should always be enough time to ensure a smooth mount, swing and fire after calling for the bird.
The problem a lot of shooters have with the midi is interpreting the range, and thus the amount of lead needed to break the clay. Because of the target’s smaller size it’s often quite easy to confuse the midi with a standard. A standard clay crossing at 40 yards will appear to be pretty similar to a midi travelling at just 30 yards away.
Because the shooter will inevitably have shot more standard targets in the past, the mental ‘sight picture’ he’s built up over the years will tell him he needs a certain amount of lead for the perceived distance. In reality though, the bird is probably travelling just that little bit faster than he is used to, and it’s also around 10 yards closer. The end result is often a miss!
The bottom line for shooting the midi is not to get flustered. If it isn’t obvious or stated on the stand what type of bird you’re shooting, ask the referee or trapper. Take your time and don’t rush the shot. Don’t let the thought of a midi put you off before you even get on the stand – take it exactly as you would any other bird.
Understand the jargon heard on the clay shooting ground with Mark Russell’s tips for shooting beginners
Sean Ponting of Widdington Shoot has pretty much been there and got the T-shirt as far as Sporting and FITASC clayshooting goes. He has had 20 years…
Learn how to hit more targets by understanding the physics of clay pigeon shooting
Minis are cracking little targets. The problem with this clay is because it’s so small and light, the bird struggles to maintain any sort of speed after 25 or 30 yards. Anything further than this and the bird starts to slow down quite considerably, even in still air, before floating gently downwards. Launched into a strong headwind, I’ve even seen the mini blown backward when it loses momentum – almost back to the trap it came from!
The trick here is to take the bird early, when it’s still under power. Don’t rush the shot, but the longer you leave it the more likely it is to be wind affected. Because the mini is such a small, delicate target, even just one pellet from a cartridge is usually enough to break it and enable you to claim a kill.
If it’s a rangy target, switch to the tighter choked barrel on your gun. Changing to a tighter choke on a multi-choked gun, if you’ve got time, is another option.
Battues can be troublesome things, but to understand how to break them you’ve got to understand how they fly.
The battue comes out of the trap very fast. It will maintain its speed and direction until its momentum decreases, when it will flip over to one side and then accelerate into the ground. When the target is presented as a crosser, the wafer-thin profile makes it hard to pick-up visually and a slim target to hit. Most shooters wait until the bird is turning in the air thus presenting a full-on target.
This is the preferred kill point. The bird is still under power, offering a full target and travelling in a predictable direction. A fraction of a second later, however, and the clay is turning and ducking and diving.
Another variation often seen around the shooting grounds is when the organiser load the battue upside down in the trap. In this case the clay will roll over and dive very soon after leaving the trap, a real looper. You need to get your shot in before the clay plummets earthwards.
Think of a clock face and remember the old theory of ‘arranging collisions’ between the bird and your stream of shot. If the target is presented from left to right, your kill point is going to be somewhere between 4 and 5 o’clock, relative to the bird before it turns onto its side and starts to dive. For right to left birds, the kill point is going to be between 7 and 8.

Two long-dormant clay shooting competitions, the Clay Shooting Classic and the Sporting Gun Clubman Championship, return to Eaton Hall Shooting Ground in Derbyshire this October, with shooters able to...

A pick of some of the best gun shops for fieldsports enthusiasts
Get the latest news delivered direct to your door
Discover the ultimate companion for fieldsports enthusiasts with Shooting Times & Country Magazine, the UK’s leading weekly publication that has been at the forefront of shooting culture since 1882. Subscribers gain access to expert tips, comprehensive gear reviews, seasonal advice and a vibrant community of like-minded shooters.
Save on shop price when you subscribe with weekly issues featuring in-depth articles on gundog training, exclusive member offers and access to the digital back issue library. A Shooting Times & Country subscription is more than a magazine, don’t just read about the countryside; immerse yourself in its most authoritative and engaging publication.

