Modifying a handed-down airgun – advice to keep it working longer
One child’s first airgun gets passed down through the family, and Phil Hooper is on hand to modify it so it can be enjoyed for a little while longer
“The Daisy airgun – that’s just a toy isn’t it?” Well yes – but no. Certainly it is inexpensive. It is compact and very light in weight at around 2lb, being made of steel stampings and plastic, and fires steel BBs at low power through a smoothbore barrel. It’s a repeater with an underlever action “just like the Winchester of the Wild West”. But while all this makes it very appealing to a nine or 10-year-old, it cannot be treated as a toy as it could do very serious damage to an eye or other tender part.
However, it can provide an excellent, early introduction to shooting and to the safety rules properly imparted before any shooting actually begins, and the paper manual included with the gun provides useful guidance for both parent and child.
These guns have been around for a long time. By the 1950s around 1.5 million children were given Daisy airguns by their parents each year in the United States! Sales of the pump-up models 25 and 325 totalled 20 million by the late 1970s. And they are still sold in high volumes today with the lever action Red Ryder (the name dates back to 1940) being the most popular model.
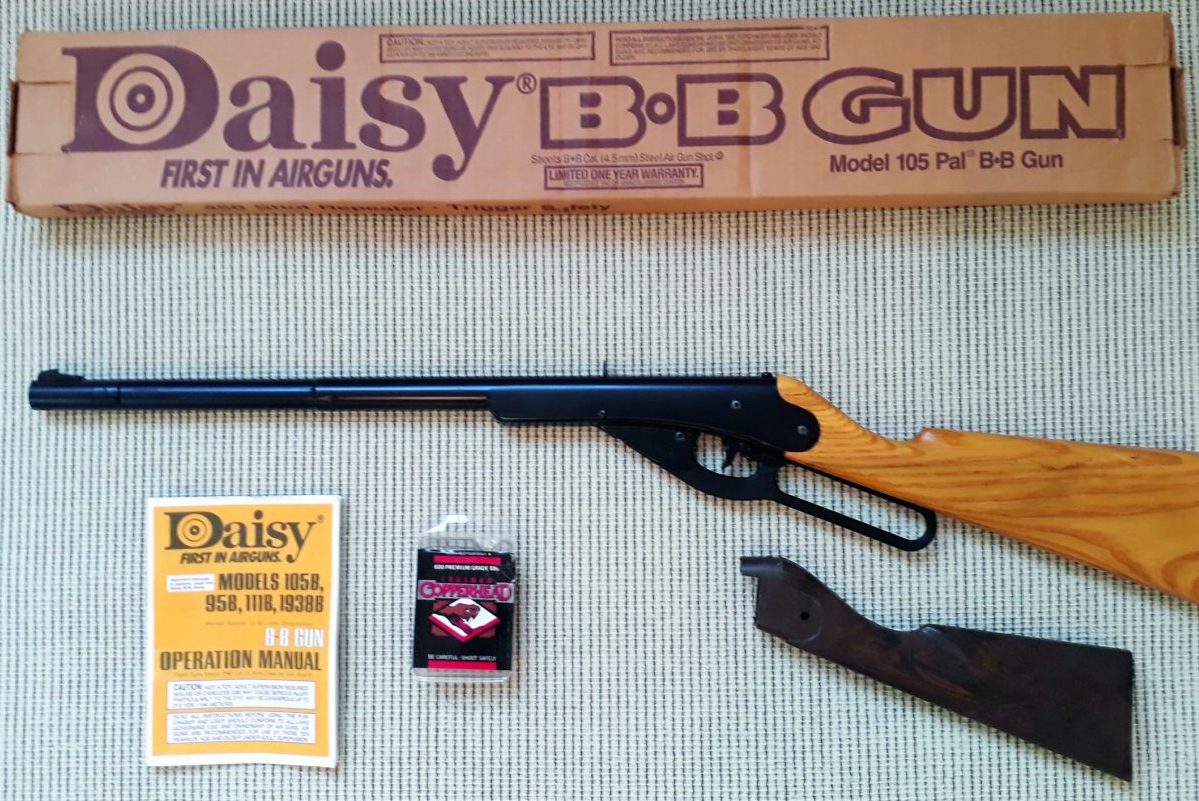
Here’s the Daisy Model 105B fitted with the extended custom stock that Phil made – it’s a cheap, but charismatic first airgun
So here’s a concise review of its origins. The Plymouth Iron Windmill Company built a new factory in Michigan in 1882, but changed from manufacturing windmills to airguns,
of a design conceived by inventor Clarence Hamilton, from 1889. One of the company directors, admiring the design, exclaimed “Boy, that’s a daisy”, meaning “a cracking little product”, so the name stuck and in 1895 the company was renamed the Daisy Manufacturing Company.
The company absorbed the American Ball Company in 1939 to then become the largest maker of steel BB shot for many years to come. Daisy moved to its present site in Rogers, Arkansas, in 1958.
Calculated difference
To clear up a popular misconception, “BB” does not stand for “Ball Bearing”. BB is one of the heavier shot sizes used in shotgun cartridges where B = 0.17” diameter, BB = 0.18” and BBB = 0.19”. But for airguns, just to add to the confusion, a BB is 0.175” in diameter. Even in those early days, steel BBs were made to very close tolerances with only those measuring between 0.172” and 0.176” being considered acceptable. A copper electrolytic flash plating was then applied, at a thickness of just 0.0002” to 0.0003”, to inhibit corrosion.
Daisy’s lever action configuration proved very popular and the design variants hardly changed over many decades, although plastics came into play for the stock (slab-sided wood on earlier guns) and the underlever (previously metal).
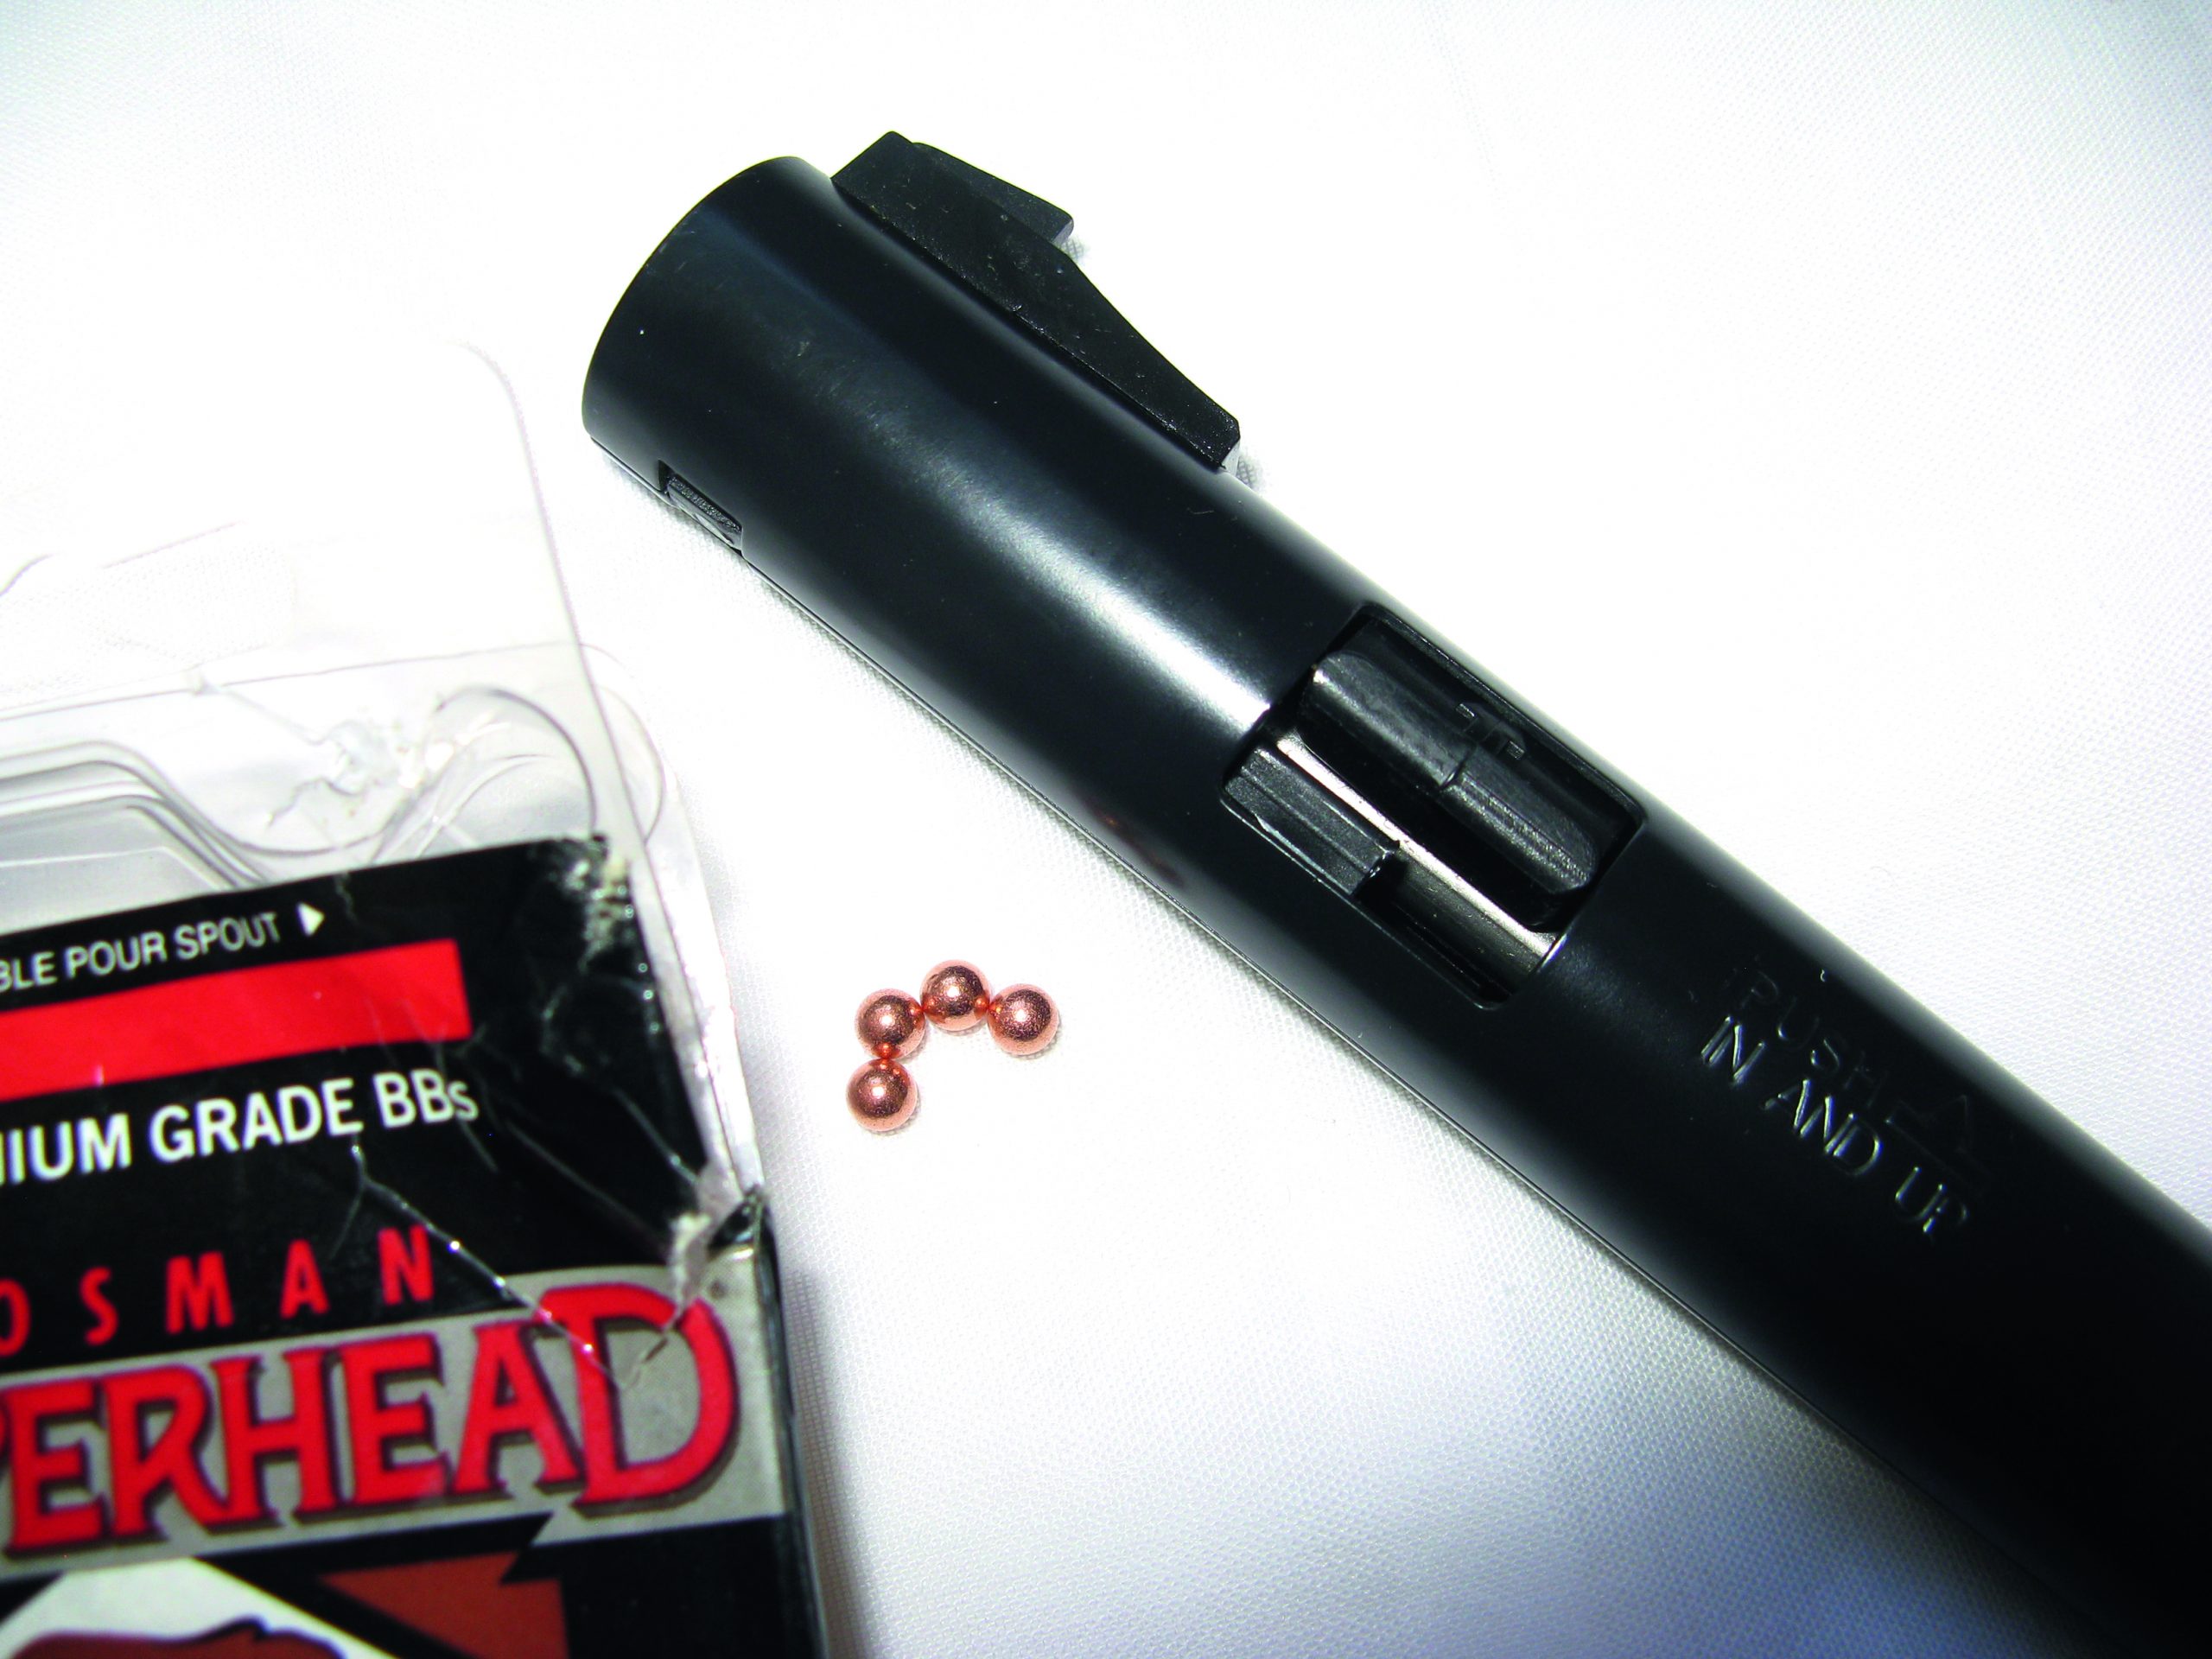
This is the BB loading port through which the mag can be filled with up to 450 BBs
Pulling the lever downwards draws back the piston until the trigger sear engages and, after returning the lever, tipping the muzzle of the gun upwards transfers a BB from the barrel sleeve magazine into the breech end of the barrel – the BB is then visible through a slot in the top of the barrel sleeve. Pulling the trigger releases the piston and, under air pressure, propels the BB towards its target.
In the case of the Model 105B “450 shot repeater” shown here, a 5.33 grain BB exits the barrel at 260 ft/s for a muzzle energy of 0.8 ft-lb. Sights are open and fixed. Trigger-pull is non-adjustable and sensibly weighted to reduce the likelihood of an accidental discharge. There is a manually operated trigger-blocking safety catch.
In the US, the National Rifle Association (NRA) and Boy Scouts of America ran programmes for many years, geared towards youngsters aged around six to 12 years, on 15’ junior ranges, for Marksmanship Merit awards. “Our” Model 105B has never been subject to serious accuracy checks, but appears capable of grouping around 1” or so at 10 yards and hitting aluminium drink cans almost every time at 20 yards in the hands of my grandson.
Paper targets have been taped to a cardboard box and steel cans not used as targets due to the propensity for a BB to ricochet back at the shooter at a velocity comparable with that at which it left the gun! The magazine was always emptied at the end of a shooting session, checked and checked again to be quite certain.
The Model 105B was bought for the grand sum of £17 for my son, Anthony, when aged nine in 1992. It provided an introduction to shooting in a fun way, and he was required to learn and repeat all the safety basics before the gun was handed to him on each occasion.
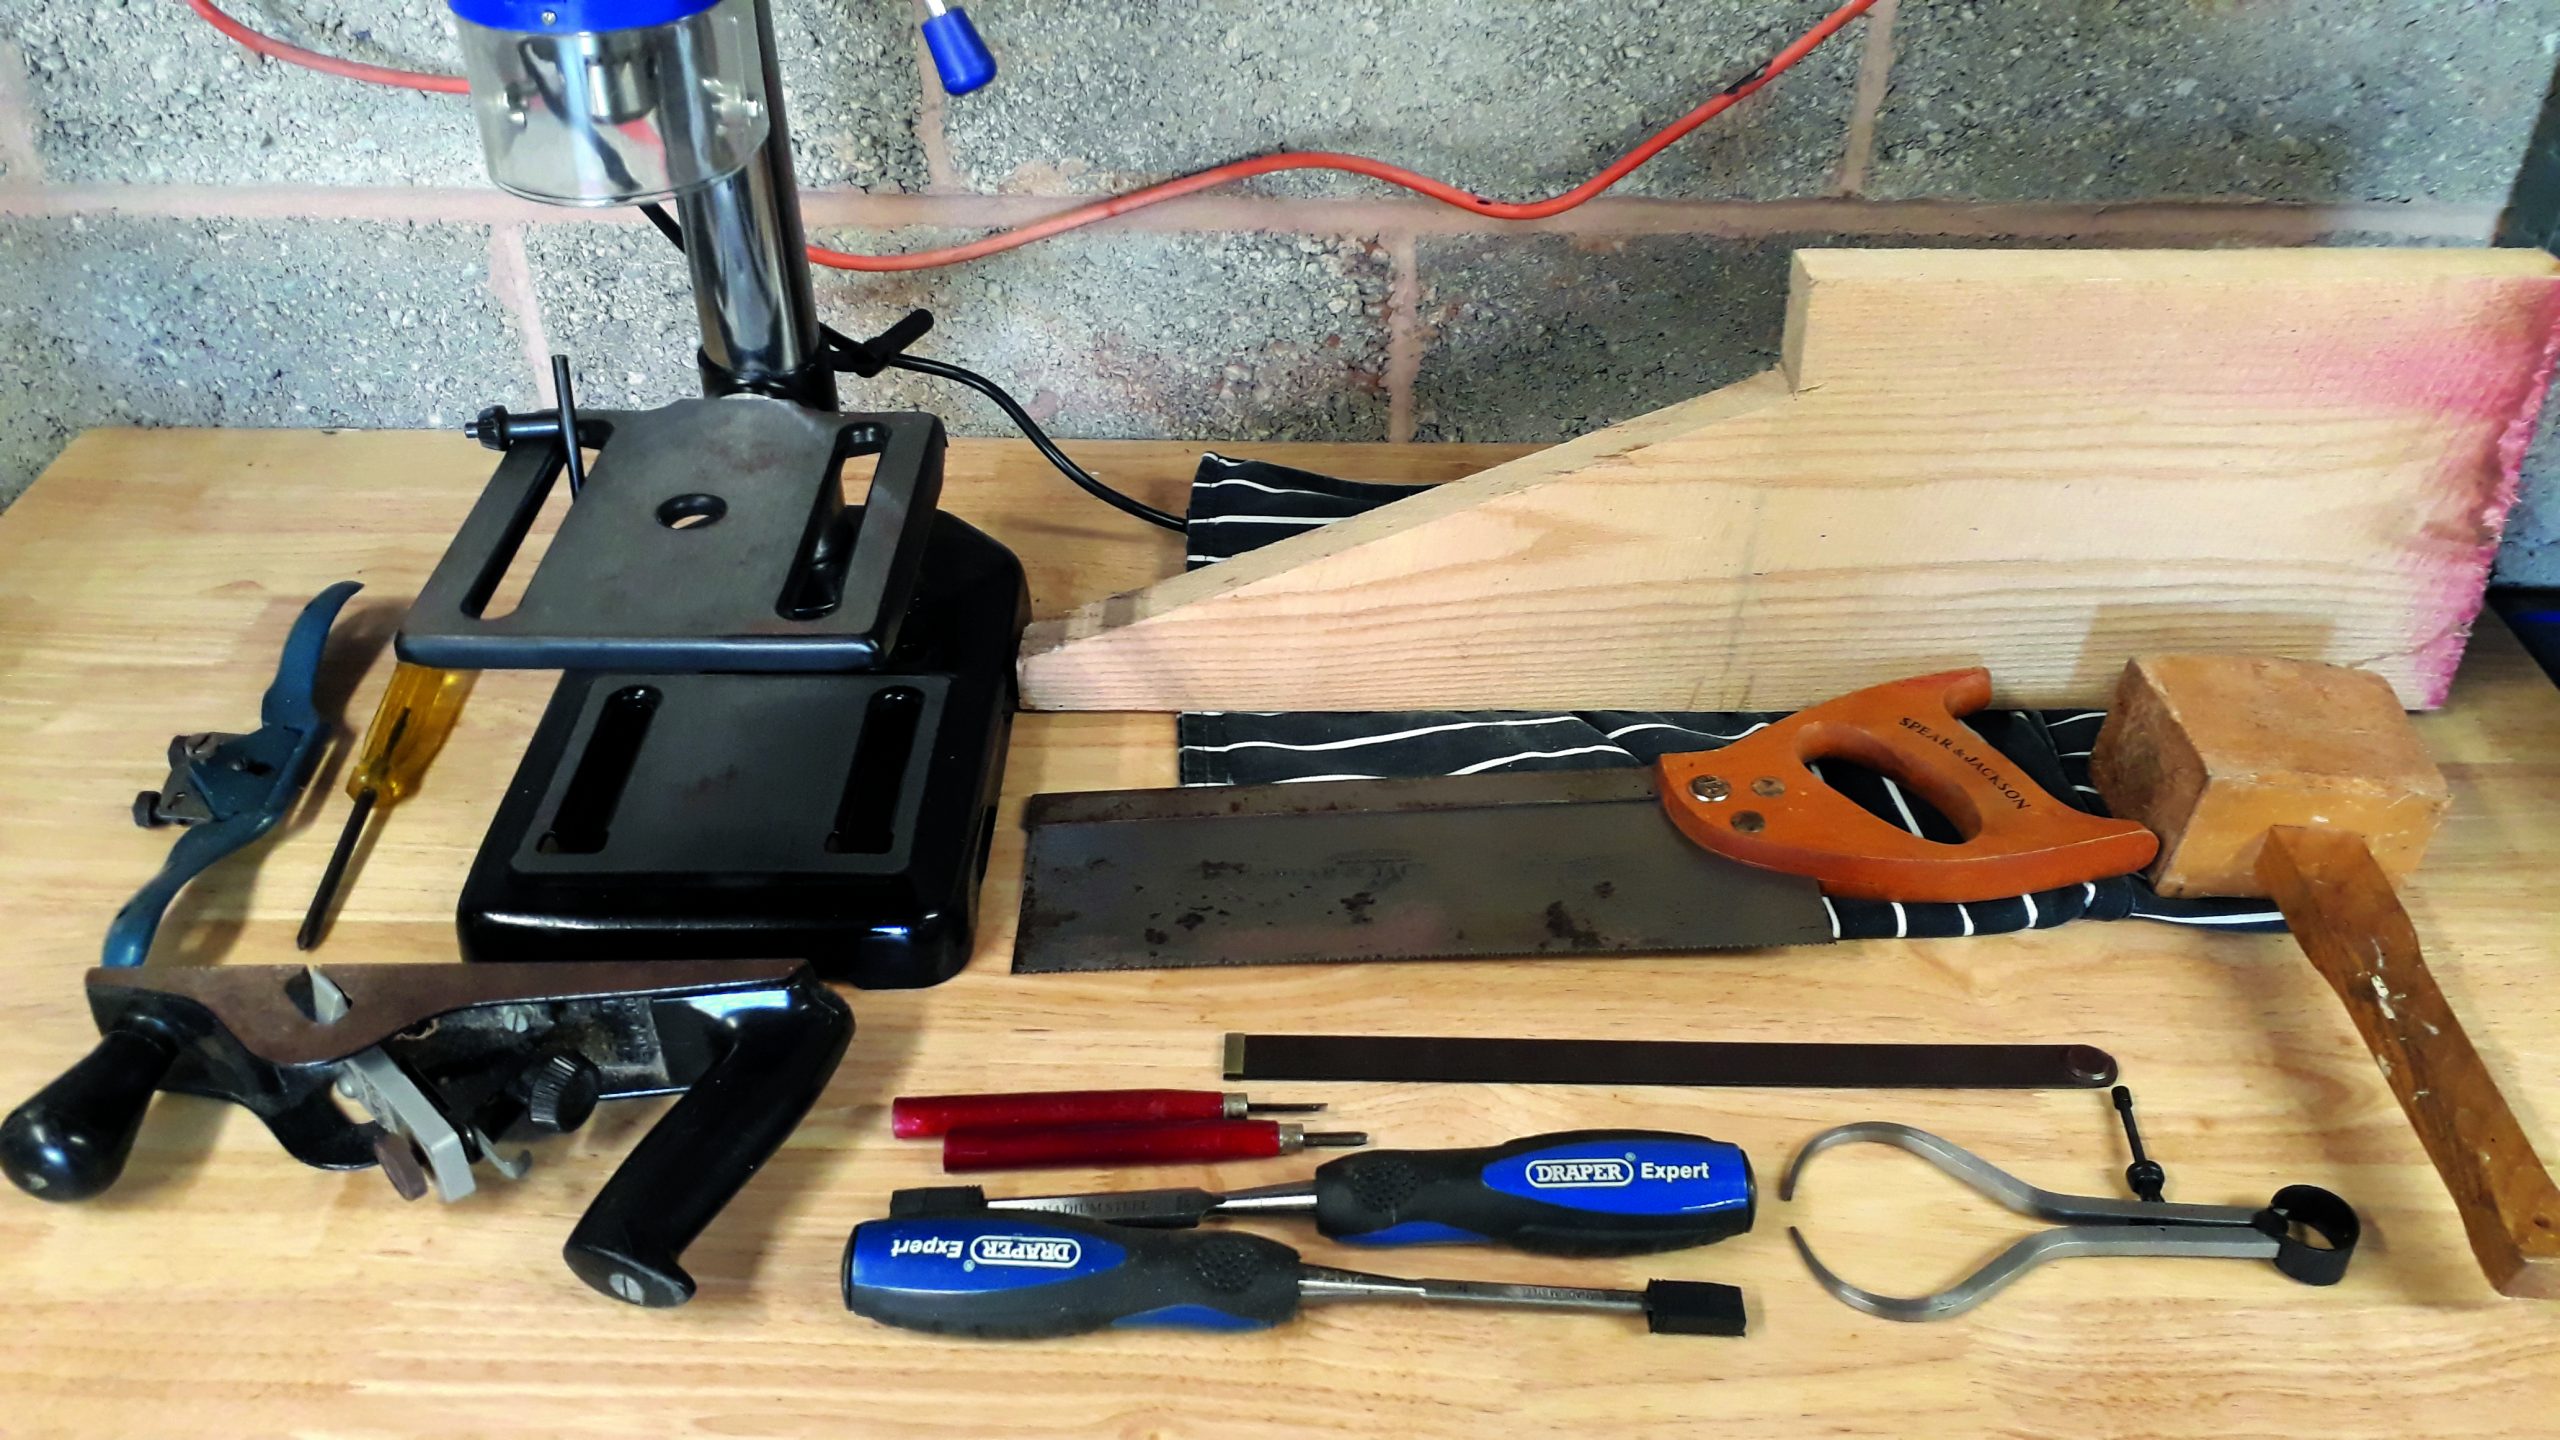
These are some of the tools that were needed to fashion the new stock from the ash blank that Phil managed to source from a friend
He learnt very quickly, including how to cock it safely without having the barrel smack him in the face, which happened only once! At the age of 12 he graduated to a Cometa 5 air rifle. The Daisy was lent to my farming friend and was used by his boys until they progressed onto a Sharp Innova with which, after some coaching, they both became competent shots.
The Daisy was mothballed until 2014 when my son passed it on to my grandson, who enjoyed it for a couple of years until he outgrew it. He had become proficient and was reluctant to graduate to anything heavier. In a rash moment I said that I’d make a replacement stock so that he could go on using it for another year, or until another growth spurt, whichever came first!
A friend and cabinet maker, Tony (one of the most skilled craftsmen I’ve known), kindly donated an ash off-cut which I thought would be ideal for the new, 2¼” longer stock. It was supplied rough-sawn, but appeared to have an attractive grain and, having removed the plastic stock from the Daisy, I was soon marking out the silhouette required.
It was duly cut out the hard way, by hand. I decided to work on the inletting for the action first, and closely copied the plastic stock detail until getting near enough dimensionally to start the iterative process of offering it up to the action, making small adjustments and then trying it for fit once again.
Inletting for each curved side-plate was achieved by following a pencilled line on the wood with a small U-blade gouging chisel until a 3mm groove was formed. Then, using a larger chisel and mallet, wood shavings were removed up to this groove until the required thickness at this point was achieved.


The profile to fit the top of the action was not hard to create, and soon the action and stock could be united so that the position for the cross-bolt could be identified. Adding the cross hole was the only point at which a power tool (a pillar drill) was used, to ensure the hole was perpendicular to the stock face and in the precise position required.
Interestingly, the top of the action had a hole through the folded steel where a small location peg protruded from the surface of the plastic stock, which, conveniently, enabled me to add a round-headed wood screw to provide additional strength to the stock-to-action joint.
Next, I needed to convert the rest of the stock from a two-dimensional shape to a three-dimensional, slightly larger, replica of the original stock. This was achieved by the use of a jack plane, spoke shave, rasp, glass paper and sanding block.
The next task was to complete the remaining inletting, providing the recess for the underlever, being simple to achieve with ¼” and 1” wood chisels and a mallet, after careful marking out with a pencil. A couple of trials were necessary to ensure an exact fit, and care was taken to ensure good clean edges to the recess and a uniform depth.
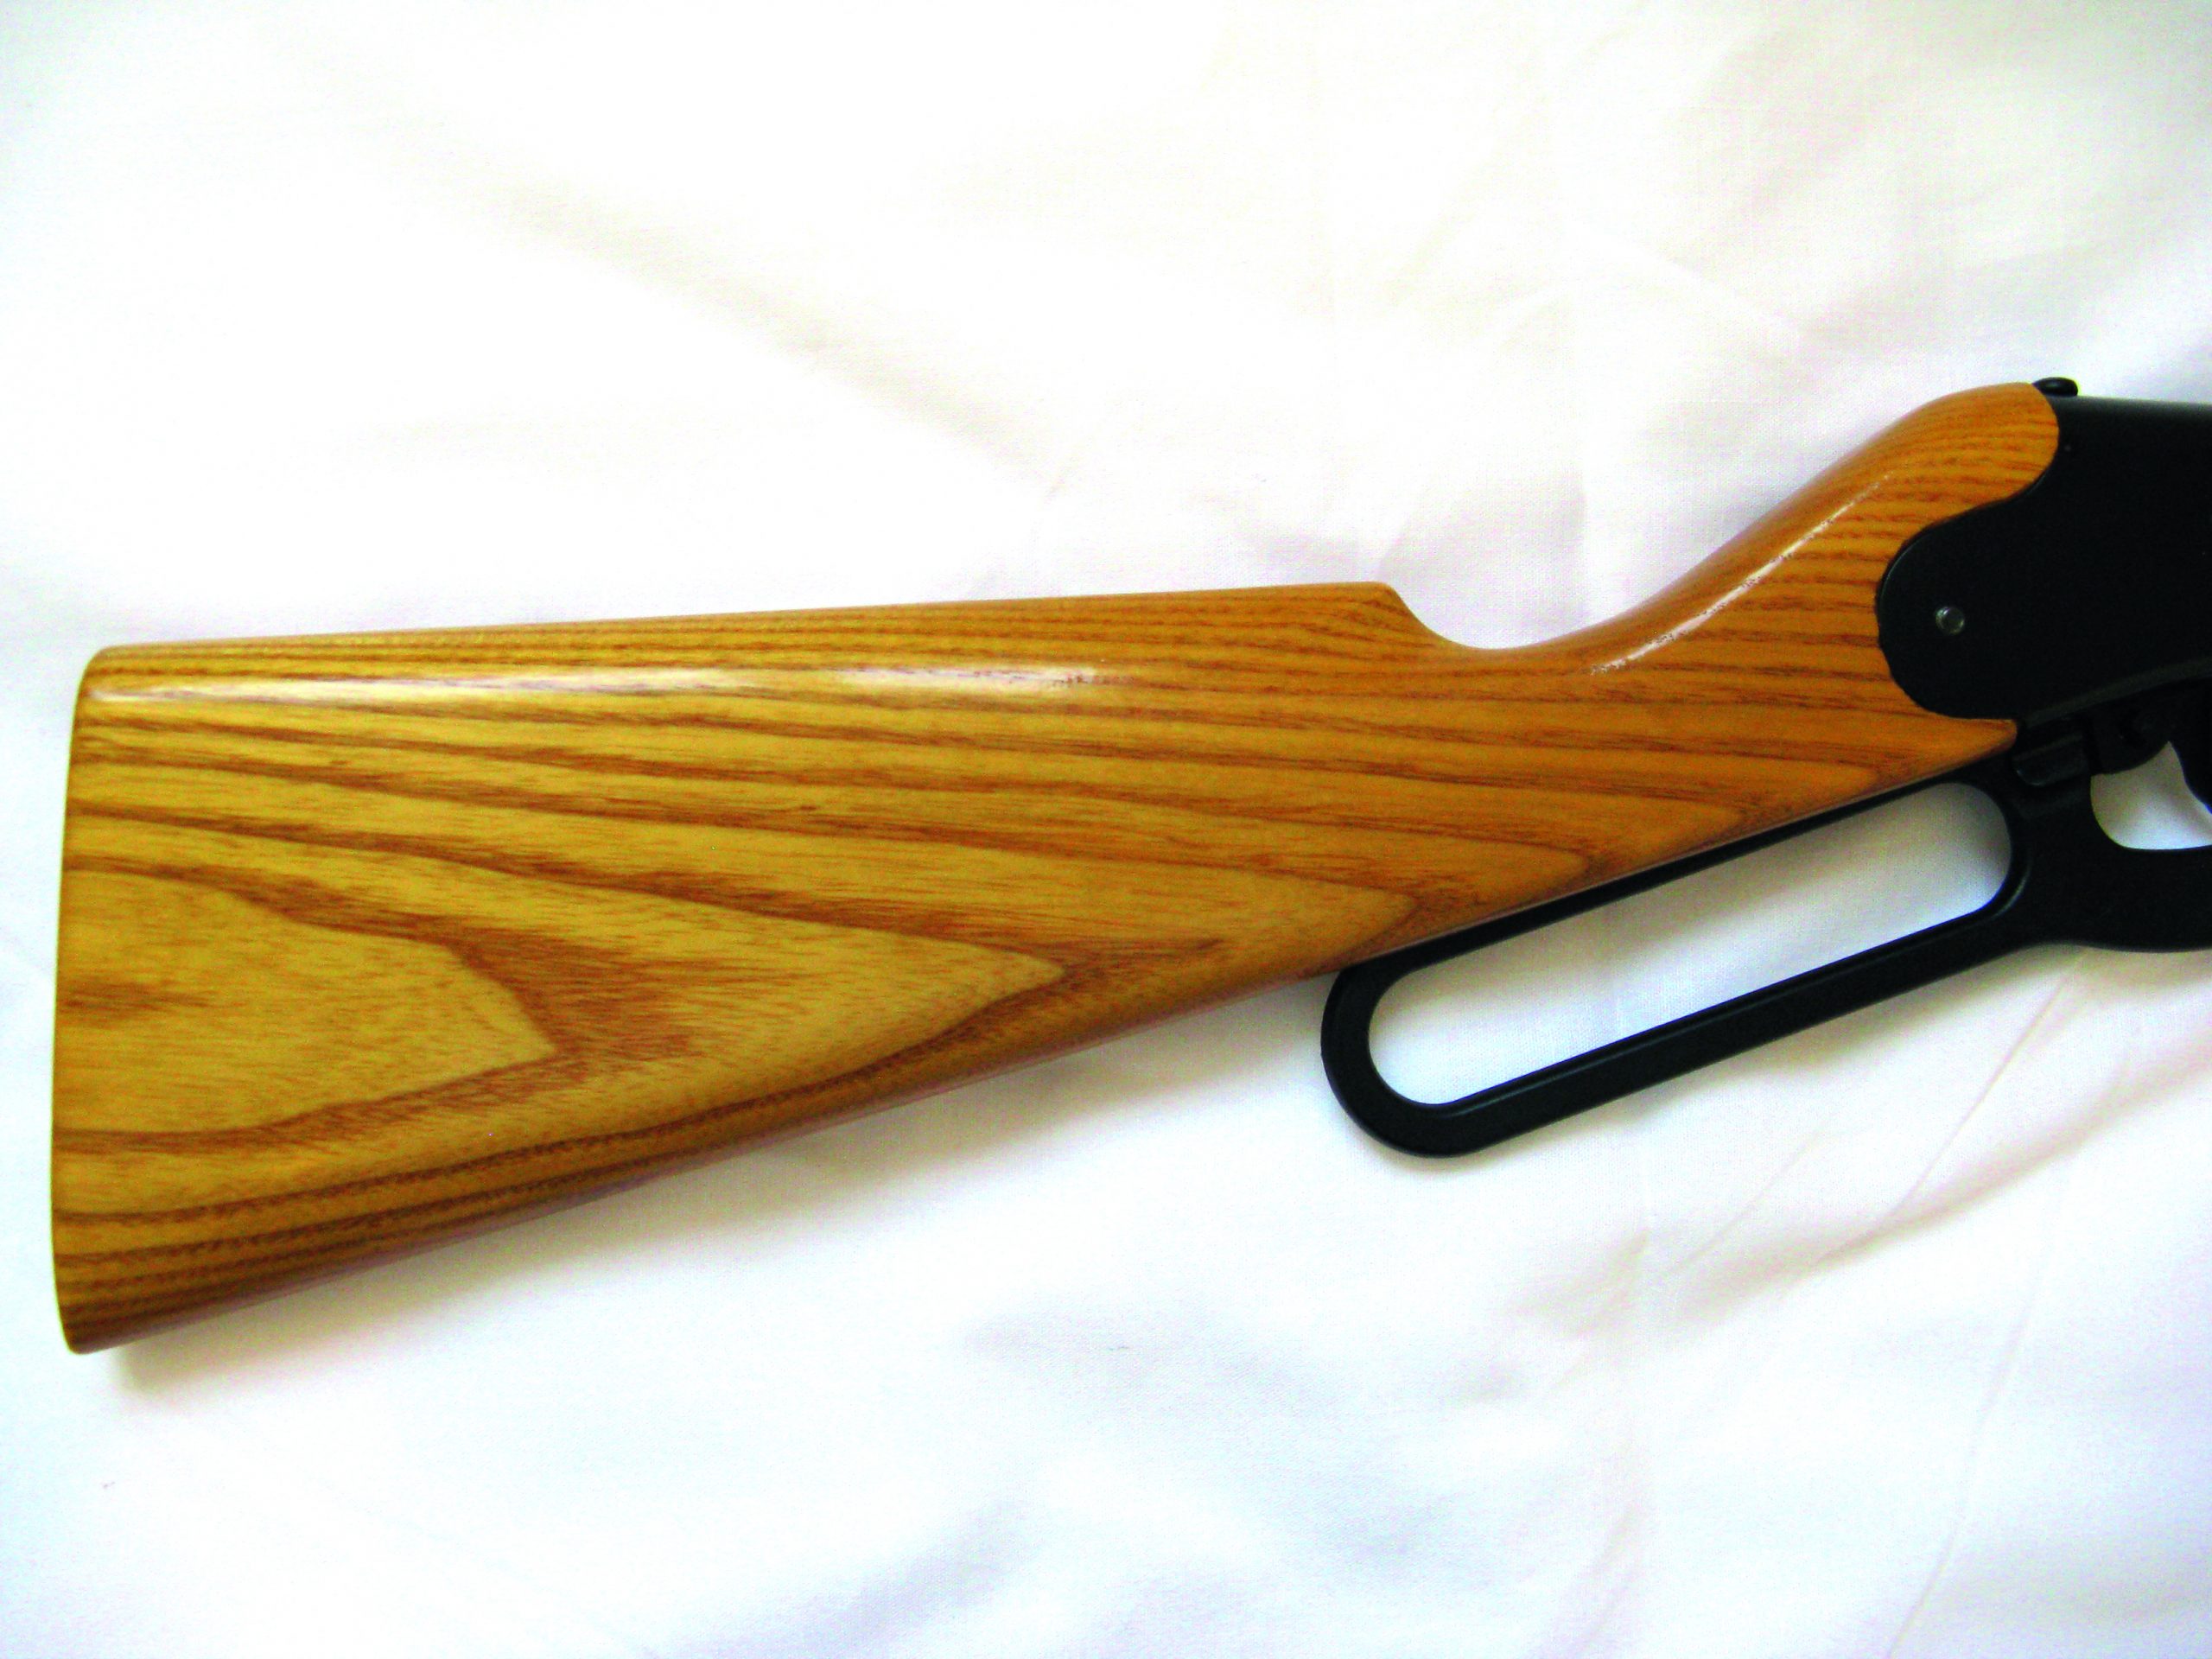
Phil fashioned the stock so the orientation of the grain runs parallel with the centreline of the barrel for the best appearance
Carving a legacy
Ash had proven to be an excellent wood to work with, very similar to walnut in that respect. The whole stock was then sanded with progressively finer glass paper, going with the grain, until it was smooth and free of any marks. It was then “de-whiskered” by wetting the whole stock with water, drying with a hot air blower and then lightly sanding the raised grain. This was done twice before completing the surface preparation with 000 grade steel wool.
I had planned to use a water-based walnut stain at this point, but decided that the existing ash colour and grain were pleasing in the natural state, so I skipped this step. I now applied six coats of Birchwood Casey Tru-Oil, with a lint-free cloth, gently flatting them with steel wool after each coat had dried.
Finally, I used a little T-Cut to take the high gloss from the surface and to give more of a satin finish. The gun could then be reassembled – job done!
My grandson Conor now found the Daisy to be far more comfortable to use with a stock that much better fitted his physique. The balance was shifted back a little, but we could always fill the magazine with 450 BBs to add 5½ oz to the weight and create some muzzle-heaviness!
Ultimately, he outgrew the gun, chose a new Diana Model 240 for his birthday, and the Daisy was set aside for his younger brother, who is now nearly old enough to have a go. I may have to refit the plastic stock for him, initially, but later the ash stock. Actually, to make it handle better and look even more like a model 1894 Winchester, perhaps I should add a wooden forend. Now where did I put the remainder of that ash off-cut?!