Maintain your airgun with this easy step-by-step guide
Want to make sure your airgun performs its best? An expert gunsmith shows you how to maintain it at home using a photographic step-by-step guide.
Did you learn to shoot with an air rifle? It’s the way many shooters start off their shooting career.
Whilst you may be a good shot now, your education may have fallen short when it comes to maintaining and servicing your rifle. What’s the best way of doing this? How can maintain your airgun yourself and make sure it performs its best? (Read our guide to the best airgun pellets.)
There are plenty of enthusiastic airgunners around who have carried out misguided home repairs on their guns. Many gunsmiths have stories to tell of finding knitting needles jammed down barrels; pellets jammed in one on top of another and customers turning up with bits of airgun in a bag, unable to put the piece back together again. (Enjoy garden airgunning? Read our list of the best air rifle targets.)
Here’s how to maintain your airgun – tips from an expert
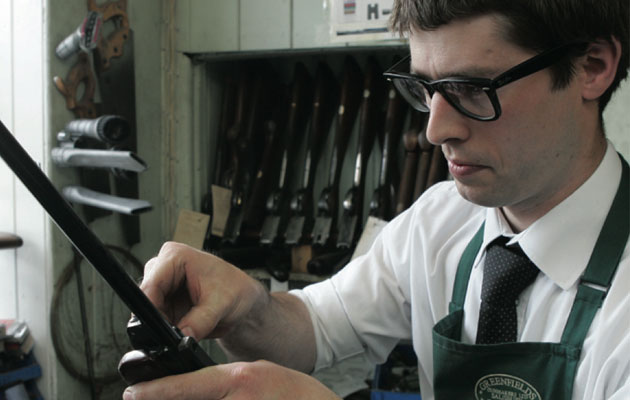
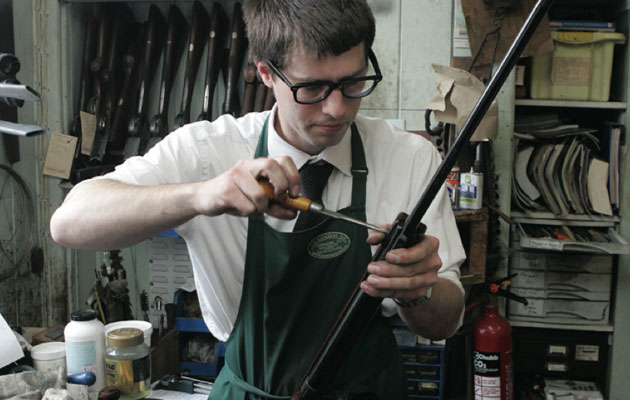
We thought it best to give you a guide showing you how, using clear photographs. So here’s one featuring Jonathan Beauchamp of Greenfields Gunsmiths in Salisbury, Wiltshire. He strips a BSA Meteor and replaces the breech and piston seals. The BSA Meteor is a legendary airgun and is still in production 58 years after its introduction. That’s because it’s a firm favourite among young target shooters and hunters.
But like a car you use regularly, the gun needs some servicing and attention from time to time. In common with any spring air rifle, the seals and springs wear out and will need to be replaced.

10 questions about air rifles – and 10 answers
1. Do I need a licence to own an air rifle? In England and Wales you do not need a…

Shooting rabbits? These are the airguns you need to know about
Want more success when shooting rabbits with an airgun and wondering what to use? I’ll narrow things down with a run through…
Understand how an air rifle works before attempting any home repairs
Jonathan advises you to check that you are using the correct tools and have some understanding of how an air rifle works before attempting any home repairs. In addition if you have bought an airgun second-hand you cannot be sure of what the previous owner has done to it. So watch out for overly- powerful springs or unexpected internal damage when you strip it down.
The definitive step by step guide to maintenance of your air rifle

Step 1: Jonathan breaks a BSA Meteor that requires replacement airtight, breech, and shock-absorbing seals
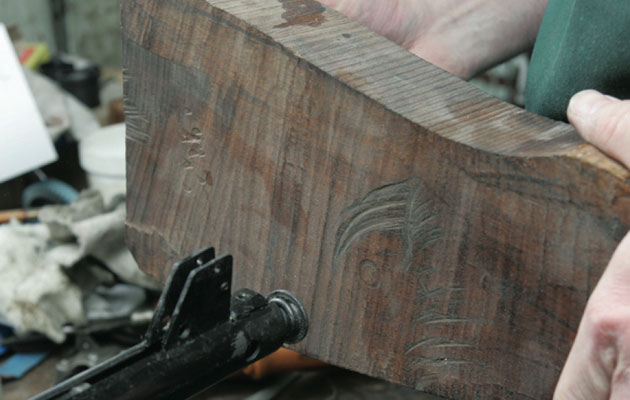
Step 2: He starts by carefully removing the stock and trigger-guard from the air rifle

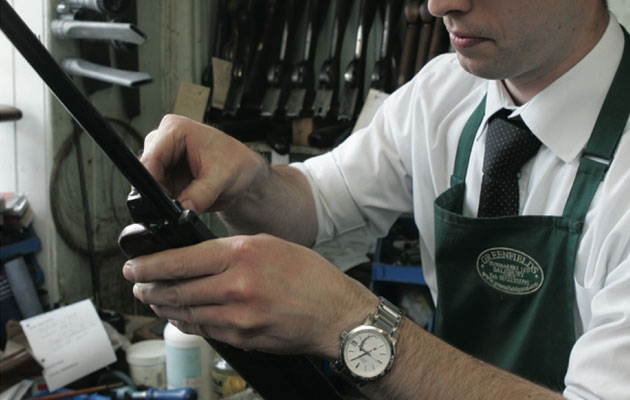
Step 3: With the Meteor gripped by a lead-covered vice to prevent damage, the two locking pins are removed to free the trigger mechanism

Step 4: Having removed the end cap, Jonathan keeps tension on the spring using a screwdriver while removing the spring retaining pin
Step 5: Jonathan places a large piece of wood against the spring, removes the screwdriver and gently allows the spring to relax against the wood
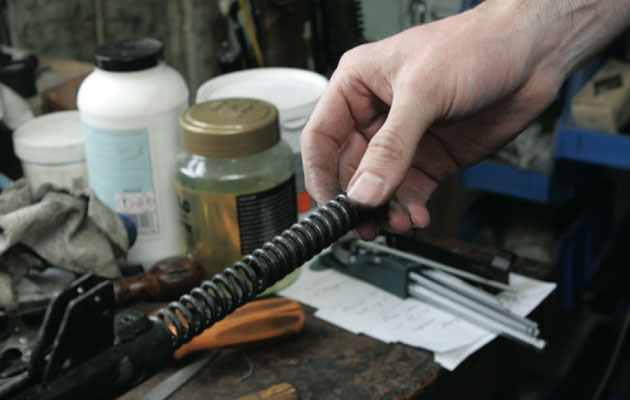
Step 6: Sliding the spring out from inside its housing

Step 7: Having removed the locking pin that connects the barrel to the housing, Jonathan now removes the cocking lever enabling the piston to be removed

Step 8: With the cocking lever out of the way, the piston can be carefully removed from its housing
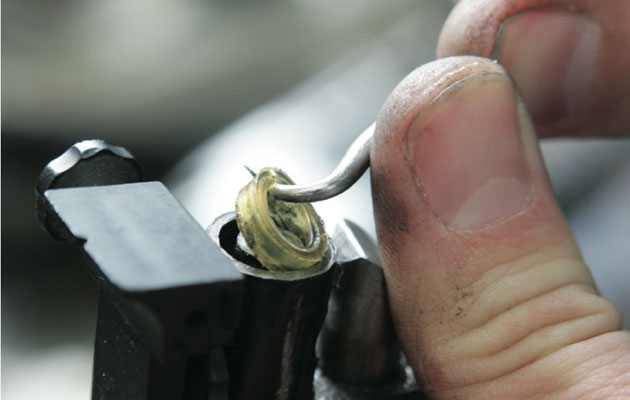
Step 9: Removing the old breech seal using a small hook
Step 10: Removing the piston head from the piston

Step 11: The piston on the Meteor has two seals – one acts as a shock-absorber, the other seals the air chamber. Here, the air seal is being removed

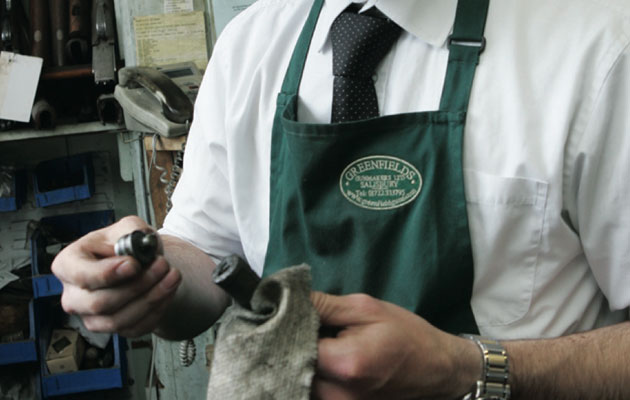
Step 12: Comparing worn-out and new breech seals, shock-absorbing seals and airtight seals

Step 13: Replacing the new breech seal – they may only go in a short way. Grease them slightly before replacing

Step 14: The shock-absorbing seal and airtight seal are replaced on the piston and are both greased
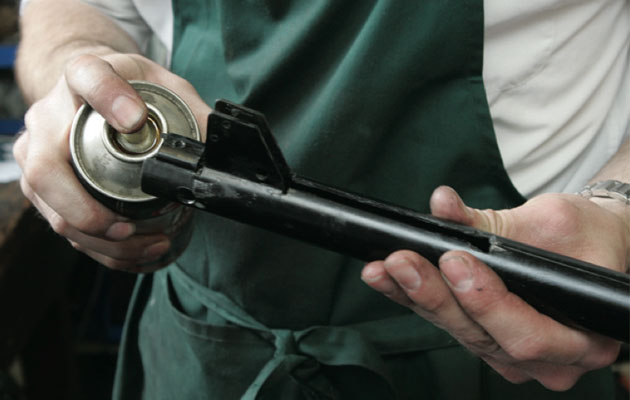
Step 15: The inside of the chamber, or housing, is given a light oiling before returning the piston

Step 16: After returning the piston, put the cocking lever back in place and reattach the barrel before returning the spring

Step 17: The spring may need a little light greasing from time to time

Step 18: The spring is put back under pressure using the screwdriver and its retaining pin put in place

Step 19: Putting the trigger mechanism back into place
Step 20: Replacing the end cap
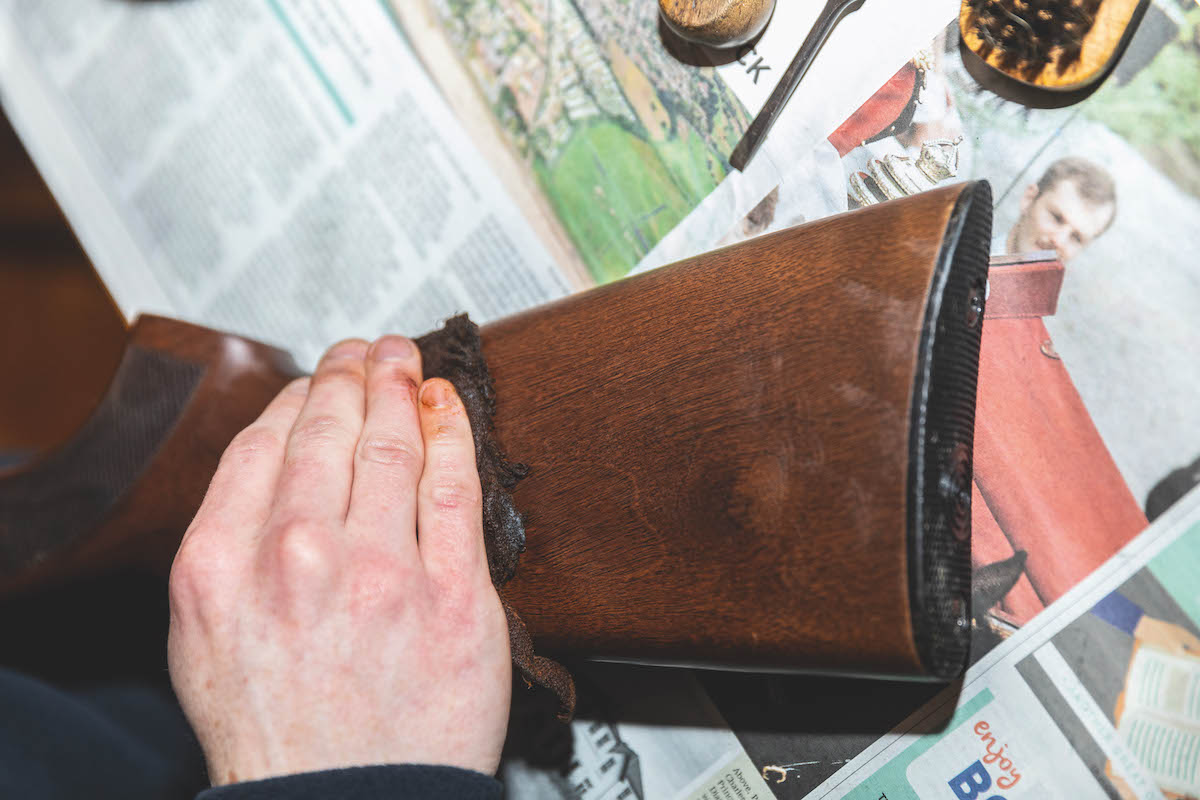
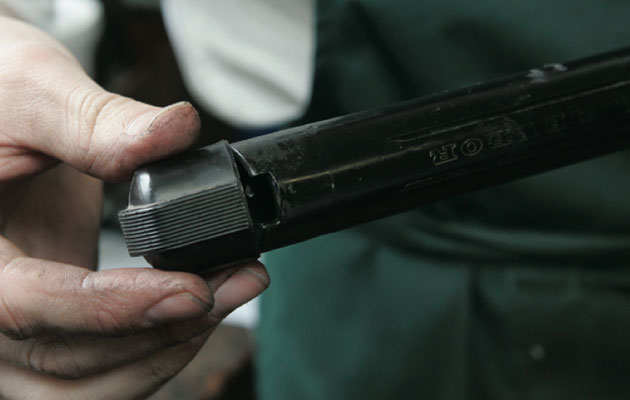
Step 21: The woodwork and trigger-guard are now put back on and the refreshed Meteor is fired and tested
This article was originally published in 2014 and has been updated.